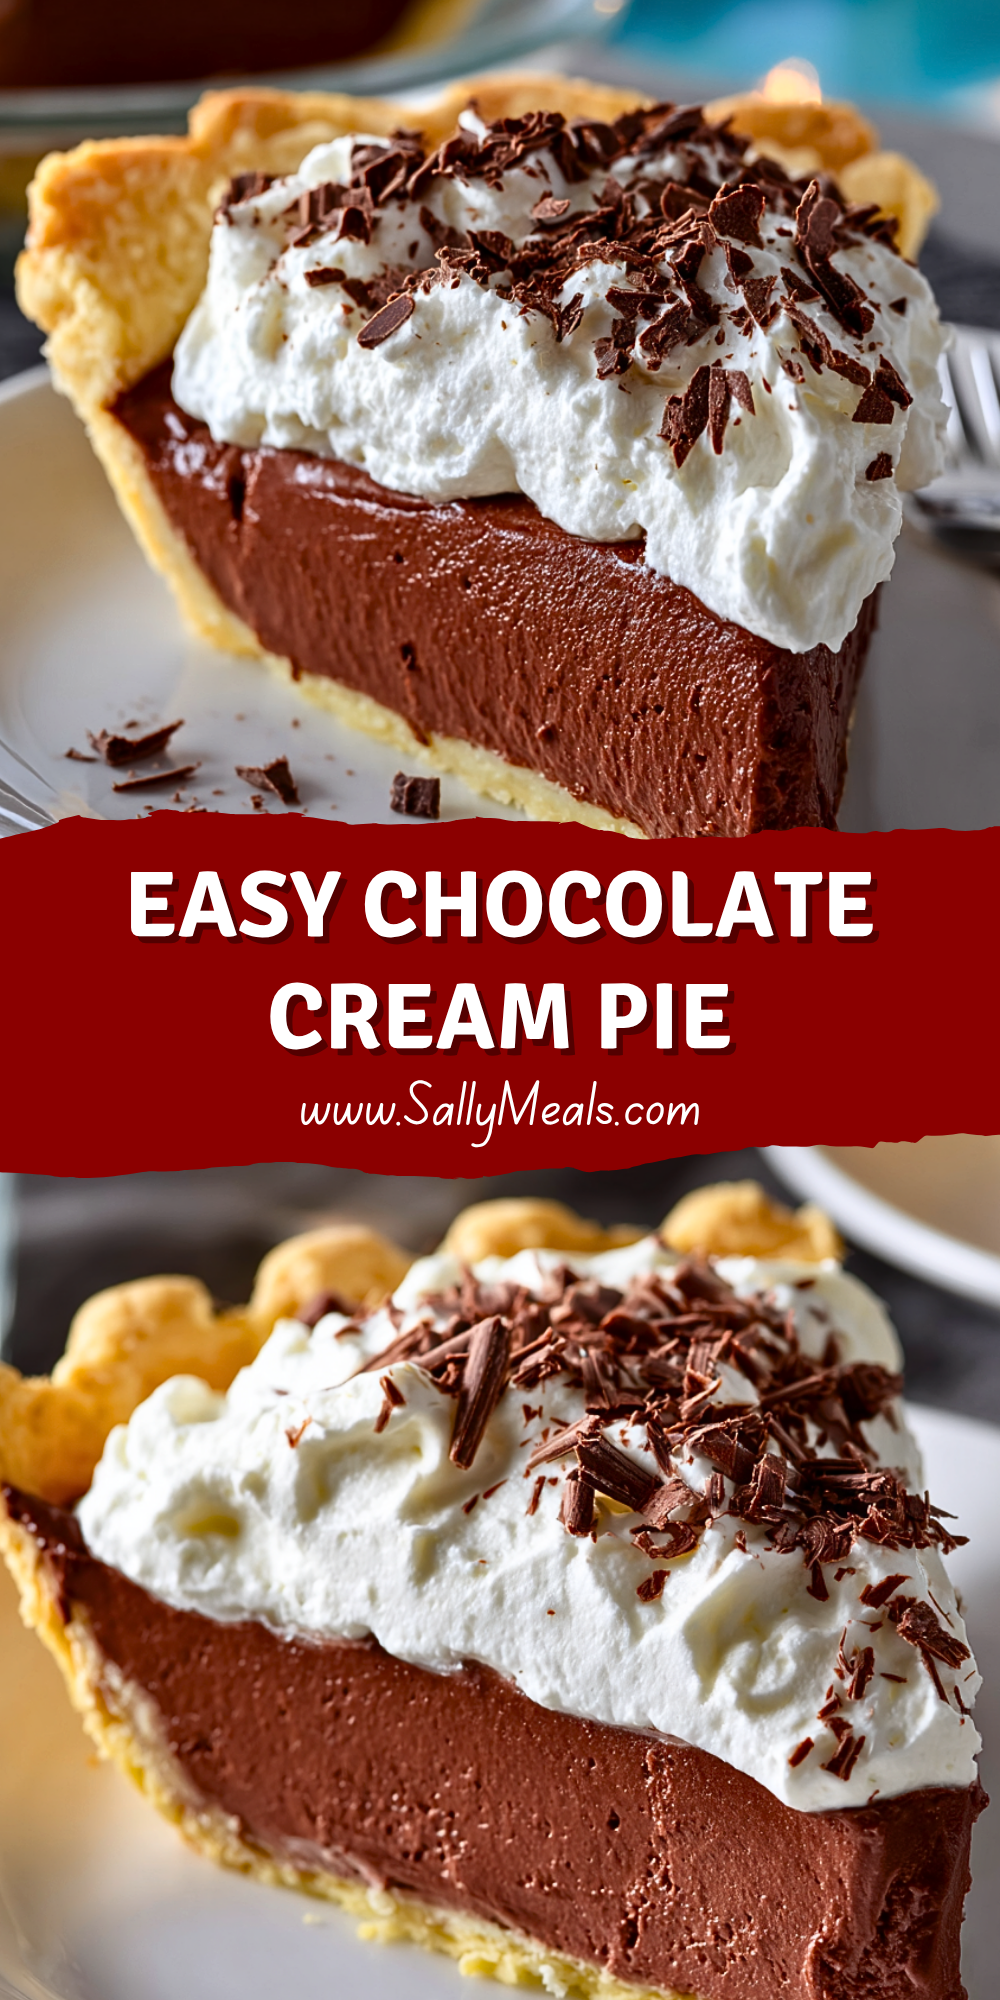
Easy Chocolate Cream Pie is the kind of dessert that instantly turns an ordinary evening into something special. With its buttery flaky crust, velvety chocolate filling, and fluffy whipped cream topping, every bite delivers a smooth and decadent texture that melts in your mouth. The balance between deep chocolate flavor and light creamy topping makes this pie irresistible for holidays, birthdays, dinner parties, or simple weekend cravings.
What makes this dessert even better is how approachable it is for home bakers. You don’t need advanced baking skills or hard-to-find ingredients to create a stunning pie that looks and tastes impressive. Whether you’re making it ahead for guests or treating yourself to a comforting dessert, this chocolate cream pie is guaranteed to become a favorite in your recipe collection.
Why You’ll Love This Easy Chocolate Cream Pie
This Easy Chocolate Cream Pie delivers everything people love about classic chocolate desserts in one beautiful slice. The filling is luxuriously smooth, rich without being overly heavy, and perfectly complemented by airy whipped cream. It’s a versatile dessert that works year-round and can easily be customized with toppings like chocolate curls, cocoa powder, caramel drizzle, or crushed cookies.
Another reason this pie stands out is its simplicity. Most of the ingredients are pantry staples, and the preparation process is straightforward enough for beginners. It also stores beautifully in the refrigerator, making it an ideal make-ahead dessert for busy schedules or entertaining guests. From its creamy texture to its elegant presentation, this pie is pure comfort and indulgence in every forkful.
Preparation Phase & Tools to Use
Creating a flawless Easy Chocolate Cream Pie becomes much easier when you have the right kitchen tools ready before you begin. A medium saucepan is essential for cooking the chocolate custard filling evenly and preventing scorching while the mixture thickens. Using a whisk is equally important because it helps create a silky-smooth filling without lumps and keeps the eggs properly incorporated during cooking.
A mixing bowl is needed for whipping the cream topping to soft peaks, while an electric hand mixer or stand mixer speeds up the process and gives the whipped cream a light, airy texture. A rubber spatula helps scrape every bit of chocolate filling from the saucepan and ensures smooth spreading inside the crust. Measuring cups and spoons are crucial for accuracy, especially when working with cornstarch and cocoa powder, since precise measurements directly affect the texture of the pie.
You’ll also need a prepared pie dish with a baked crust to hold the filling securely. Finally, a fine grater or vegetable peeler can be useful for creating delicate chocolate shavings that give the finished dessert an elegant bakery-style appearance.
Preparation Tips
For the smoothest chocolate filling, make sure to whisk continuously while cooking the custard so the mixture thickens evenly without forming lumps. Tempering the egg yolks slowly with warm liquid is another important step because it prevents the eggs from scrambling and keeps the filling creamy and rich. Allow the pie filling to cool slightly before transferring it into the crust to avoid making the crust soggy.
Using high-quality chocolate will dramatically improve the flavor, so choose a good semisweet or dark chocolate for the best results. When whipping the cream topping, chill both the mixing bowl and beaters beforehand to help the cream whip faster and hold its shape longer. For clean slices, refrigerate the pie for several hours or overnight before serving so the filling fully sets and develops its signature silky texture.
Ingredients for this Easy Chocolate Cream Pie
For the Pie Crust
- 1 pre-baked 9-inch pie crust (homemade or store-bought)
- Optional: 1 tablespoon melted butter for brushing the crust after baking for extra crispness
For the Chocolate Cream Filling
- 1 cup granulated sugar
- ¼ cup unsweetened cocoa powder
- ¼ cup cornstarch
- ¼ teaspoon salt
- 4 large egg yolks
- 3 cups whole milk
- 4 ounces semisweet chocolate, finely chopped
- 2 tablespoons unsalted butter
- 2 teaspoons vanilla extract
For the Whipped Cream Topping
- 1 ½ cups heavy whipping cream
- 3 tablespoons powdered sugar
- 1 teaspoon vanilla extract
Optional Garnishes
- Chocolate curls
- Cocoa powder dusting
- Chocolate chips
- Crushed chocolate cookies
- Shaved dark chocolate
- Caramel drizzle
Step 1: Prepare the Pie Crust
If using a homemade pie crust, roll it into a 9-inch pie dish and crimp the edges as desired. Bake the crust according to your recipe instructions until lightly golden brown and fully cooked. Allow it to cool completely before adding the filling.
For store-bought crusts, follow the package instructions for blind baking if necessary. Cooling the crust completely is essential because adding warm filling to a hot crust can create excess moisture and soften the texture.
For extra protection against sogginess, lightly brush the cooled crust with melted butter or a thin layer of melted chocolate and let it set before filling.
Step 2: Combine the Dry Ingredients
In a medium saucepan, whisk together the granulated sugar, cocoa powder, cornstarch, and salt. Mixing the dry ingredients thoroughly before adding liquids helps prevent lumps from forming later during cooking.
The cocoa powder provides the deep chocolate base while the cornstarch thickens the filling into a silky custard consistency.
Step 3: Add the Egg Yolks and Milk
In a separate bowl, lightly whisk the egg yolks until smooth. Gradually add the milk while whisking continuously.
Slowly pour the milk and egg mixture into the saucepan with the dry ingredients, whisking until everything is fully combined and smooth. Make sure no dry pockets remain at the bottom of the pan.
This step creates the foundation for the creamy chocolate filling.
Step 4: Cook the Chocolate Filling
Place the saucepan over medium heat and cook the mixture while whisking constantly. As the mixture heats, it will gradually begin to thicken.
Continue cooking for about 8–10 minutes until the filling reaches a pudding-like consistency. The custard should coat the back of a spoon and hold gentle whisk lines.
Avoid turning the heat too high, as rapid cooking may scorch the chocolate or cause the eggs to curdle. Constant whisking is the key to achieving a perfectly smooth filling.
Step 5: Add Chocolate, Butter, and Vanilla
Once the filling has thickened, remove the saucepan from the heat immediately.
Add the chopped semisweet chocolate, butter, and vanilla extract. Stir until the chocolate is fully melted and the filling becomes glossy, rich, and velvety smooth.
The butter enhances the silky texture while the vanilla deepens the chocolate flavor and balances the sweetness beautifully.
Step 6: Fill the Pie Crust
Pour the warm chocolate filling into the cooled pie crust. Use a rubber spatula to spread the filling evenly all the way to the edges.
Lightly tap the pie dish on the counter a few times to release any trapped air bubbles and create a smooth surface.
For an ultra-smooth top, gently run an offset spatula across the filling before chilling.
Step 7: Chill the Pie Properly
Cover the surface of the filling directly with plastic wrap to prevent a skin from forming.
Refrigerate the pie for at least 4–6 hours, though overnight chilling produces the best texture and flavor. During this time, the filling fully sets into a creamy, sliceable consistency.
Patience during chilling makes a huge difference in the final result.
Step 8: Prepare the Whipped Cream Topping
In a chilled mixing bowl, combine the heavy whipping cream, powdered sugar, and vanilla extract.
Using an electric mixer, beat on medium-high speed until soft-to-medium peaks form. The whipped cream should be light, fluffy, and stable enough to hold its shape without becoming grainy.
Be careful not to overwhip, as this can turn the cream dense or buttery.
Step 9: Decorate the Pie
Spread or pipe the whipped cream over the chilled chocolate pie. Create decorative swirls using a piping bag for a bakery-style presentation.
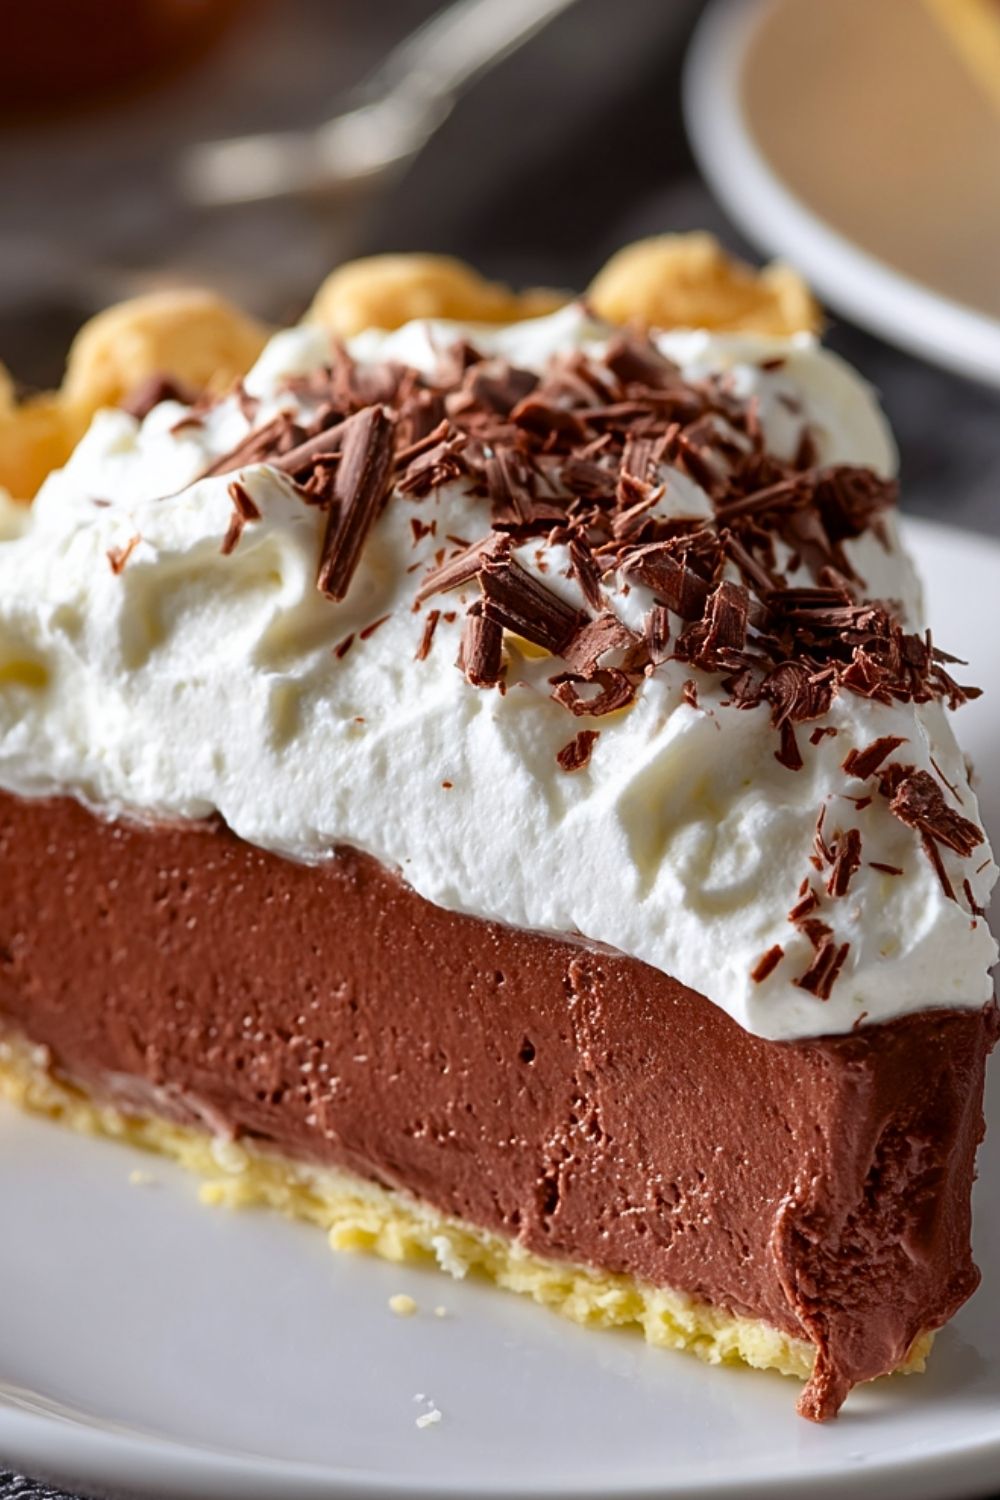
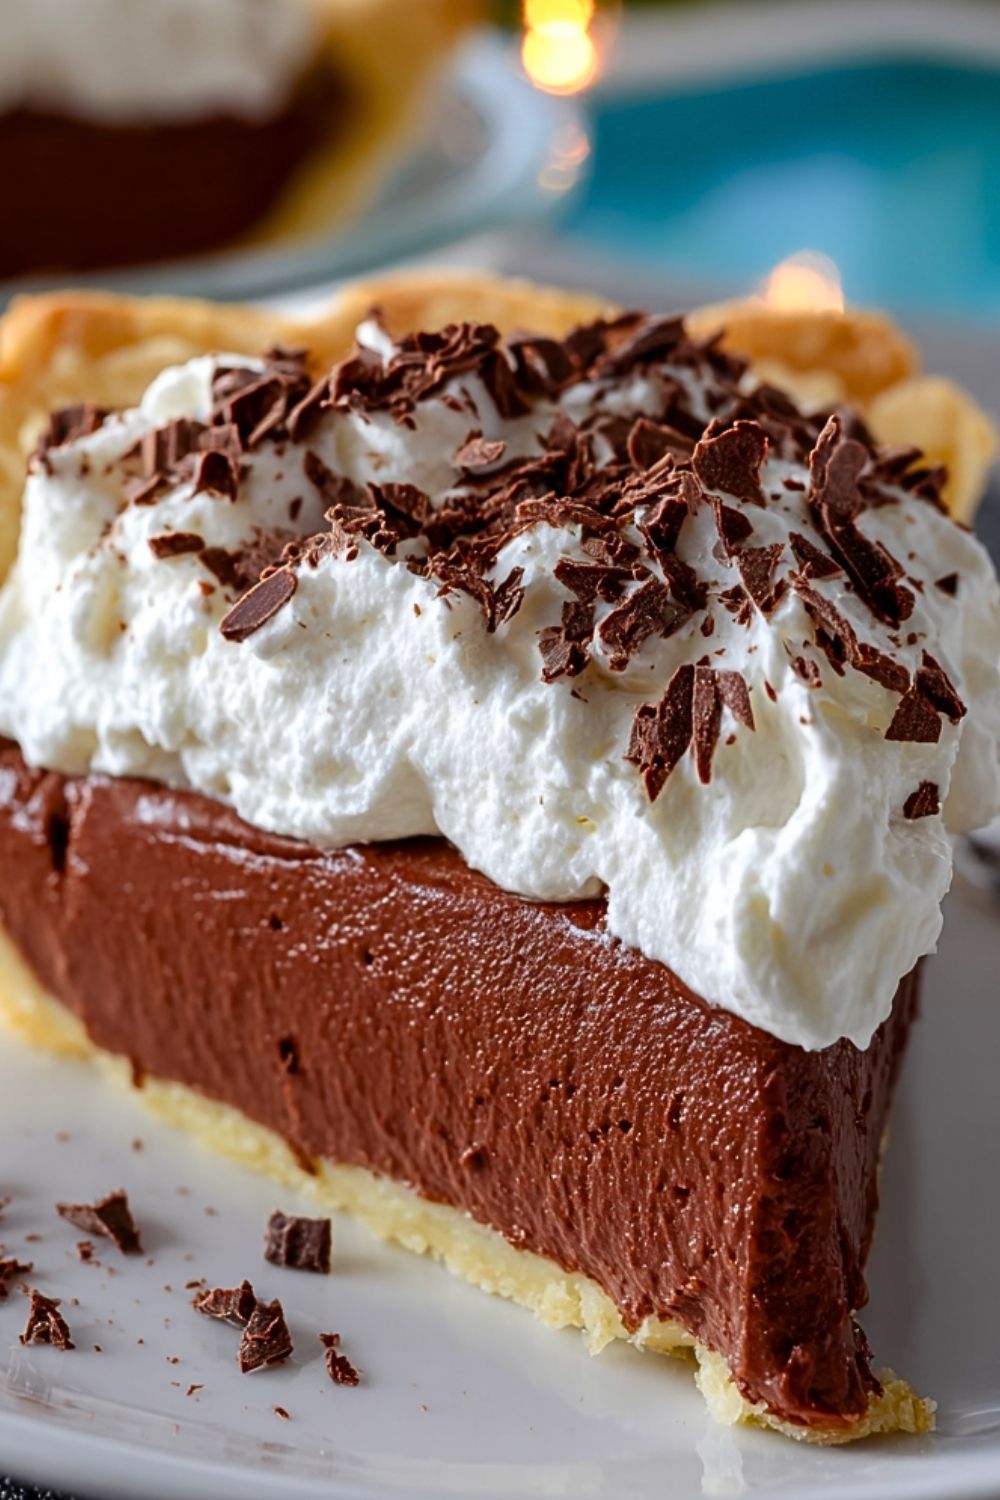
Top with chocolate curls, shaved chocolate, cocoa powder, or chocolate chips for extra elegance and texture.
The contrast between the creamy white topping and rich dark chocolate filling makes the dessert especially eye-catching.
Step 10: Slice and Serve
For clean slices, dip a sharp knife into warm water and wipe it dry between cuts.
Serve the pie chilled for the best texture and flavor. Each slice should have a flaky crust, silky chocolate center, and airy whipped cream topping balanced perfectly in every bite.
This dessert pairs wonderfully with coffee, espresso, cold milk, or fresh berries for an even more indulgent serving experience.
Notes
Easy Chocolate Cream Pie is one of those timeless desserts that combines elegance with pure comfort food appeal. The silky chocolate filling develops its best texture after a long chill in the refrigerator, so making the pie a day ahead is highly recommended whenever possible. This resting time allows the custard to fully set while deepening the chocolate flavor for an even richer bite.
For a more intense chocolate taste, you can substitute part of the semisweet chocolate with dark chocolate. If you prefer a lighter and sweeter filling, milk chocolate can also work beautifully. The crust is another area where customization shines — traditional pastry crusts offer a flaky texture, while graham cracker or chocolate cookie crusts create an entirely different dessert experience.
The whipped cream topping should always be added shortly before serving if you want the freshest presentation. However, stabilized whipped cream can help maintain decorative piping for longer periods during parties or events. Small garnishes like chocolate curls, cocoa powder, or crushed cookies elevate the visual appeal and make the pie look professionally finished without extra effort.
Because the filling is custard-based, maintaining gentle heat during cooking is essential. Rushing the process may lead to grainy texture or uneven thickening. Slow cooking and continuous whisking are the secrets behind that luxurious bakery-style smoothness.
Watch Out for These Mistakes While Cooking
Overheating the Custard
Cooking the filling over high heat can scorch the chocolate or scramble the egg yolks. Always use medium heat and whisk continuously to maintain a smooth consistency.
Skipping Constant Whisking
Leaving the custard unattended may cause lumps or uneven thickening. Frequent whisking ensures the filling cooks evenly and prevents sticking at the bottom of the saucepan.
Adding Filling to a Warm Crust
A warm crust can become soggy when filled too early. Allow the crust to cool completely before adding the chocolate custard.
Under-Chilling the Pie
Cutting into the pie too soon prevents the filling from properly setting. Refrigerate for at least 4–6 hours, though overnight chilling delivers the best results.
Overwhipping the Cream
Heavy cream can quickly become grainy or buttery if beaten too long. Stop mixing once medium peaks form for a soft and fluffy topping.
Using Low-Quality Chocolate
Since chocolate is the star ingredient, lower-quality chocolate may create a dull flavor. Choose good-quality semisweet or dark chocolate for a richer dessert.
Forgetting Plastic Wrap on the Filling
Without covering the surface, the custard can develop a thick skin while chilling. Press plastic wrap directly onto the filling to maintain a silky texture.
Cutting with a Dry Knife
Using a dry knife can drag through the filling and ruin clean slices. Dip the knife in warm water and wipe between cuts for neat presentation.
Storage Instructions
Easy Chocolate Cream Pie should always be stored in the refrigerator because of its dairy-based filling and whipped cream topping. Cover the pie tightly with plastic wrap or store it in an airtight pie container to prevent it from absorbing refrigerator odors and to keep the whipped cream fresh.
The pie stays fresh for about 3 to 4 days when properly refrigerated. The crust may soften slightly over time, but the flavor often becomes even richer after the first day. If possible, store whipped cream separately and add it fresh before serving for the best appearance and texture.
Freezing is possible, though the texture of the custard may change slightly after thawing. To freeze, wrap the pie tightly in multiple layers of plastic wrap and aluminum foil. Freeze for up to one month. Thaw overnight in the refrigerator before serving.
Avoid leaving the pie at room temperature for extended periods, especially in warm environments, since the custard filling can soften too much and lose structure.
Estimated Nutrition
Per Slice (Based on 8 Servings)
- Calories: 420
- Carbohydrates: 38g
- Protein: 6g
- Fat: 28g
- Saturated Fat: 16g
- Cholesterol: 135mg
- Sodium: 220mg
- Sugar: 27g
- Fiber: 3g
Nutritional values may vary depending on the type of chocolate, crust, and whipped topping used.
Frequently Asked Questions
Can I make Easy Chocolate Cream Pie ahead of time?
Yes, this pie is actually better when made ahead because the filling needs several hours to fully chill and set properly.
Can I use instant pudding instead of homemade filling?
You can, but homemade filling provides a much richer flavor and creamier texture compared to instant pudding mixes.
What type of chocolate works best?
Semisweet chocolate offers the best balance of sweetness and deep chocolate flavor, though dark chocolate creates a more intense result.
Can I use a graham cracker crust?
Absolutely. Graham cracker crust adds a delicious buttery crunch and pairs wonderfully with the creamy chocolate filling.
Why is my filling not thickening?
This usually happens if the custard wasn’t cooked long enough or if the heat was too low. Continue cooking while whisking until the mixture thickens noticeably.
How do I prevent lumps in the custard?
Whisk constantly while cooking and make sure the dry ingredients are fully mixed before adding liquids.
Can I freeze leftover slices?
Yes, individual slices can be frozen tightly wrapped for convenient future desserts. Thaw in the refrigerator before serving.
What toppings go well with chocolate cream pie?
Chocolate curls, berries, crushed cookies, caramel drizzle, toasted nuts, or cocoa powder all make excellent toppings.
Conclusion
Easy Chocolate Cream Pie is the perfect combination of creamy, rich, and comforting flavors wrapped inside a flaky crust and topped with clouds of fresh whipped cream. Despite its elegant appearance, the recipe is simple enough for beginner bakers while still impressive enough for holidays, celebrations, and dinner parties.
Its smooth chocolate custard filling, customizable toppings, and make-ahead convenience make it a dessert that fits nearly every occasion. Whether served at a family gathering or enjoyed as a late-night treat, every slice delivers classic chocolate comfort with a luxurious homemade touch.
Once you try this Easy Chocolate Cream Pie, it’s likely to become one of the desserts everyone requests again and again.
Easy Chocolate Cream Pie
- Prep Time: 25 minutes
- Cook Time: 10 minutes
- Total Time: 6 hours 35 minutes
- Yield: 8 servings 1x
- Category: Dessert
- Method: Stovetop and Chilling
- Cuisine: American
- Diet: Vegetarian
Description
This Easy Chocolate Cream Pie is the ultimate creamy chocolate dessert with a silky homemade filling, flaky buttery crust, and fluffy whipped cream topping. Perfect for holidays, dinner parties, family gatherings, or whenever you need an easy dessert recipe that looks impressive without requiring advanced baking skills. The smooth chocolate custard paired with light whipped cream creates a rich yet balanced flavor everyone loves. Whether you are searching for easy pie recipes, chocolate dessert ideas, homemade pie recipes, or classic comfort food desserts, this chocolate cream pie is guaranteed to become a favorite.
Ingredients
1 pre-baked 9-inch pie crust
1 tablespoon melted butter optional
1 cup granulated sugar
1/4 cup unsweetened cocoa powder
1/4 cup cornstarch
1/4 teaspoon salt
4 large egg yolks
3 cups whole milk
4 ounces semisweet chocolate finely chopped
2 tablespoons unsalted butter
2 teaspoons vanilla extract
1 1/2 cups heavy whipping cream
3 tablespoons powdered sugar
1 teaspoon vanilla extract
1/4 cup chocolate curls
2 tablespoons chocolate shavings
1 tablespoon cocoa powder
1/4 cup mini chocolate chips
Instructions
1. Bake the pie crust according to package or recipe instructions until golden brown, then allow it to cool completely.
2. In a medium saucepan, whisk together the sugar, cocoa powder, cornstarch, and salt until fully combined.
3. In a separate bowl, whisk the egg yolks and milk together until smooth.
4. Slowly pour the milk mixture into the saucepan while whisking continuously to prevent lumps.
5. Place the saucepan over medium heat and cook while whisking constantly until the custard thickens about 8 to 10 minutes.
6. Remove the saucepan from the heat and stir in the chopped semisweet chocolate, butter, and vanilla extract until smooth and glossy.
7. Pour the chocolate filling into the cooled pie crust and spread evenly with a spatula.
8. Cover the surface directly with plastic wrap and refrigerate for at least 4 to 6 hours or overnight until fully set.
9. In a chilled bowl beat the heavy whipping cream powdered sugar and vanilla extract until soft-to-medium peaks form.
10. Spread or pipe the whipped cream over the chilled pie.
11. Garnish with chocolate curls chocolate shavings cocoa powder or chocolate chips if desired.
12. Slice and serve chilled.
Notes
Use high-quality semisweet or dark chocolate for the richest and smoothest flavor.
Chill the pie overnight whenever possible for the best texture and clean slices.
Place plastic wrap directly on the filling while chilling to prevent a skin from forming.
Nutrition
- Serving Size: 1 slice
- Calories: 420
- Sugar: 27g
- Sodium: 220mg
- Fat: 28g
- Saturated Fat: 16g
- Unsaturated Fat: 10g
- Trans Fat: 0g
- Carbohydrates: 38g
- Fiber: 3g
- Protein: 6g
- Cholesterol: 135mg
Keywords: easy chocolate cream pie, chocolate pie recipe, homemade chocolate pie, easy dessert recipe, cream pie, chocolate custard pie, holiday dessert, pie recipes, chocolate dessert ideas