Whenever I think about cozy campfire nights or summer get-togethers, s’mores instantly come to mind. That delightful combination of gooey marshmallows, rich chocolate, and crunchy graham crackers is pure nostalgia in every bite. But sometimes, making traditional s’mores isn’t always convenient—especially when you’re entertaining indoors. That’s exactly why I love baking these S’mores Cookie Bars. They capture all those beloved flavors in an easy-to-make, crowd-pleasing dessert.
The first time I whipped up a batch of these bars, they disappeared in minutes! I couldn’t believe how simple it was to layer the cookie dough with chocolate and marshmallows, yet the result tasted like something from a gourmet bakery. If you enjoy the classic s’mores experience, you’re going to adore this fun twist.
Why You’ll Love This S’mores Cookie Bars Recipe
This dessert checks all the boxes: it’s easy to make, fun to serve, and guaranteed to satisfy any sweet tooth. You don’t need a campfire or special tools—just a baking pan and your oven. Each bite is a perfect balance of buttery cookie dough, melted chocolate, and soft, toasty marshmallows. Whether you’re baking for a potluck, a party, or just a cozy night in, S’mores Cookie Bars will win over everyone.
What Kind of Chocolate Should I Use?
One of the beauties of making S’mores Cookie Bars is how adaptable they are. When it comes to chocolate, you have plenty of options. I usually reach for classic milk chocolate bars to mirror the traditional s’mores flavor, but semi-sweet chocolate chips or dark chocolate chunks also work beautifully if you prefer something richer. For extra indulgence, try layering different types of chocolate—you’ll get depth and contrast in every bite.
Options for Substitutions
While this recipe is already incredibly simple, it’s always nice to know how you can tailor it to your preferences or pantry:
- Butter Substitute: You can swap unsalted butter with plant-based butter or margarine for a dairy-free version.
- Marshmallows: Regular mini marshmallows melt perfectly, but you could also use vegan marshmallows if needed.
- Graham Crackers: If you can’t find graham crackers, digestive biscuits or crushed tea biscuits are good alternatives.
- Flour: A 1:1 gluten-free flour blend can replace the all-purpose flour to make these bars gluten-free.
- Add-ins: Want to get creative? Toss in some chopped nuts, peanut butter chips, or even a sprinkle of sea salt on top for extra flavor.
With these easy swaps, you can enjoy S’mores Cookie Bars no matter your dietary needs or taste preferences.
Ingredients for This S’mores Cookie Bars Recipe
- Unsalted Butter
Provides richness and helps create a soft, tender cookie base. - Granulated Sugar
Adds sweetness and contributes to the chewy texture. - Brown Sugar
Brings moisture and a subtle molasses flavor, giving the bars depth. - Egg
Acts as a binder and adds structure to the cookie dough. - Vanilla Extract
Enhances the overall flavor with warm, aromatic notes. - All-Purpose Flour
The foundation of the dough, providing structure and stability. - Graham Cracker Crumbs
Delivers that signature s’mores flavor and a slightly sandy texture. - Baking Soda
Helps the bars rise and remain soft and tender. - Salt
Balances the sweetness and enhances all the other flavors. - Milk Chocolate Bars or Chips
The star of the show—melts beautifully for that gooey chocolate layer. - Mini Marshmallows
Toast up perfectly in the oven, creating the classic s’mores experience.
Each of these ingredients plays a key role in building the perfect layered dessert, combining chewy cookie, melty chocolate, and soft marshmallow in every delicious bite.
Step 1: Preheat the Oven and Prepare the Pan
Start by preheating your oven to 350°F (175°C). Line a 9×9-inch baking pan with parchment paper, leaving a slight overhang on the sides so you can easily lift out the bars after baking. Lightly grease the parchment to prevent sticking.
Step 2: Make the Cookie Dough
In a large mixing bowl, cream together the unsalted butter, granulated sugar, and brown sugar until light and fluffy. Add the egg and vanilla extract, and continue mixing until well combined. In a separate bowl, whisk together the all-purpose flour, graham cracker crumbs, baking soda, and salt. Gradually add the dry ingredients to the wet mixture, mixing just until a soft dough forms.
Step 3: Press the Base Layer
Take about two-thirds of the cookie dough and press it evenly into the bottom of your prepared baking pan. Use your hands or a spatula to smooth it out, making sure it reaches all the corners.
Step 4: Add the Chocolate and Marshmallows
Place your milk chocolate bars or sprinkle chocolate chips evenly over the cookie dough base. Then, generously scatter mini marshmallows on top of the chocolate layer. Don’t be shy—you want every bite to be packed with gooey marshmallows.
Step 5: Top with Remaining Dough
Take the remaining cookie dough and flatten small portions between your hands. Gently place these pieces over the marshmallows, covering as much of the surface as possible. It’s okay if some marshmallows peek through—this gives the bars that signature rustic look.
Step 6: Bake to Perfection
Place the pan in the preheated oven and bake for 20–25 minutes, or until the top is golden brown and the edges are set. The marshmallows may puff and brown slightly, which is exactly what you want.
Step 7: Cool and Slice
Allow the bars to cool completely in the pan before lifting them out using the parchment overhang. Once cooled, slice into squares or rectangles and enjoy!
How Long to Cook the S’mores Cookie Bars
The S’mores Cookie Bars typically take about 20 to 25 minutes to bake at 350°F (175°C). You’ll know they’re ready when the top is a lovely golden brown and the edges look set. The marshmallows will puff up, and the chocolate will melt into gooey layers. Keep an eye on them during the last few minutes—every oven is a little different, and you don’t want to overbake them, as this can dry out the cookie layer.
Tips for Perfect S’mores Cookie Bars
- Line Your Pan Well: Parchment paper with an overhang makes it easy to lift the bars out of the pan and helps with cleaner slicing.
- Don’t Overmix the Dough: Mix just until the dry ingredients are incorporated. Overmixing can make the cookie base tough.
- Balance the Dough Layers: Make sure to save enough dough for the top layer so you can get that nice marbled look with the marshmallows peeking through.
- Use Quality Chocolate: Since chocolate is a key flavor here, using a good-quality milk chocolate or dark chocolate will elevate the taste.
- Let Them Cool: It can be tempting to dive right in, but letting the bars cool completely will give you clean slices and the perfect chewy texture.
Watch Out for These Mistakes While Cooking
- Skipping the Parchment Paper: Without it, the bars can stick to the pan, making them difficult to remove cleanly.
- Overbaking: This is a common mistake. If you bake them too long, the cookie layer can become dry and the marshmallows may turn hard instead of staying gooey.
- Uneven Dough Layers: Spreading the dough too thin on the bottom or not covering enough on top can lead to inconsistent texture and taste.
- Using Large Marshmallows: Stick with mini marshmallows. Large ones won’t distribute evenly and can create big gaps or overly sticky pockets.
- Cutting Before Cooling: Slicing the bars too soon will result in a messy crumble. Patience is key—wait for them to cool completely.
What to Serve With S’mores Cookie Bars?
Hot Chocolate
A warm mug of rich hot chocolate pairs beautifully with these bars, especially on chilly days.
Coffee or Espresso
A freshly brewed cup of coffee helps balance the sweetness of the bars and makes for a lovely afternoon treat.
Vanilla Ice Cream
Serve the bars slightly warm with a scoop of vanilla ice cream on the side for an indulgent dessert.
Fresh Berries
Add a handful of fresh raspberries or strawberries on the plate for a refreshing contrast.
Whipped Cream
A dollop of homemade whipped cream adds a light, airy complement to the dense bars.
Milk
Sometimes, nothing beats a cold glass of milk to enjoy alongside gooey, chocolatey treats.
Salted Caramel Drizzle
For a gourmet twist, drizzle a bit of salted caramel sauce over the top before serving.
Fruit Salad
Balance the richness of the bars with a simple fruit salad for a more rounded dessert option.
Storage Instructions
Once completely cooled, store your S’mores Cookie Bars in an airtight container at room temperature for up to 4 days. If you prefer a firmer texture, you can refrigerate them, where they’ll keep for about 1 week. Just be sure to bring them to room temperature before serving for the best flavor and texture.
If you’d like to make them ahead or keep some for later, these bars also freeze well. Wrap individual bars tightly in plastic wrap, then place them in a freezer-safe bag or container. They’ll stay fresh in the freezer for up to 2 months. To enjoy, simply thaw at room temperature.
Estimated Nutrition
Please note that nutrition values are approximate and can vary depending on the specific brands of ingredients used. For a standard serving size (1 bar, assuming 16 bars per 9×9-inch pan):
- Calories: ~230
- Total Fat: 12g
- Saturated Fat: 7g
- Cholesterol: 35mg
- Sodium: 140mg
- Total Carbohydrates: 28g
- Dietary Fiber: 1g
- Sugars: 18g
- Protein: 3g
These bars are definitely a treat, so enjoy in moderation—but trust me, it’s hard to stop at just one!
Frequently Asked Questions
Can I make S’mores Cookie Bars in advance?
Yes! These bars are perfect for making ahead. You can bake them a day or two before serving. Just store them in an airtight container to keep them fresh.
Can I double the recipe?
Absolutely. If you’re baking for a crowd, double the recipe and use a 9×13-inch pan. You may need to adjust the baking time slightly—check for doneness after about 25–30 minutes.
How do I know when the bars are done?
Look for a golden-brown top and set edges. The marshmallows should be puffed and lightly toasted. A toothpick inserted into the center should come out with just a few moist crumbs.
Can I use dark chocolate instead of milk chocolate?
Yes, dark chocolate works wonderfully if you want a richer, less sweet flavor. You can also mix milk and dark chocolate for a more complex taste.
What if I don’t have graham crackers?
No problem! You can substitute digestive biscuits or tea biscuits. They provide a similar flavor and texture.
Can I use marshmallow fluff instead of mini marshmallows?
You can, but be aware that marshmallow fluff melts more and can make the bars gooier and a little messier. If you prefer neat slices, stick with mini marshmallows.
How should I store leftover bars?
Store cooled bars in an airtight container at room temperature for up to 4 days, in the fridge for 1 week, or freeze for up to 2 months.
Can I make these gluten-free?
Yes! Use a 1:1 gluten-free flour blend and substitute the graham crackers with gluten-free graham crackers or a similar gluten-free cookie.
Conclusion
S’mores Cookie Bars are the ultimate way to enjoy the nostalgic flavors of s’mores, no campfire required. They’re easy to make, fun to share, and endlessly adaptable to suit your tastes. Whether you’re baking them for a party, potluck, or a simple family treat, they’re sure to bring smiles all around. I hope you enjoy making (and eating!) these as much as I do. Happy baking!
S’mores Cookie Bars
- Prep Time: 15 minutes
- Cook Time: 20 minutes
- Total Time: 35 minutes
- Yield: 16 bars 1x
Description
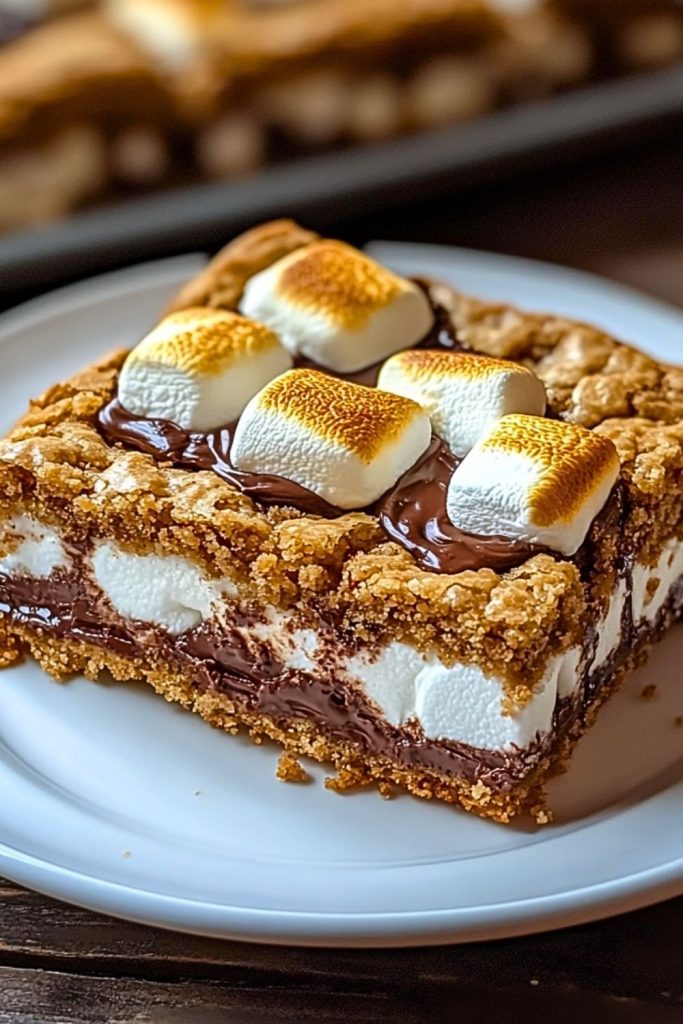
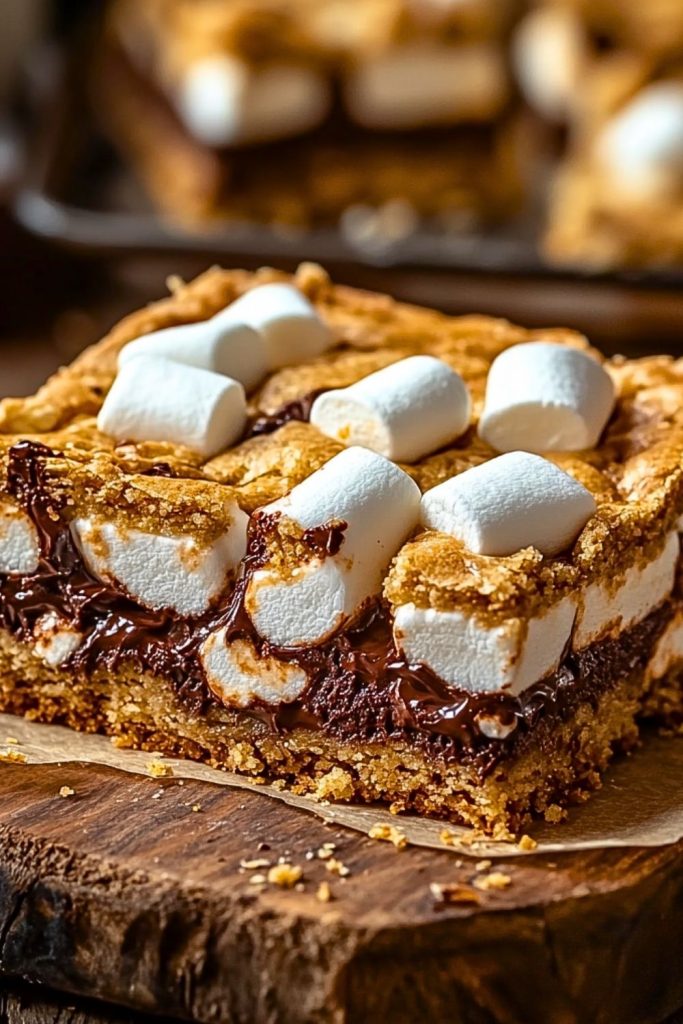
S’mores Cookie Bars combine all the flavors of a classic campfire treat into an easy-to-make layered dessert. With a buttery graham cracker cookie base, melty chocolate, and gooey marshmallows, these bars are perfect for parties, potlucks, or anytime you’re craving a nostalgic sweet treat.
Ingredients
- 1/2 cup (1 stick) unsalted butter, softened
- 1/2 cup granulated sugar
- 1/2 cup brown sugar, packed
- 1 large egg
- 1 teaspoon vanilla extract
- 1 1/4 cups all-purpose flour
- 3/4 cup graham cracker crumbs
- 1/2 teaspoon baking soda
- 1/4 teaspoon salt
- 2–3 milk chocolate bars (about 6 oz) or 1 cup milk chocolate chips
- 1 1/2 cups mini marshmallows
Instructions
-
Preheat the oven to 350°F (175°C). Line a 9×9-inch baking pan with parchment paper, leaving an overhang on the sides. Lightly grease the parchment.
-
Cream the butter and sugars in a large bowl until light and fluffy. Add the egg and vanilla extract, mixing until combined.
-
Whisk the dry ingredients—flour, graham cracker crumbs, baking soda, and salt—in a separate bowl.
-
Gradually combine the dry ingredients with the wet mixture until a soft dough forms.
-
Press two-thirds of the dough evenly into the prepared baking pan.
-
Layer the chocolate over the cookie base, followed by an even layer of mini marshmallows.
-
Flatten pieces of the remaining dough and place over the top of the marshmallows, covering as much as possible.
-
Bake for 20–25 minutes, or until golden brown and the edges are set.
-
Cool completely in the pan before lifting out and slicing into bars.