I always find myself reaching for recipes that feel festive but don’t require hours in the kitchen—and these Krispies Easter Egg Nests are exactly that. They’re impossibly cute, just the right amount of sweet, and made entirely from pantry staples. Every year around springtime, I make a batch of these and watch them disappear faster than I can snap a photo. They’re perfect for Easter gatherings, school parties, or a fun weekend project with kids.
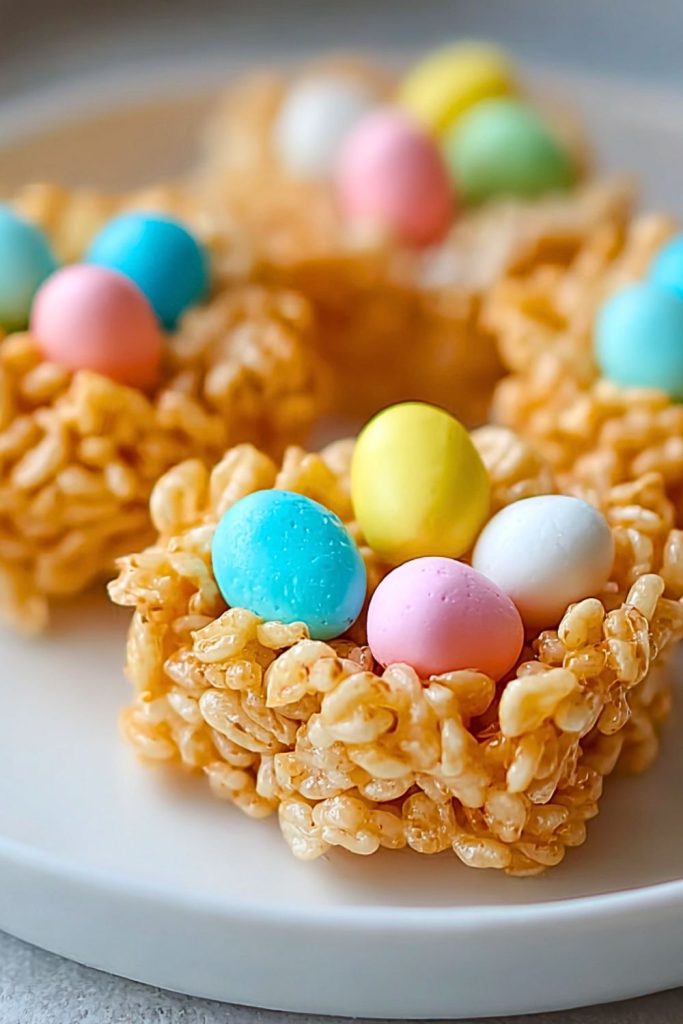
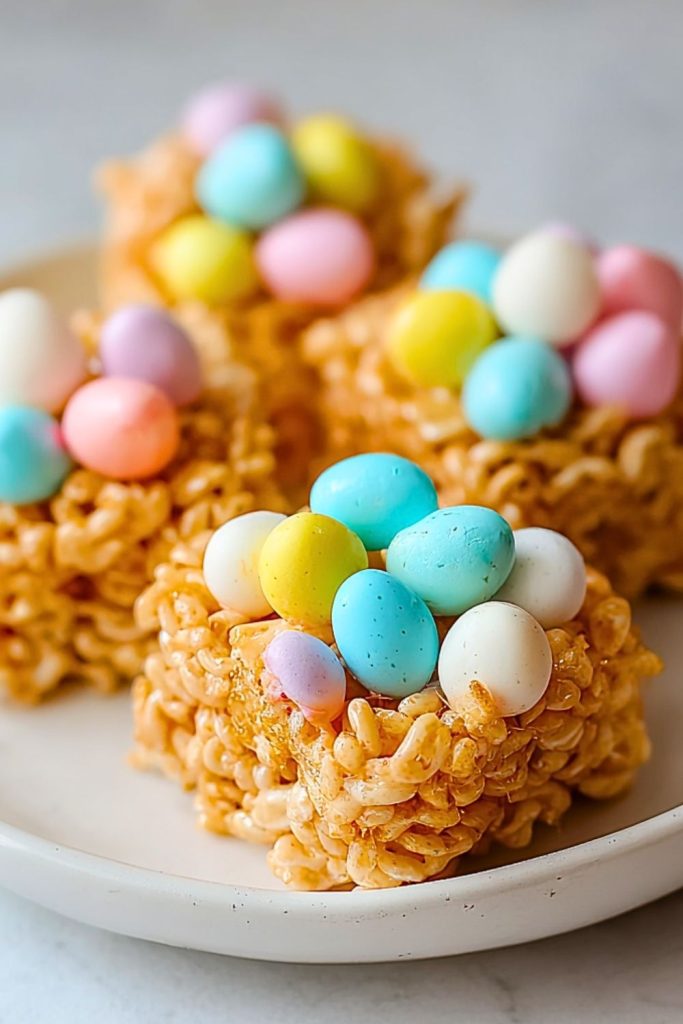
The chewy marshmallow krispie base is shaped into little nests, cradling candy-coated chocolate eggs in pastel colors. It’s a beautiful combination of texture and whimsy. Plus, they’re no-bake, mess-friendly, and totally customizable. These are the kinds of treats that spark joy the moment you lay eyes on them—and they taste even better.
Why You’ll Love These Krispies Easter Egg Nests
Whether you’re looking for a quick spring dessert or a kid-friendly activity, these nests check every box. They’re simple to make, don’t need an oven, and come together in less than 30 minutes. The colorful eggs make them visually irresistible, and the chewy, buttery krispie treat is a nostalgic bite of childhood for adults and kids alike. They’re also great for gifting—just wrap them up in clear bags with a ribbon and you’re set.
What Kind of Cereal Works Best for Krispies Easter Egg Nests?
Classic crispy rice cereal is the gold standard here—it’s light, crisp, and holds its shape perfectly once mixed with the gooey marshmallow mixture. I’ve tested a few alternatives out of curiosity, but nothing gives quite the same clean crunch and structure as the traditional kind. That said, if you’re feeling adventurous, puffed quinoa or puffed millet can be a fun twist for a more wholesome version. Just be prepared for a slightly different texture.
Options for Substitutions
If you’re working around allergies or simply want to switch things up, there are plenty of ways to tweak this recipe:
- Marshmallows: Swap regular marshmallows for vegan marshmallows if needed. Just keep an eye on melting time—they behave a little differently.
- Butter: Use plant-based butter or coconut oil if dairy-free is your goal. I’ve done it and the results are still delicious.
- Cereal: As mentioned, puffed grains or even cornflakes can work in a pinch, though the nest structure may be a bit looser.
- Egg Candies: Chocolate eggs are traditional, but jelly beans, M&M’s, or even dried fruit work beautifully for a unique twist.
- Add-ins: A spoonful of peanut butter mixed into the marshmallow mixture adds extra richness, or a dash of vanilla extract brings extra depth.
These nests are forgiving and fun to experiment with, so feel free to make them your own.
Ingredients for These Krispies Easter Egg Nests
Crispy Rice Cereal
This is the heart of the nests—providing that signature crunch and structure. It’s lightweight, easy to mold, and perfect for holding shape.
Mini Marshmallows
They melt down into a gooey, sweet binder that holds the cereal together. Using mini marshmallows makes melting quicker and smoother.
Butter
A little butter goes a long way in creating a rich, slightly salty base that balances the sweetness of the marshmallows.
Vanilla Extract (optional but recommended)
It enhances the overall flavor with a subtle warmth that makes the treats taste a bit more grown-up.
Candy-Coated Chocolate Eggs
These are the fun and colorful stars of the show. They sit perfectly in the center of each nest, adding both visual charm and a sweet bite.
Nonstick Cooking Spray or Butter (for your hands or muffin tin)
Helps prevent sticking when shaping the nests, whether you’re using your hands or forming them in a muffin pan.
Step 1: Melt the Butter and Marshmallows
In a large saucepan over low heat, melt the butter gently. Once fully melted, add the mini marshmallows and stir constantly until completely smooth and melted. Be patient—low heat keeps the mixture from getting stiff or overly sticky.
Step 2: Stir in Vanilla and Cereal
Remove the pan from heat and quickly stir in the vanilla extract (if using). Then add the crispy rice cereal and mix until evenly coated. The mixture will be thick and sticky—use a spatula coated in nonstick spray to help mix easily.
Step 3: Shape the Nests
Spray your hands with nonstick spray or lightly butter them. Take heaping spoonfuls of the mixture and form them into nests, pressing down into the center to make a dip. You can also use a greased muffin tin to press the mixture in and form perfect nest shapes.
Step 4: Add the Chocolate Eggs
While the nests are still slightly warm (but not hot), press 2–3 candy-coated eggs gently into the center of each one. Don’t push too hard—just enough for them to stick once the nest firms up.
Step 5: Let Them Set
Allow the nests to cool and set at room temperature for about 20–30 minutes. Once firm, they’re ready to be served or stored.
How Long to Cook the Krispies Easter Egg Nests
Since this is a no-bake treat, there’s no oven time involved. The cooking happens entirely on the stovetop and takes just about 5–7 minutes to melt the butter and marshmallows together. After shaping the nests, give them around 20–30 minutes to cool and set completely at room temperature. If you’re in a hurry, you can pop them in the fridge for 10–15 minutes to speed things up.
Tips for Perfect Krispies Easter Egg Nests
- Low and slow heat is key – Melting the marshmallows on low heat prevents them from becoming tough or chewy.
- Use nonstick spray liberally – This helps avoid sticky hands and tools, making shaping way easier.
- Work quickly – The mixture starts to firm up fast, so shape the nests as soon as the cereal is mixed in.
- Use a muffin tin for uniform shapes – If you want consistent, clean nests, press the mixture into greased muffin cups.
- Add eggs after shaping, not before – If added too early, the chocolate can melt or get pushed in too far.
- Don’t pack too tightly – Pressing the cereal down too hard can make the nests overly dense instead of light and chewy.
- Let them cool completely – This helps them hold their shape when picked up or stored.
Watch Out for These Mistakes While Cooking
- Overheating the marshmallows: High heat makes the marshmallow mixture stiff and hard to work with. Always melt on low.
- Waiting too long to shape: Once mixed, the cereal firms up quickly. Delay too long and shaping becomes nearly impossible.
- Skipping nonstick spray: Whether using a spoon, muffin tin, or your hands, nonstick spray is essential to prevent a sticky mess.
- Overpacking the nests: Pressing the mixture too tightly makes them dense and less pleasant to eat.
- Placing eggs while too hot: If the nests are piping hot, the candy eggs can melt or lose their coating.
- Storing before fully cooled: This can lead to condensation and a soggy texture. Let them cool completely first.
What to Serve With Krispies Easter Egg Nests?
Mini Carrot Cupcakes
Light and spiced just right, they complement the sweetness of the nests without overwhelming.
Fruit Skewers
A refreshing and colorful balance to the sugary treats—grapes, strawberries, and pineapple are perfect.
Deviled Eggs
They add a savory contrast to your Easter spread and play off the “egg” theme in a fun way.
Chocolate-Dipped Pretzels
The sweet-salty combo works well alongside the marshmallowy nests.
Spring Punch or Lemonade
Something fizzy or citrusy helps cleanse the palate and keep things refreshing.
Sugar Cookies with Royal Icing
Cut into bunny or chick shapes, these add charm and variety to any dessert table.
Cheese and Cracker Platter
To add a little balance to all the sweets, a savory board is always welcome and gives guests variety.
Easter Bunny Trail Mix
Toss popcorn, pastel candies, mini marshmallows, and pretzels for a playful party mix.
Storage Instructions
Once the Krispies Easter Egg Nests have completely cooled and set, transfer them to an airtight container. They’ll stay fresh at room temperature for up to 3 days. If your kitchen runs warm, consider storing them in the fridge to prevent melting or stickiness—just let them sit at room temp for a few minutes before serving so they’re not too firm.
For longer storage, you can freeze them for up to a month. Wrap each nest individually in plastic wrap, then place them in a freezer-safe bag or container. Thaw at room temperature for a few hours before enjoying.
Estimated Nutrition
(Per nest, based on a batch of 12 nests with standard ingredients)
- Calories: ~140
- Total Fat: 3g
- Saturated Fat: 1.5g
- Cholesterol: 5mg
- Sodium: 80mg
- Carbohydrates: 28g
- Sugar: 15g
- Fiber: 0g
- Protein: 1g
Note: Nutritional values can vary based on brand of cereal, marshmallows, and type of chocolate eggs used.
Frequently Asked Questions
Can I make these Krispies Easter Egg Nests ahead of time?
Yes! You can prepare them up to 3 days in advance. Just store in an airtight container at room temperature until ready to serve.
Can I use large marshmallows instead of mini ones?
Absolutely. Just make sure to chop them into smaller pieces to speed up melting and keep stirring constantly to avoid lumps.
What if I don’t have candy eggs?
No problem! You can substitute with jelly beans, mini marshmallows, or even fruit gummies. Anything small and colorful will look great in the nests.
Can I color the nests?
Yes—you can add a few drops of food coloring to the melted marshmallow mixture before adding the cereal. Pastel shades work great for spring!
Are these treats gluten-free?
They can be! Just use a certified gluten-free crispy rice cereal and double-check your marshmallows and candy eggs for any hidden gluten.
Can I use a mold to shape the nests?
Definitely. A muffin tin is perfect for this, or you can use silicone cupcake molds for easy release and cute shapes.
How do I keep the mixture from sticking to my hands?
Spray your hands lightly with nonstick spray or rub a small amount of butter on them before shaping the nests.
Can I make these without butter?
Yes. Coconut oil or plant-based margarine can be used as a substitute, though the flavor will be slightly different.
Conclusion
Krispies Easter Egg Nests are the kind of treat that blend fun, nostalgia, and seasonal charm all in one sweet bite. They’re quick to make, easy to customize, and guaranteed to bring smiles—whether you’re making them with kids, gifting them to friends, or adding them to your Easter dessert table. Once you try them, they just might become a spring tradition in your home like they did in mine.
Krispies Easter Egg Nests
- Prep Time: 10 minutes
- Cook Time: 7 minutes
- Total Time: 30 minutes
- Yield: 12 nests 1x
- Category: Dessert
- Method: No-Bake
- Cuisine: American
- Diet: Vegetarian
Description
These no-bake Krispies Easter Egg Nests are an adorable and festive springtime treat made with gooey marshmallow cereal and colorful chocolate eggs. They’re quick to make, fun to shape, and the perfect addition to your Easter celebration.
Ingredients
3 tablespoons butter
4 cups mini marshmallows
1 teaspoon vanilla extract (optional)
6 cups crispy rice cereal
36 candy-coated chocolate eggs
Nonstick cooking spray or butter for shaping
Instructions
1. In a large saucepan, melt the butter over low heat.
2. Add mini marshmallows and stir constantly until melted and smooth.
3. Remove from heat and stir in vanilla extract if using.
4. Add crispy rice cereal and stir until fully coated.
5. Spray your hands with nonstick spray or grease lightly with butter.
6. Scoop spoonfuls of the mixture and form into nests by shaping and pressing the center.
7. Alternatively, press the mixture into greased muffin tins to shape.
8. While still warm, gently press 2–3 chocolate eggs into the center of each nest.
9. Let the nests cool at room temperature for 20–30 minutes until set.
10. Serve, store, or wrap for gifting.
Notes
Store in an airtight container at room temperature for up to 3 days.
Freeze for up to 1 month—wrap individually and store in a sealed container.
Use muffin tins for uniform nest shapes.
Spray hands and tools well to avoid sticking.
Nutrition
- Serving Size: 1 nest
- Calories: 140
- Sugar: 15g
- Sodium: 80mg
- Fat: 3g
- Saturated Fat: 1.5g
- Unsaturated Fat: 1g
- Trans Fat: 0g
- Carbohydrates: 28g
- Fiber: 0g
- Protein: 1g
- Cholesterol: 5mg
Keywords: Easter, no-bake, treats, kids, spring