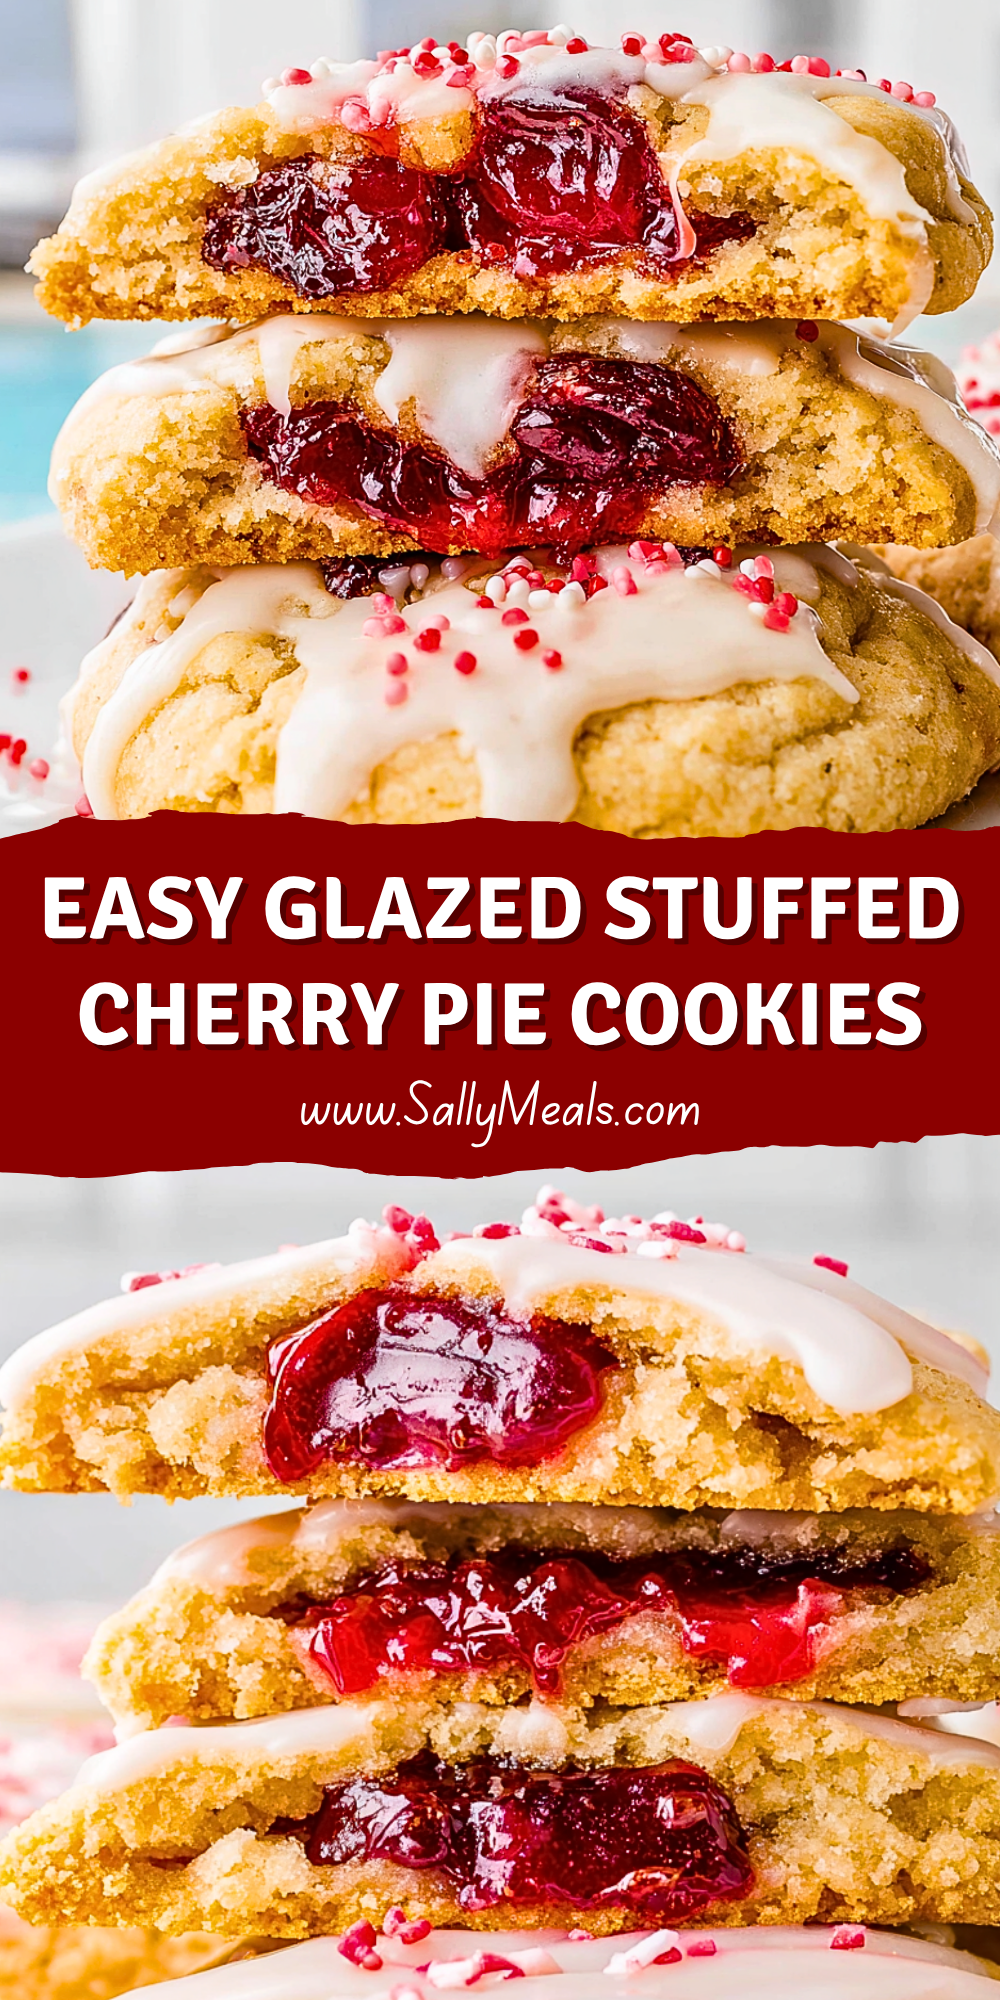
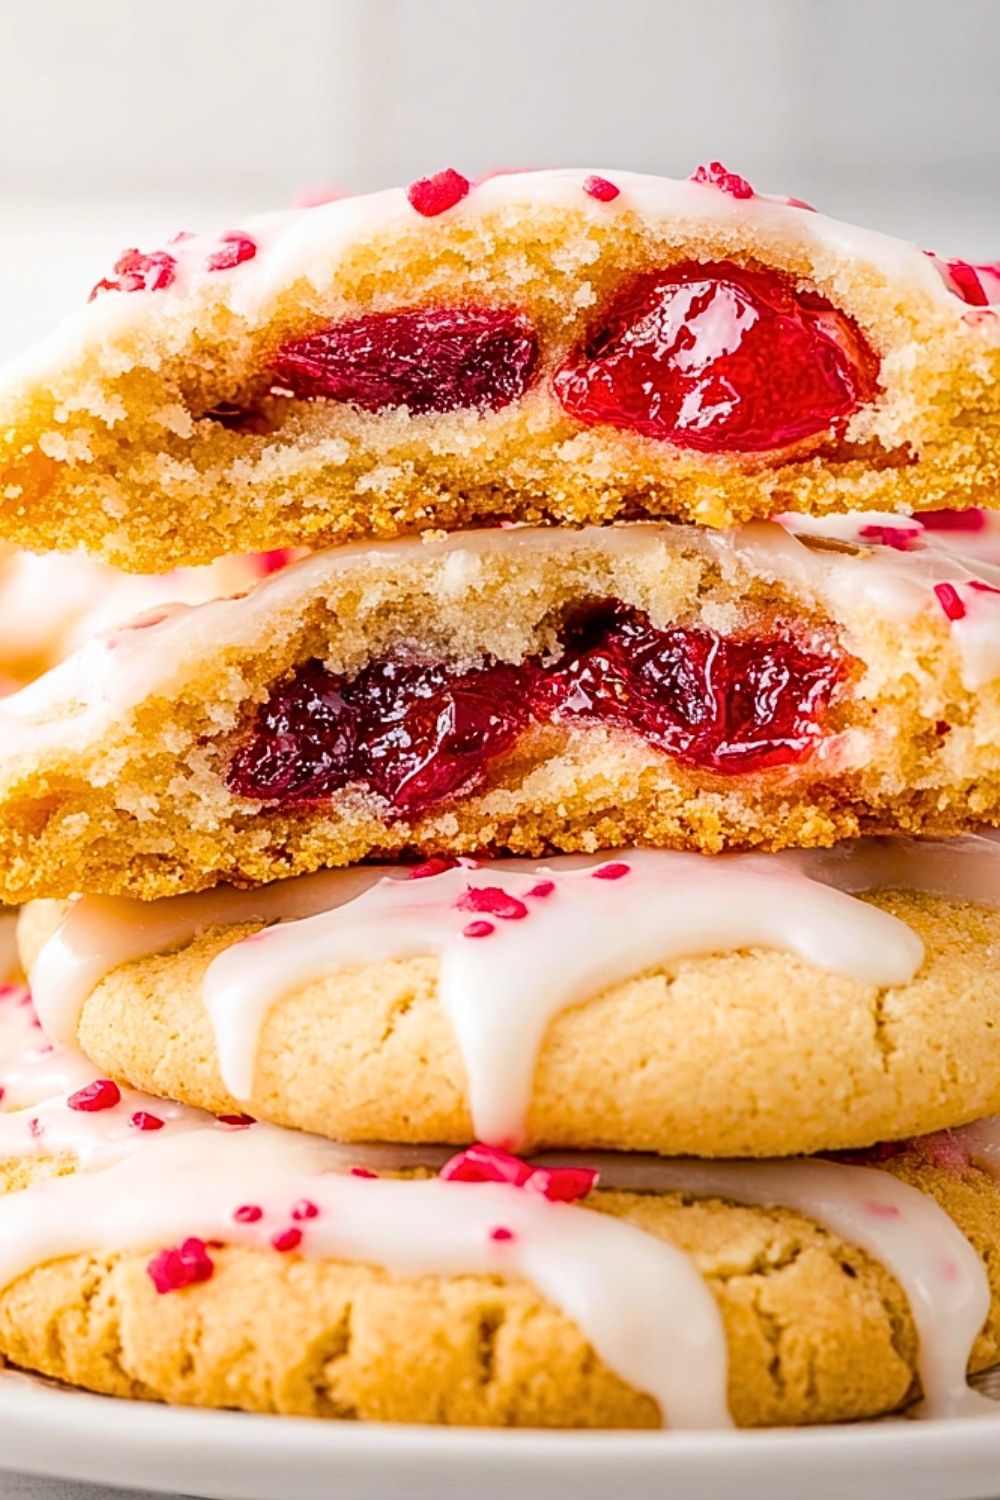
I love baking cookies that feel a little extra special without turning the kitchen upside down, and these Easy Glazed Stuffed Cherry Pie Cookies are exactly that kind of treat. They combine the soft, buttery texture of bakery-style cookies with a gooey cherry pie filling tucked right inside. The sweet glaze drizzled over the top adds the perfect finishing touch, while the pink and red sprinkles make them look festive enough for holidays, parties, or a cozy weekend baking session.
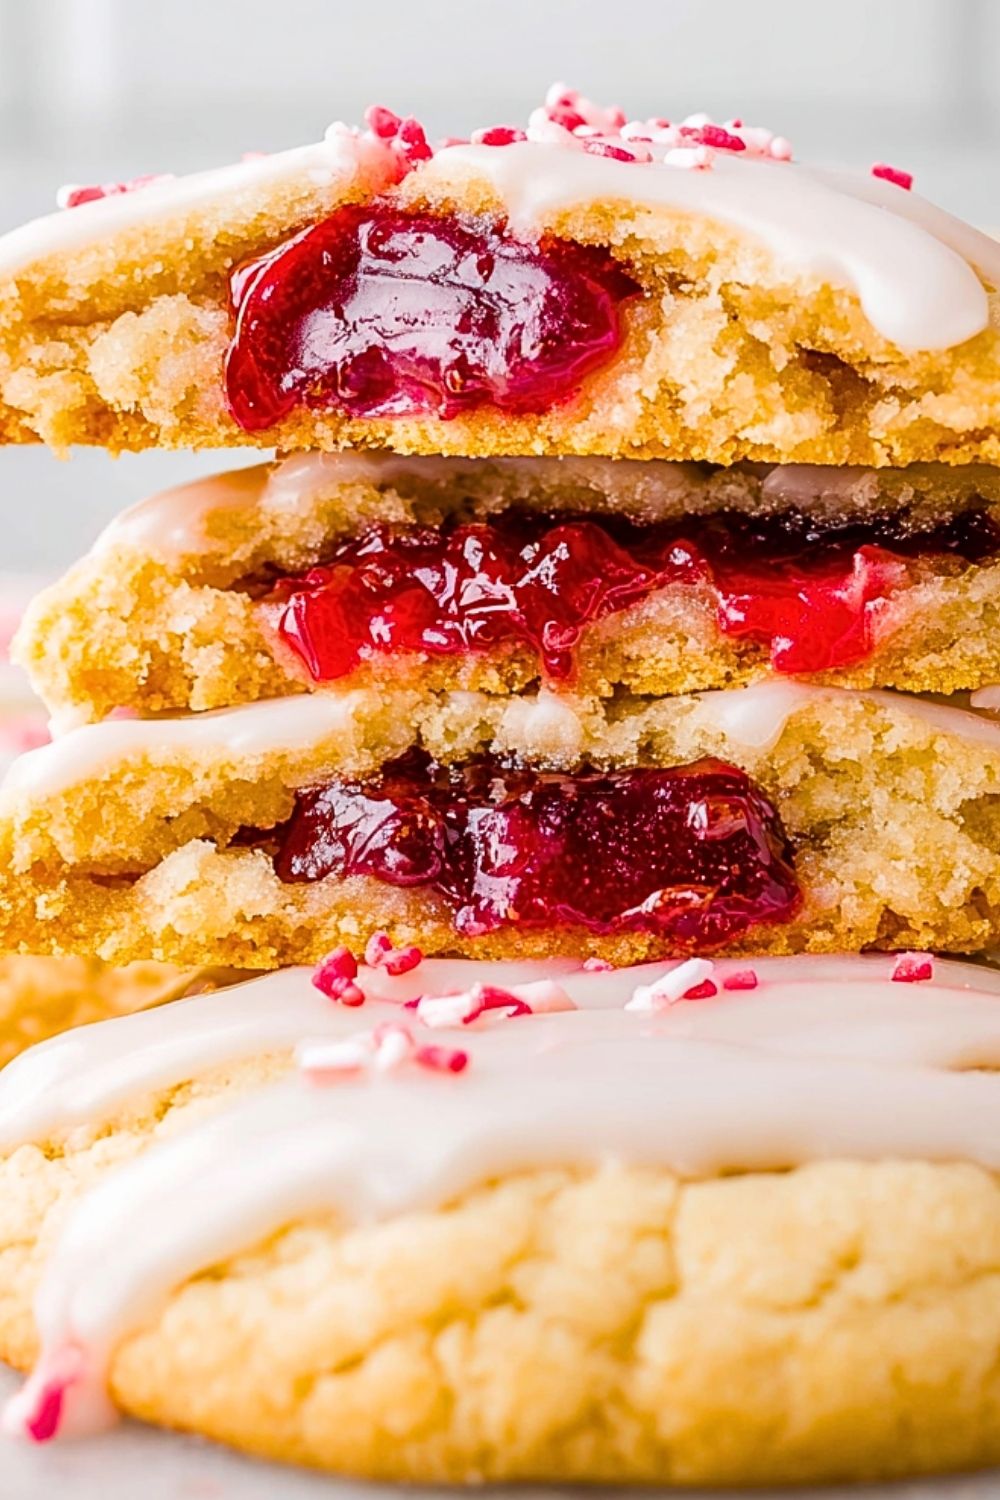
What makes these cookies stand out is the surprise center hidden inside every bite. The cherry filling melts into the soft cookie dough as they bake, creating a dessert that tastes like cherry pie and sugar cookies combined into one irresistible treat. I always find myself reaching for another because they balance fruity sweetness, creamy glaze, and buttery richness so perfectly.
Why You’ll Love These Easy Glazed Stuffed Cherry Pie Cookies
These cookies are soft, thick, and filled with a bright cherry flavor that instantly makes them memorable. The contrast between the tender cookie exterior and the juicy cherry filling creates a dessert that feels bakery-worthy while still being simple enough for home bakers.
Another reason these cookies are so popular is how versatile they are. They fit beautifully on Valentine’s Day dessert trays, holiday cookie platters, birthday party tables, or casual weekend dessert spreads. The glaze and sprinkles also make them easy to customize with different colors or seasonal decorations.
You’ll also appreciate how approachable this recipe is. Even though the cookies look impressive, the process is straightforward and beginner-friendly. Using canned cherry pie filling keeps things easy while still delivering rich flavor and texture.
What Kind of Cherry Filling Should I Use for Easy Glazed Stuffed Cherry Pie Cookies?
Cherry pie filling works best because it has the perfect thick consistency for stuffing inside cookie dough without becoming too runny during baking. The cherries stay juicy while the filling thickens slightly in the oven, helping create that classic pie-like center.
If you prefer a homemade option, you can prepare your own cherry filling using fresh or frozen cherries cooked with sugar and cornstarch until thickened. Homemade filling gives you more control over sweetness and texture, but store-bought pie filling is incredibly convenient and reliable.
You can also experiment with different fruit fillings if you want to switch things up. Raspberry, strawberry, blueberry, or mixed berry fillings all work wonderfully with the soft glazed cookie base.
Options for Substitutions
If you need to adjust the recipe based on ingredients you already have, there are several easy substitutions that still produce delicious cookies.
Butter can be replaced with plant-based butter for a dairy-free version while still maintaining a soft texture. If you want a slightly richer flavor, browned butter can also be used to add a subtle caramel-like depth.
For the filling, canned cherry pie filling can be swapped with raspberry preserves, strawberry jam, blueberry pie filling, or even apple pie filling for a different flavor profile.
The glaze can be customized as well. Instead of a classic vanilla glaze, you can add almond extract for a bakery-style flavor that pairs beautifully with cherries. Lemon glaze also creates a bright contrast against the sweet filling.
If you need a gluten-free option, a good quality 1-to-1 gluten-free baking flour blend can usually replace all-purpose flour successfully in this type of cookie recipe.
For decorations, feel free to swap the sprinkles for sanding sugar, crushed freeze-dried fruit, mini chocolate chips, or leave the cookies plain with only the glaze for a more elegant finish.
Ingredients for These Easy Glazed Stuffed Cherry Pie Cookies
All-Purpose Flour
All-purpose flour gives the cookies their structure and creates the soft yet sturdy texture needed to hold the cherry filling inside. It helps the cookies stay thick and tender while baking.
Baking Powder
Baking powder adds lift and softness to the dough, helping the cookies bake up light instead of dense. It also encourages a slightly puffed texture that pairs perfectly with the gooey center.
Salt
A small amount of salt balances the sweetness and enhances the buttery and cherry flavors throughout the cookies.
Unsalted Butter
Butter creates the rich, soft, melt-in-your-mouth texture that makes these cookies irresistible. Using softened butter also helps the dough cream smoothly with the sugar.
Granulated Sugar
Granulated sugar sweetens the cookies while also contributing to their lightly crisp edges and soft centers.
Brown Sugar
Brown sugar adds moisture and a subtle caramel-like depth that makes the cookie dough taste richer and softer.
Eggs
Eggs bind the ingredients together while adding richness and helping the cookies maintain their soft texture.
Vanilla Extract
Vanilla extract brings warmth and bakery-style flavor to the dough and complements the cherry filling beautifully.
Almond Extract
A small touch of almond extract enhances the cherry flavor and gives the cookies a classic cherry-dessert taste.
Cherry Pie Filling
Cherry pie filling is the star of the recipe, creating the sweet, juicy center hidden inside every cookie. The thick consistency works perfectly for stuffing without leaking too much during baking.
Powdered Sugar
Powdered sugar is used for the glaze, creating a smooth and sweet topping that hardens slightly as it sets.
Milk
Milk thins the glaze to the perfect consistency for drizzling over the cookies.
Pink and Red Sprinkles
Sprinkles add color, texture, and a festive appearance that makes the cookies even more eye-catching.
Step 1: Prepare the Baking Sheets and Oven
Start by preheating your oven to 350°F. Line large baking sheets with parchment paper to prevent sticking and make cleanup easier.
Allow the butter to fully soften at room temperature before starting the dough. Soft butter creams more smoothly with the sugars and helps create the perfect cookie texture.
If the cherry pie filling contains very large cherry pieces, roughly chop them into smaller chunks. Smaller pieces are easier to stuff into the cookies and distribute more evenly.
Step 2: Mix the Dry Ingredients
In a medium bowl, whisk together the all-purpose flour, baking powder, and salt.
Mixing the dry ingredients separately ensures the baking powder and salt are evenly distributed throughout the dough. This helps every cookie bake consistently.
Set the bowl aside while preparing the wet ingredients.
Step 3: Cream the Butter and Sugars
In a large mixing bowl, beat the softened butter, granulated sugar, and brown sugar together until the mixture becomes light and fluffy.
This step is important because it incorporates air into the dough, helping the cookies stay soft and thick instead of heavy.
Cream the mixture for several minutes using either a stand mixer or a hand mixer for the best texture.
Step 4: Add the Eggs and Extracts
Add the eggs one at a time, mixing well after each addition.
Pour in the vanilla extract and almond extract, then continue mixing until everything is fully combined.
The dough should look creamy, smooth, and slightly fluffy at this stage.
Step 5: Combine the Wet and Dry Ingredients
Gradually add the dry ingredient mixture into the wet ingredients.
Mix slowly to avoid overworking the dough. Continue mixing just until no dry streaks remain.
The finished dough should feel soft, thick, and easy to scoop without being sticky.
If the dough feels too soft, chill it in the refrigerator for about 20 to 30 minutes before assembling the cookies.
Step 6: Scoop and Flatten the Dough
Using a cookie scoop or spoon, portion the dough into evenly sized balls.
Flatten one dough ball slightly in your hand or on a parchment-lined surface.
Creating a flat base helps hold the cherry filling securely inside the cookie.
Step 7: Add the Cherry Filling
Place a small spoonful of cherry pie filling into the center of the flattened dough.
Be careful not to overfill the cookies. Too much filling can leak out during baking and make the cookies spread unevenly.
Try to include both cherries and some of the thick filling for the best texture.
Step 8: Seal the Cookies
Take another small piece of dough and place it over the filling.
Gently pinch the edges together to completely seal the filling inside.
Roll the cookie lightly between your hands if needed to smooth the seams and shape the cookies evenly.
Proper sealing helps keep the filling tucked inside while baking.
Step 9: Arrange the Cookies on the Baking Sheet
Place the stuffed cookies onto the prepared baking sheets, leaving enough space between each cookie for slight spreading.
Because these cookies are thick and filled, they generally spread less than traditional sugar cookies.
Press the tops very lightly if you want a flatter bakery-style appearance.
Step 10: Bake the Cookies
Bake the cookies for approximately 12 to 15 minutes or until the edges become lightly golden.
The centers may still appear slightly soft when removed from the oven, but they will continue setting as they cool.
Avoid overbaking, as this can dry out the cookies and reduce the soft texture.
Step 11: Cool the Cookies Completely
Allow the cookies to cool on the baking sheet for several minutes before transferring them to a wire rack.
Cooling the cookies fully before glazing prevents the glaze from melting too quickly and sliding off.
The cherry filling will also thicken slightly as the cookies cool.
Step 12: Prepare the Glaze
In a small bowl, whisk together powdered sugar and milk until smooth.
Adjust the consistency as needed by adding extra powdered sugar for a thicker glaze or more milk for a thinner drizzle.
For extra flavor, you can also add a tiny splash of vanilla or almond extract.
Step 13: Glaze and Decorate the Cookies
Drizzle the glaze generously over the cooled cookies.
Immediately top with pink and red sprinkles before the glaze sets.
The glaze adds sweetness, visual appeal, and a bakery-style finish that makes the cookies look professionally made.
Step 14: Let the Glaze Set Before Serving
Allow the cookies to rest for about 15 to 20 minutes so the glaze can firm up slightly.
Once set, the cookies are ready to serve and enjoy.
The final result is a soft buttery cookie filled with sweet cherry pie filling and finished with a beautiful sugary glaze.
Easy Glazed Stuffed Cherry Pie Cookies
How Long to Prepare These Easy Glazed Stuffed Cherry Pie Cookies
Making these cookies is surprisingly manageable, even though they look like a bakery-style specialty dessert. Most of the preparation time goes into mixing the dough, stuffing the cookies carefully, and allowing them to cool before glazing. The process is simple enough for beginner bakers while still producing impressive results.
The total preparation and baking process usually takes around 1 hour from start to finish. If you choose to chill the dough for easier handling, add an additional 20 to 30 minutes. These cookies are ideal for weekend baking sessions, holiday baking days, or special occasions when you want a dessert that looks elegant without requiring complicated techniques.
Preparation Time
Preparing the dough and assembling the cookies generally takes about 25 to 35 minutes. This includes mixing the ingredients, portioning the dough, adding the cherry filling, and sealing the cookies.
Baking Time
The cookies bake relatively quickly, usually requiring about 12 to 15 minutes per batch depending on your oven and cookie size.
Cooling and Glazing Time
After baking, allow approximately 20 minutes for cooling and decorating. This gives the cookies enough time to set properly before glazing.
Total Time
Including preparation, baking, cooling, and decorating, the total time is typically around 1 hour to 1 hour and 15 minutes.
Tips for Perfect Easy Glazed Stuffed Cherry Pie Cookies
Use Softened Butter
Softened butter creates a smoother dough and helps produce soft, tender cookies. Butter that is too cold will not cream properly, while melted butter can make the dough spread too much.
Chill the Dough if Needed
If the dough becomes sticky or difficult to handle, chilling it briefly makes stuffing and sealing much easier. Chilled dough also helps the cookies maintain a thicker shape while baking.
Do Not Overfill the Cookies
Adding too much cherry filling can cause the cookies to burst open in the oven. Use a modest spoonful to keep the filling neatly tucked inside.
Seal the Edges Carefully
Take time to fully pinch and seal the dough around the filling. Proper sealing prevents leaks and keeps the cookies looking smooth and bakery-style.
Use Parchment Paper
Parchment paper prevents sticking and helps the cookies bake more evenly. It also makes cleanup faster and easier.
Let the Cookies Cool Before Glazing
Warm cookies can cause the glaze to melt and slide off. Cooling them completely allows the glaze to set beautifully on top.
Add Almond Extract for Bakery Flavor
Even a small amount of almond extract enhances the cherry flavor dramatically and gives the cookies a classic bakery-style taste.
Decorate While the Glaze Is Wet
Sprinkles should be added immediately after glazing so they stick properly before the glaze begins to harden.
Watch Out for These Mistakes While Cooking
Overmixing the Dough
Overmixing can create dense cookies instead of soft, tender ones. Mix only until the ingredients are combined.
Using Too Much Filling
Too much filling often leaks out during baking and can cause uneven cookies. Keep the filling centered and controlled.
Skipping Dough Chilling When Necessary
If the dough feels too warm or sticky, skipping the chilling step can lead to excessive spreading and difficult assembly.
Baking Too Long
Overbaked cookies lose their soft texture quickly. Remove them once the edges are lightly golden and the centers still appear slightly soft.
Glazing Warm Cookies
Applying glaze too early causes it to melt into the cookies instead of creating a smooth topping.
Forgetting to Line the Baking Sheet
Without parchment paper or a baking mat, the sugary filling may stick to the pan if any leaks occur.
Uneven Dough Portions
Different sized cookies bake unevenly. Using a cookie scoop helps maintain uniform size and texture.
What to Serve With Easy Glazed Stuffed Cherry Pie Cookies?
Vanilla Ice Cream
The cold creaminess of vanilla ice cream pairs beautifully with the warm cherry filling and buttery cookie texture.
Hot Coffee
A rich cup of coffee balances the sweetness of the glaze and filling, making these cookies perfect for afternoon treats or dessert platters.
Cherry Milkshakes
For cherry lovers, serving these cookies alongside a creamy cherry milkshake creates a fun and indulgent dessert pairing.
Whipped Cream
Fresh whipped cream adds a light and airy contrast that complements the dense, soft cookie texture.
Hot Chocolate
The rich flavor of hot chocolate pairs wonderfully with the fruity cherry filling, especially during colder months or holiday gatherings.
Storage Instructions
These Easy Glazed Stuffed Cherry Pie Cookies store very well, making them a great make-ahead dessert for parties, celebrations, and holiday baking.
Room Temperature Storage
Store the cookies in an airtight container at room temperature for up to 3 days. Place parchment paper between layers to prevent sticking.
Refrigerator Storage
Because of the fruit filling, refrigeration can help extend freshness. Store the cookies in an airtight container in the refrigerator for up to 1 week.
Before serving, allow refrigerated cookies to sit at room temperature for several minutes for the best texture.
Freezing Instructions
These cookies freeze surprisingly well. Arrange them in a single layer until frozen solid, then transfer them to a freezer-safe container or bag.
They can typically be frozen for up to 2 months. Thaw at room temperature before serving.
Freezing the Dough
The cookie dough can also be assembled and frozen before baking. Freeze the stuffed dough balls on a tray until firm, then store them in freezer bags.
Bake directly from frozen, adding a few extra minutes to the baking time.
Estimated Nutrition
The exact nutritional values may vary depending on ingredient brands, cookie size, and glaze amount, but here is an estimated overview per cookie.
- Calories: 290–340
- Carbohydrates: 42g
- Protein: 3g
- Fat: 13g
- Saturated Fat: 8g
- Sugar: 26g
- Sodium: 120mg
- Fiber: 1g
These cookies are meant to be a fun dessert treat, especially for celebrations and special occasions.
Frequently Asked Questions
Can I Use Homemade Cherry Filling?
Yes, homemade cherry filling works wonderfully in this recipe. Just make sure the filling is thick enough so it does not become too runny during baking.
Can I Make the Dough Ahead of Time?
Absolutely. The dough can be prepared and refrigerated for up to 2 days before assembling and baking the cookies.
Why Did My Filling Leak Out?
Filling usually leaks if the cookies are overfilled or not sealed completely. Make sure the edges are fully pinched together before baking.
Can I Freeze the Baked Cookies?
Yes, these cookies freeze very well. Store them in airtight freezer-safe containers and thaw before serving.
Can I Use Other Pie Fillings?
Definitely. Raspberry, strawberry, blueberry, and apple pie fillings all work beautifully in this cookie recipe.
Conclusion
Easy Glazed Stuffed Cherry Pie Cookies are the kind of dessert that instantly stands out on any table. Their soft buttery texture, sweet cherry-filled center, and smooth sugary glaze create a combination that feels both comforting and impressive.
These cookies are perfect for holidays, parties, bake sales, Valentine’s Day treats, or simply satisfying a craving for something fruity and sweet. They look elegant, taste bakery-quality, and still remain simple enough for home bakers of all skill levels.
Once you try them fresh from the oven with their gooey cherry center and glossy glaze, it becomes easy to see why they disappear so quickly every time they are served.
Easy Glazed Stuffed Cherry Pie Cookies
- Prep Time: 30 minutes
- Cook Time: 15 minutes
- Total Time: 45 minutes
- Yield: 18 cookies 1x
- Category: Dessert
- Method: Baking
- Cuisine: American
- Diet: Vegetarian
Description
These Easy Glazed Stuffed Cherry Pie Cookies are soft, buttery, and filled with a sweet cherry pie center that melts into every bite. Finished with a smooth vanilla glaze and festive sprinkles, they look bakery-style while being simple enough to make at home. They are perfect for holiday desserts, Valentine’s Day treats, easy dessert ideas, party cookies, sweet snack recipes, and fun baking projects for families. The combination of tender sugar cookie dough, gooey cherry filling, and glossy glaze creates a dessert that feels both nostalgic and impressive. Whether you need quick dessert ideas, easy baking recipes, or crowd-pleasing cookie recipes, these stuffed cherry pie cookies always stand out on the dessert table.
Ingredients
2 ¾ cups all-purpose flour
1 teaspoon baking powder
½ teaspoon salt
1 cup unsalted butter, softened
1 cup granulated sugar
¼ cup brown sugar
2 large eggs
1 teaspoon vanilla extract
½ teaspoon almond extract
1 cup cherry pie filling
2 cups powdered sugar
3 tablespoons milk
Pink and red sprinkles for decorating
Instructions
1. Preheat the oven to 350°F and line baking sheets with parchment paper.
2. In a medium bowl, whisk together the flour, baking powder, and salt.
3. In a large bowl, beat the softened butter, granulated sugar, and brown sugar until light and fluffy.
4. Add the eggs one at a time, mixing well after each addition. Stir in the vanilla extract and almond extract.
5. Gradually mix the dry ingredients into the wet ingredients until a soft dough forms.
6. Scoop portions of dough and flatten each slightly.
7. Add a small spoonful of cherry pie filling into the center of the dough.
8. Cover with another piece of dough and pinch the edges closed to seal the filling inside.
9. Arrange the stuffed cookies on the prepared baking sheets.
10. Bake for 12 to 15 minutes or until the edges are lightly golden.
11. Allow the cookies to cool completely on a wire rack.
12. Whisk together powdered sugar and milk to create a smooth glaze.
13. Drizzle the glaze over the cooled cookies and immediately top with sprinkles.
14. Let the glaze set before serving.
Notes
Do not overfill the cookies or the cherry filling may leak during baking.
Chilling the dough for 20 minutes helps keep the cookies thick and easier to seal.
Allow the cookies to cool completely before glazing so the icing sets properly instead of melting.
Nutrition
- Serving Size: 1 cookie
- Calories: 320
- Sugar: 26g
- Sodium: 120mg
- Fat: 13g
- Saturated Fat: 8g
- Unsaturated Fat: 4g
- Trans Fat: 0g
- Carbohydrates: 42g
- Fiber: 1g
- Protein: 3g
- Cholesterol: 42mg
Keywords: easy glazed stuffed cherry pie cookies, cherry pie cookies, stuffed cookies, easy dessert recipe, holiday cookies, glazed cookies, cherry dessert, bakery style cookies, Valentine cookies, easy baking recipe