
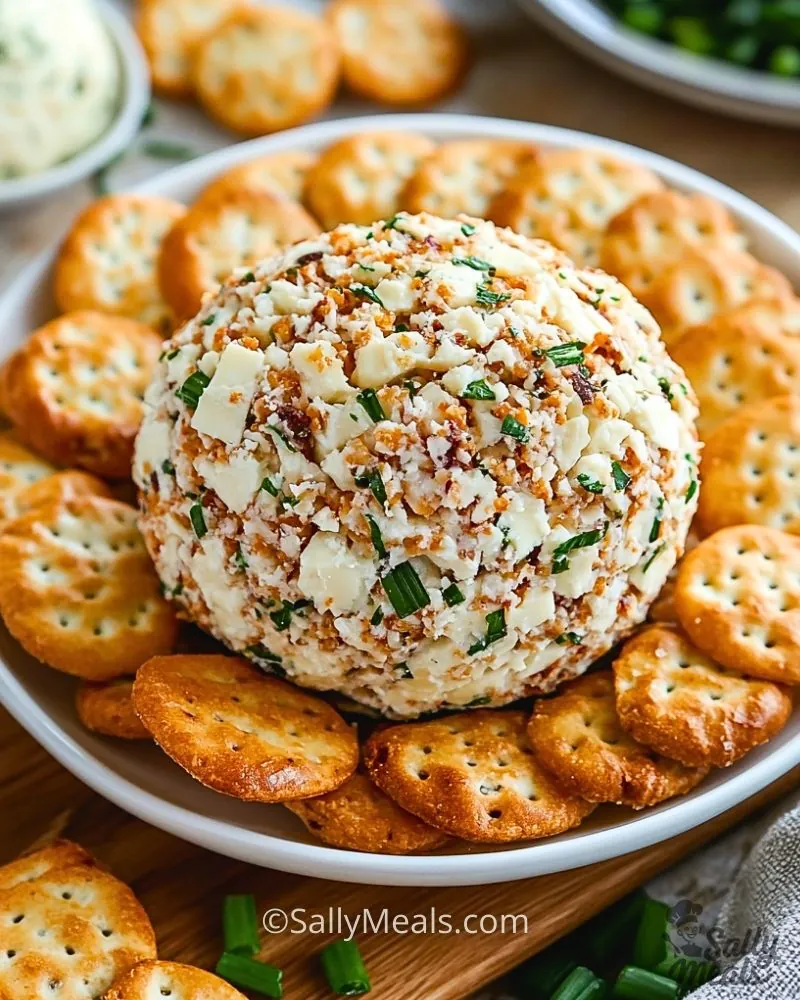
A cheese ball is one of those timeless appetizers that never goes out of style. It’s creamy, savory, and packed with flavor, making it the perfect centerpiece for any gathering. I love how easy it is to prepare ahead of time, and when served with crispy crackers or fresh veggies, it’s always a crowd-pleaser. Whether it’s for a holiday party, game night, or a casual get-together, this classic cheese ball is sure to impress.

What makes this cheese ball so irresistible is the combination of smooth, tangy cheese, crunchy nuts, and flavorful mix-ins like bacon and fresh herbs. It’s a simple recipe, but one that delivers big on taste. Plus, it’s completely customizable—you can swap out ingredients to suit your preferences or dietary needs. Once you try this homemade version, you’ll never go back to store-bought!
Why You’ll Love This Classic Cheese Ball
- Easy to Make – No complicated steps, just mix, roll, and chill!
- Make-Ahead Friendly – Perfect for prepping the day before your event.
- Customizable – Add your favorite flavors, from spicy jalapeños to sweet dried fruits.
- Crowd-Pleaser – Everyone loves a creamy, cheesy appetizer with crispy crackers!
- Perfect for Any Occasion – Serve it at holiday parties, game nights, or even as a snack.
What Kind of Cheese Should I Use for This Cheese Ball?
For the best flavor and texture, I recommend using a combination of cream cheese and sharp cheddar. The cream cheese provides a smooth and creamy base, while the sharp cheddar adds a bold and tangy flavor. You can also experiment with other cheeses like Parmesan or gouda for a unique twist. Just make sure to use cheeses that are easy to spread and complement each other well.
Options for Substitutions
While this recipe uses classic ingredients, you can easily swap them out to suit your taste or dietary needs. Here are some substitution ideas:
- Cheese: If you’re looking for a lighter option, you can use reduced-fat cream cheese or even Greek yogurt to replace part of the cream cheese.
- Nuts: For the coating, pecans or walnuts work great if you don’t have almonds. You can even go nut-free by using a crushed cracker topping.
- Bacon: If you’re vegetarian or simply don’t eat bacon, you can swap it out with crispy fried onions or a sprinkle of smoked paprika for a similar savory flavor.
- Herbs: Fresh herbs like dill, rosemary, or chives can be used in place of parsley to give the cheese ball a different flavor profile.
Feel free to get creative and make it your own!
Ingredients for this Classic Cheese Ball Recipe
Here’s a quick overview of the key ingredients and their roles in making this cheese ball so delicious:
- Cream Cheese: The base of the cheese ball, giving it a rich and creamy texture.
- Sharp Cheddar Cheese: Adds tang and a robust flavor that perfectly balances the creaminess of the cream cheese.
- Bacon: For a savory, crispy element that gives the cheese ball a smoky depth.
- Chopped Parsley: Fresh herbs like parsley bring color and a hint of freshness to contrast the richness.
- Almonds (or other nuts): These add a satisfying crunch to the outer coating and a slightly sweet flavor.
- Garlic Powder & Onion Powder: These seasonings boost the flavor, making the cheese ball extra savory.
- Worcestershire Sauce: Adds a touch of umami to enhance the overall taste.
Each ingredient brings something unique to the table, making this cheese ball a perfect blend of flavors and textures.
Step-by-Step Instructions for Making a Classic Cheese Ball
Step 1: Prepare the Cream Cheese Mixture
In a large bowl, use a hand mixer or a stand mixer to beat the softened cream cheese until smooth and creamy. This will be the base of your cheese ball.
Step 2: Add the Cheddar Cheese
Once the cream cheese is smooth, mix in the sharp cheddar cheese. Continue mixing until fully combined, ensuring the cheddar is well distributed throughout the cream cheese.
Step 3: Mix in the Seasonings and Bacon
Add garlic powder, onion powder, Worcestershire sauce, and chopped bacon. Stir until everything is evenly combined, and the flavors are well integrated.
Step 4: Form the Cheese Ball
Transfer the cheese mixture onto a large piece of plastic wrap. Gently shape it into a ball by rolling the plastic wrap around it, ensuring the cheese ball is smooth and firm.
Step 5: Coat the Cheese Ball
In a shallow dish, spread the chopped almonds and parsley. Roll the cheese ball in the almond and parsley mixture until it’s fully coated. Press gently to ensure the coating sticks.
Step 6: Chill and Serve
Wrap the cheese ball tightly in the plastic wrap and refrigerate for at least 2 hours (or overnight) to let the flavors meld and the cheese ball firm up. When ready to serve, place the cheese ball on a platter and surround it with crackers or fresh vegetables for dipping.
How Long to Cook the Classic Cheese Ball
The beauty of this cheese ball recipe is that there’s no cooking involved! The only time required is chilling the cheese ball to help it firm up and allow the flavors to develop. For best results, refrigerate the cheese ball for at least 2 hours, but overnight is even better. This will give it a nice, solid texture and make it easier to serve.
Tips for Perfect Classic Cheese Ball
- Soften the Cream Cheese: Make sure your cream cheese is at room temperature before mixing. This will help achieve a smooth and creamy texture.
- Customize the Coating: You can switch up the coating depending on your preferences—consider using crushed crackers, bacon bits, or even chopped green onions.
- Chill Properly: Be patient and allow enough time for the cheese ball to chill in the fridge. This step is key to making sure the cheese ball holds its shape and the flavors develop.
- Serve with Variety: Pair with an assortment of crackers, fresh veggies like carrots, cucumber slices, or even sliced baguette for a more elegant touch.
Watch Out for These Mistakes While Making a Cheese Ball
- Using Cold Cream Cheese: Starting with cold cream cheese can make it difficult to get a smooth texture. Always soften it to room temperature for easy mixing.
- Not Chilling Long Enough: If you don’t chill the cheese ball long enough, it may fall apart when serving. Be sure to give it at least 2 hours in the fridge, or even overnight.
- Overmixing the Ingredients: Mixing too much can cause the cream cheese to become too soft or greasy. Mix just enough to combine everything evenly without overdoing it.
- Not Tasting Before Coating: Always taste the cheese mixture before you roll it into a ball. If it needs more seasoning, now’s the time to adjust!
What to Serve with This Classic Cheese Ball?
The great thing about this cheese ball is that it pairs wonderfully with so many things. Here are some ideas for what to serve alongside it:
1. Assorted Crackers
A variety of crackers, from buttery to whole grain, provide the perfect base for spreading the cheese ball.
2. Fresh Veggies
Serve with crisp carrot sticks, celery, cucumber slices, and bell pepper strips for a healthier option.
3. Sliced Baguette
For a more elegant touch, offer slices of fresh baguette. Its crispy texture complements the creamy cheese ball beautifully.
4. Apple Slices
The sweet and tart flavor of fresh apple slices balances out the richness of the cheese.
5. Pretzels
Pretzels, whether soft or crunchy, add a fun and salty twist to the classic pairing.
6. Grapes
Fresh grapes, especially red or green ones, bring a natural sweetness that pairs well with the savory cheese.
7. Pickles
A tangy pickle or two will provide a crunchy and briny contrast to the creamy cheese ball.
8. Prosciutto
Thin slices of prosciutto add a delicate, salty touch that enhances the cheese ball’s flavor and makes the dish feel more luxurious.
Storage Instructions
This classic cheese ball stores very well and can be kept in the fridge for up to 5 days. After preparing and chilling it, wrap it tightly in plastic wrap or place it in an airtight container to prevent it from drying out or absorbing other odors in the fridge. If you’re making it ahead of time, it can even be stored for up to a week before serving, just be sure to give it enough time to firm up in the fridge.
If you want to make the cheese ball in advance, you can also freeze it! Wrap it tightly in plastic wrap and foil, then store it in a freezer-safe container for up to 3 months. To serve, simply thaw it in the refrigerator overnight and coat it with the herbs and nuts before serving.
Estimated Nutrition
Here’s an estimate of the nutritional breakdown for one serving (about 1/8th of the cheese ball), depending on your specific ingredients:
- Calories: 250-300 kcal
- Protein: 8-10 grams
- Fat: 22-25 grams
- Carbohydrates: 3-5 grams
- Fiber: 1-2 grams
- Sodium: 400-500 mg
Keep in mind that the nutritional values can vary depending on substitutions (like reduced-fat cheese or different types of nuts) and portion sizes.
Frequently Asked Questions
1. Can I make this cheese ball ahead of time?
Yes, this cheese ball can be made up to a week in advance. Just make sure to store it in an airtight container or tightly wrapped in plastic wrap in the fridge.
2. Can I freeze a cheese ball?
Absolutely! Wrap the cheese ball tightly in plastic wrap and foil, and store it in a freezer-safe container for up to 3 months. To serve, thaw it in the fridge overnight before coating with nuts and herbs.
3. What can I use if I don’t have bacon?
If you prefer to skip the bacon, try using crispy fried onions, smoked paprika, or even chopped olives for a similar savory flavor.
4. Can I use different nuts for the coating?
Yes! Pecans, walnuts, or cashews are great alternatives to almonds. Just be sure to chop them finely so they coat the cheese ball evenly.
5. Can I add spice to this cheese ball?
If you love a little heat, feel free to add chopped jalapeños or red pepper flakes to the mixture for an extra kick.
6. How do I keep the cheese ball from getting too soft?
Be sure to chill the cheese ball for the recommended time. If it’s too warm before serving, it may get too soft and difficult to handle.
7. Can I use low-fat cream cheese for this recipe?
Yes, you can substitute low-fat cream cheese for a lighter option. Just keep in mind that it might change the texture slightly, but it will still taste delicious!
8. How can I make this cheese ball vegetarian?
Simply omit the bacon and choose a plant-based coating such as chopped nuts or roasted seeds. You can also add some finely chopped veggies like bell peppers for a bit of crunch.
Conclusion
This classic cheese ball is the perfect appetizer for any occasion. It’s creamy, flavorful, and easy to prepare, making it a must-have for your next gathering. Don’t forget to save this recipe on Pinterest and share it with your family and friends. They’ll be thanking you for this delicious treat!

The Best Classic Cheese Ball Recipe
- Prep Time: 15 minutes
- Chill Time: 2 hours
- Total Time: 2 hours 15 minutes
- Yield: 8 servings 1x
Description
This Classic Cheese Ball Recipe is a crowd-pleasing appetizer that’s rich, creamy, and full of flavor. The combination of cream cheese, sharp cheddar, bacon, and fresh herbs creates a savory, tangy, and irresistible dish perfect for parties and gatherings. It’s easy to make and can be prepared ahead of time, making it an ideal choice for busy hosts.
Ingredients
- 8 oz cream cheese, softened
- 2 cups sharp cheddar cheese, shredded
- 1/2 cup cooked bacon, crumbled
- 2 tbsp fresh parsley, chopped
- 1/4 cup chopped almonds (or preferred nuts)
- 1 tsp garlic powder
- 1 tsp onion powder
- 1 tsp Worcestershire sauce
Instructions
- Beat softened cream cheese until smooth.
- Add shredded sharp cheddar cheese and mix until combined.
- Stir in garlic powder, onion powder, Worcestershire sauce, and crumbled bacon.
- Shape the cheese mixture into a ball using plastic wrap.
- Roll the cheese ball in chopped parsley and almonds until coated.
- Refrigerate for at least 2 hours or overnight to firm up.
- Serve with crackers, veggies, or bread.