When dessert dreams turn into reality, they often look like a Strawberry Earthquake Cake. This show-stopping treat features layers of tender, buttery cake, creamy whipped topping, and juicy strawberries bursting through in sweet, chaotic glory. Its name pays tribute to the beautiful mess it creates—a deliberate and irresistible explosion of textures and flavors.
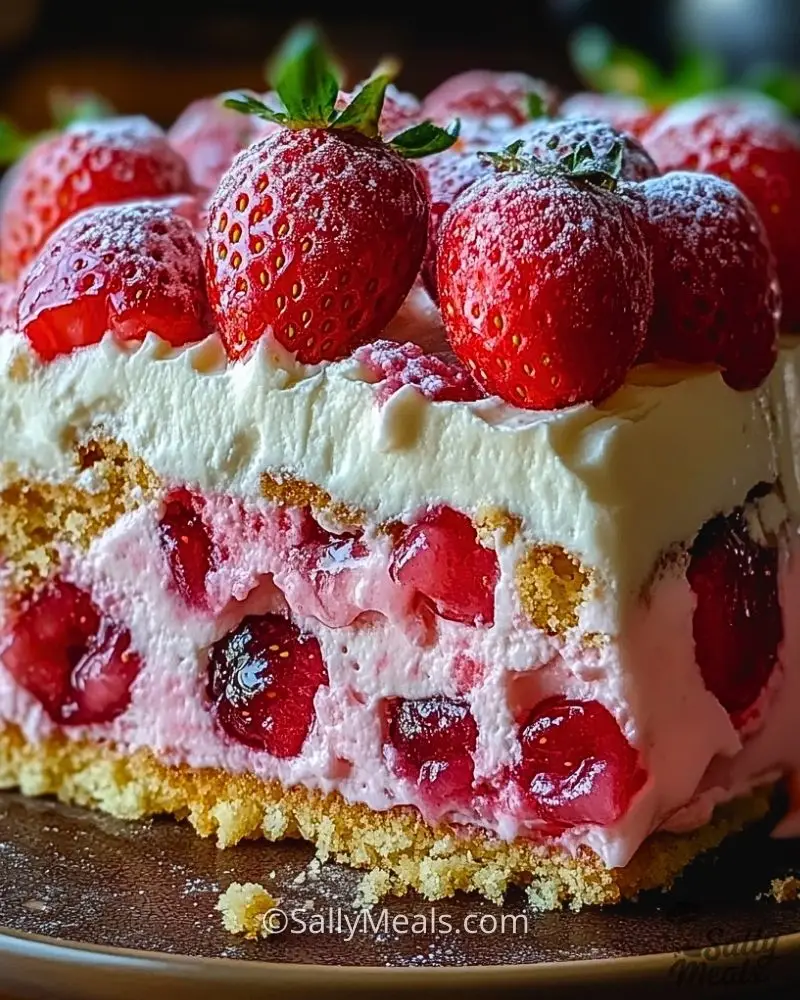
Every bite delivers a contrast of fluffy, creamy, and slightly crumbly layers, with strawberries stealing the spotlight in the most delightful way. Whether it’s for a spring gathering, a summer potluck, or a cozy weekend indulgence, this cake brings joy in every forkful. And the best part? You don’t need to be a pastry chef to make it look and taste like a masterpiece.
Why You’ll Love This Strawberry Earthquake Cake
- Unique texture: From soft cake base to fluffy cream and whole strawberries, it’s a satisfying blend.
- Visually stunning: The bright strawberries against the creamy white topping make this cake instantly eye-catching.
- Simple to make: No advanced techniques needed—just layering, mixing, and chilling.
- Perfect for gatherings: It’s a crowd-pleaser that slices beautifully and delivers on both looks and flavor.
- No baking stress: This recipe is designed to be foolproof, even with its “earthquake” effect—it’s meant to look a little wild!
Preparation Phase & Tools to Use (Essential Tools and Their Importance)
Before diving into making your Strawberry Earthquake Cake, set yourself up for success with a clean, prepped kitchen and the right tools on hand. This not only speeds up the process but ensures your final result turns out picture-perfect and delicious.
- 9×13-inch Baking Dish: This is the ideal size for creating those deep, layered effects and supports the structure of the cake. A glass or ceramic dish works best to evenly distribute heat.
- Mixing Bowls (Large & Medium): You’ll need separate bowls to mix your cake batter, whipped layers, and strawberry filling. Stainless steel or glass bowls are ideal for stability.
- Electric Hand Mixer or Stand Mixer: This tool is key for whipping the cream layer to the perfect soft peaks, ensuring a smooth, fluffy texture.
- Rubber Spatula: Ideal for gently folding ingredients and scraping down sides of the bowl so nothing goes to waste.
- Offset Spatula or Butter Knife: Helps you evenly spread the whipped topping over the cake without pulling up the layers.
- Cooling Rack: If you bake the cake base, placing the dish on a cooling rack avoids overcooking from residual heat.
- Refrigerator Space: Not exactly a tool, but you’ll need a flat, level space in your fridge for proper chilling and setting of the cake.
Preparation Tips
- Chill the Bowl and Beaters: For a fluffier whipped cream topping, chill your mixing bowl and beaters for 15 minutes before whipping.
- Use Fresh Strawberries: Ripe, sweet strawberries give the cake its standout flavor. If they’re out of season, frozen ones can work—but make sure they’re fully thawed and drained.
- Let the Cake Cool Fully: If you bake the bottom layer, don’t rush to add toppings. A warm base will melt your whipped cream and ruin the texture.
- Cut Strawberries Uniformly: Keep the size of your berry chunks consistent to ensure an even texture and distribution throughout.
- Layer Gently: Don’t press down between layers; let the cream and fruit settle naturally to preserve that “earthquake” effect.
Ingredients for This Strawberry Earthquake Cake
Here’s everything you’ll need to bring this fruity, creamy, delightfully messy cake to life:
For the Cake Base:
- 1 box vanilla or white cake mix (plus ingredients listed on the box: usually eggs, oil, and water)
- 1 teaspoon vanilla extract (optional, for extra flavor)
For the Creamy Filling:
- 8 oz cream cheese, softened
- 1/2 cup powdered sugar
- 1/2 teaspoon vanilla extract
- 1 cup heavy whipping cream (chilled)
For the Strawberry Layer:
- 2 cups fresh strawberries, hulled and chopped
- 2 tablespoons granulated sugar (optional, depending on the sweetness of your berries)
- 1 tablespoon lemon juice
- 1/2 cup strawberry jam (optional, for added richness)
For the Topping:
- 1 1/2 cups whipped topping (or homemade whipped cream)
- Whole strawberries for garnish (about 10–12, with stems on)
- Powdered sugar for dusting (optional, for a finishing touch)
This combination of ingredients results in a perfectly sweet, rich, and fruity dessert that’s just the right amount of decadent.
Step 1: Prepare the Cake Base
Preheat your oven according to the directions on the cake mix box (usually 350°F / 175°C). Grease a 9×13-inch baking dish. In a large bowl, prepare the cake mix as instructed, adding vanilla extract if using. Pour the batter into the dish and bake for about 22–25 minutes or until the center is set but still soft (it will cook slightly more later). Let it cool completely.
Step 2: Prepare the Strawberry Layer
While the cake base cools, combine the chopped strawberries, sugar, and lemon juice in a bowl. Let them sit for 15 minutes to macerate and release their juices. If using strawberry jam, fold it in afterward for a more intense strawberry burst.
Step 3: Make the Creamy Filling
In another mixing bowl, beat the softened cream cheese until smooth. Add powdered sugar and vanilla extract, and mix until well combined. In a chilled bowl, whip the heavy cream until soft peaks form. Gently fold the whipped cream into the cream cheese mixture until smooth and airy.
Step 4: Layer the Goodness
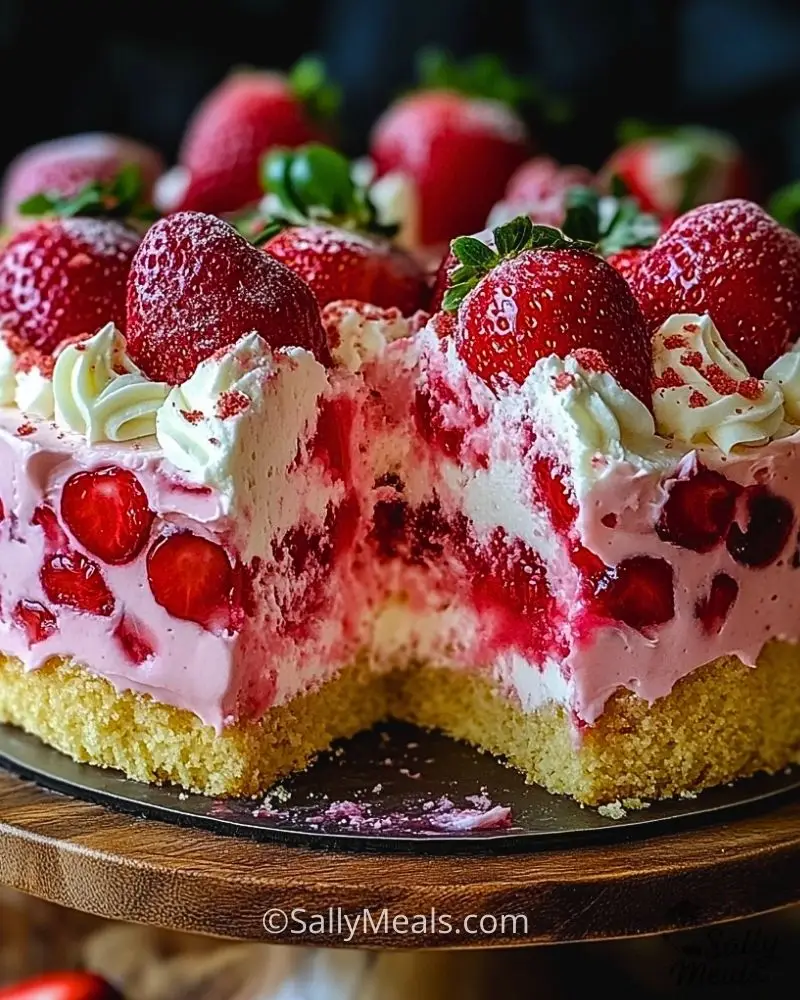
Once the cake is fully cooled, spoon the creamy filling over the surface and spread gently with an offset spatula. Dollop the strawberry mixture evenly across the top, allowing some to sink into the cream. You can swirl lightly for a marbled effect or leave it chunky for that classic “earthquake” look.
Step 5: Add the Final Topping
Spread the whipped topping (or remaining whipped cream) over the strawberries. Smooth it out, then top with whole strawberries for garnish. Dust lightly with powdered sugar if desired for a snow-kissed finish.
Step 6: Chill Before Serving
Place the finished cake in the refrigerator for at least 2–3 hours, or overnight if you can wait. This helps everything set and makes slicing easier while deepening the flavor.
Notes
- Make It Ahead: This dessert is perfect for prepping a day in advance. The flavors meld beautifully overnight, and it cuts cleaner after chilling.
- Swap the Berries: If strawberries aren’t in season, feel free to use raspberries, cherries, or a mix of berries. Adjust sweetness depending on the fruit’s tartness.
- Gluten-Free Option: Substitute the cake mix with a gluten-free version and double-check all labels to ensure the rest of your ingredients are safe.
- Whipped Cream Alternative: You can use a store-bought whipped topping for convenience, but homemade whipped cream definitely gives a fresher, richer taste.
- Serve Cold: This cake is best enjoyed straight from the fridge. Its cool, creamy texture contrasts perfectly with the soft cake and juicy fruit.
Watch Out for These Mistakes While Cooking
- Skipping the Cooling Step: Spreading cream over a warm cake will cause it to melt into a puddle. Patience is key—let the base cool completely.
- Overbeating the Whipped Cream: Whip only until soft peaks form. Overmixing can lead to a grainy texture or butter-like separation.
- Using Watery Strawberries: If your strawberries are overly juicy, drain the excess liquid before layering to avoid soggy cake.
- Layering Too Aggressively: Pressing down on the cream or fruit can flatten the cake and muddy the layers. Keep it light-handed.
- Rushing the Chill Time: The cake needs time to set. Cutting too soon can cause it to fall apart and lose that beautiful layered structure.
- Using Warm Cream Cheese: It should be softened, not melted. Too warm and it won’t hold its shape, making the filling runny.
- Overloading with Jam: A little goes a long way—too much jam can overpower the fresh strawberry flavor and make things too sweet.
- Storing at Room Temperature: Always refrigerate this cake, especially due to the cream and fruit. Leaving it out can cause spoilage.
What to Serve With Strawberry Earthquake Cake?
This luscious, fruity dessert pairs beautifully with a variety of drinks and sides that complement its creamy texture and bright flavor. Whether you’re serving it after a big meal or at a summer party, here are some tasty pairings to elevate the experience.
8 Recommendations
1. Fresh Mint Iced Tea
The coolness of mint tea balances the cake’s sweetness and refreshes your palate between bites.
2. Sparkling Lemon Water
Light, bubbly, and citrusy—this is the perfect sip to keep things from feeling too rich.
3. Vanilla Bean Ice Cream
For true indulgence, a scoop of vanilla ice cream beside a slice of the cake creates the ultimate creamy, dreamy duo.
4. Espresso or Cold Brew Coffee
The bitterness of coffee provides a bold contrast to the sweetness, especially if you’re serving this cake as a brunch dessert.
5. Prosecco or Rosé Wine
Planning a celebration? These fruity, bubbly wines enhance the strawberry notes without overpowering the dessert.
6. Lemon Sorbet
The tart, icy texture of lemon sorbet cuts through the cake’s richness and adds a refreshing zing.
7. Cheese Platter with Brie or Mascarpone
For an elevated dessert table, serve small bites of soft cheese to balance the cake’s fruity sweetness.
8. Berry Medley Salad
A simple bowl of mixed berries (blueberries, raspberries, and blackberries) with a touch of mint and honey pairs wonderfully as a fresh side.
Storage Instructions
To keep your Strawberry Earthquake Cake tasting fresh and delicious, follow these easy storage tips:
- Refrigerate: Always store the cake in the fridge, covered tightly with plastic wrap or in an airtight container. It will stay fresh for up to 4 days.
- Do Not Freeze Fully Assembled: Freezing this cake is not recommended once it’s assembled, especially with whipped cream and fresh strawberries—they can become watery and mushy once thawed.
- Prep Components Separately: If you want to prep ahead and freeze, you can bake and freeze the cake base separately for up to a month. Let it thaw completely before adding the creamy and fruit layers fresh.
Estimated Nutrition
(Based on 1 slice out of 12 servings; using standard cake mix and whipped cream)
- Calories: 320
- Total Fat: 17g
- Saturated Fat: 10g
- Cholesterol: 55mg
- Sodium: 270mg
- Carbohydrates: 38g
- Sugars: 26g
- Protein: 3g
- Fiber: 1g
Note: Nutrition may vary based on brand of ingredients used and portion size.
Frequently Asked Questions
1. Can I use frozen strawberries instead of fresh ones?
Yes, you can! Just make sure they’re completely thawed and drained before using, to prevent excess moisture from making the cake soggy.
2. Is it possible to make this cake dairy-free?
Absolutely. Use a dairy-free cake mix, plant-based cream cheese, and coconut whipped cream for an entirely dairy-free version.
3. Do I have to use a cake mix, or can I make the base from scratch?
You can definitely make the base from scratch if you prefer. A simple vanilla or butter cake recipe works great—just be sure it’s soft and moist.
4. Can I make this into cupcakes or mini cakes?
Yes! You can pour the cake batter into lined muffin tins and assemble mini versions. They’re adorable and perfect for parties or individual servings.
5. How long does the cake need to chill before serving?
At least 2–3 hours is ideal, but overnight chilling gives the best flavor and texture, allowing the layers to set nicely.
6. Can I add other fruits to the recipe?
Definitely! Raspberries, blueberries, or cherries mix well with strawberries. Just keep the ratios balanced so the cake doesn’t become too juicy.
7. How do I keep the whipped cream from deflating?
Use cold utensils and bowl, whip the cream just to soft peaks, and gently fold it into the filling. You can also stabilize it with a tablespoon of powdered sugar or cornstarch.
8. Why is it called an “Earthquake” Cake?
The name comes from its rustic, uneven layers and the way fruit and cream seem to erupt or “break through” the cake—creating that messy, delicious look!
Conclusion
Strawberry Earthquake Cake is the perfect harmony of indulgence and ease. It’s rich, fruity, creamy, and beautifully chaotic—all the things that make a dessert unforgettable. Whether you’re looking to impress guests or treat yourself, this no-fuss cake is a guaranteed hit. With simple ingredients and a few pro tips, you can whip up a bakery-worthy masterpiece without breaking a sweat. Make it once, and you’ll find yourself craving it again and again.

Strawberry Earthquake Cake
- Prep Time: 30 minutes
- Cook Time: 2 hours
- Total Time: 2 hours 30 minutes
- Yield: 12 servings 1x
Description
A delightfully messy, rich dessert bursting with layers of sweet strawberries, creamy whipped filling, and tender vanilla cake. Its signature “earthquake” look comes from the way the strawberries and cream settle unpredictably into the cake, creating a delicious chaos in every bite.
Ingredients
Cake Base:
- 1 box vanilla or white cake mix (plus ingredients listed on the box)
- 1 tsp vanilla extract (optional)
Creamy Filling:
- 8 oz cream cheese, softened
- 1/2 cup powdered sugar
- 1/2 tsp vanilla extract
- 1 cup heavy whipping cream, chilled
Strawberry Layer:
- 2 cups fresh strawberries, hulled and chopped
- 2 tbsp granulated sugar (optional)
- 1 tbsp lemon juice
- 1/2 cup strawberry jam (optional)
Topping:
- 1 1/2 cups whipped topping or homemade whipped cream
- Whole strawberries for garnish (10–12)
- Powdered sugar for dusting (optional)
Instructions
- Preheat oven to 350°F (175°C). Grease a 9×13-inch baking dish.
- Prepare cake mix according to package instructions, adding vanilla extract if using. Pour into baking dish and bake for 22–25 minutes. Let cool completely.
- In a bowl, combine chopped strawberries, sugar, and lemon juice. Let sit 15 minutes. Fold in jam if using.
- Beat softened cream cheese until smooth. Add powdered sugar and vanilla extract. Mix well.
- In a separate chilled bowl, whip heavy cream to soft peaks. Gently fold into the cream cheese mixture.
- Spread creamy filling over cooled cake. Spoon strawberry mixture over top.
- Spread whipped topping over strawberries. Garnish with whole strawberries and dust with powdered sugar.
- Chill for at least 2–3 hours before serving.

