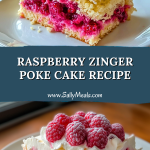
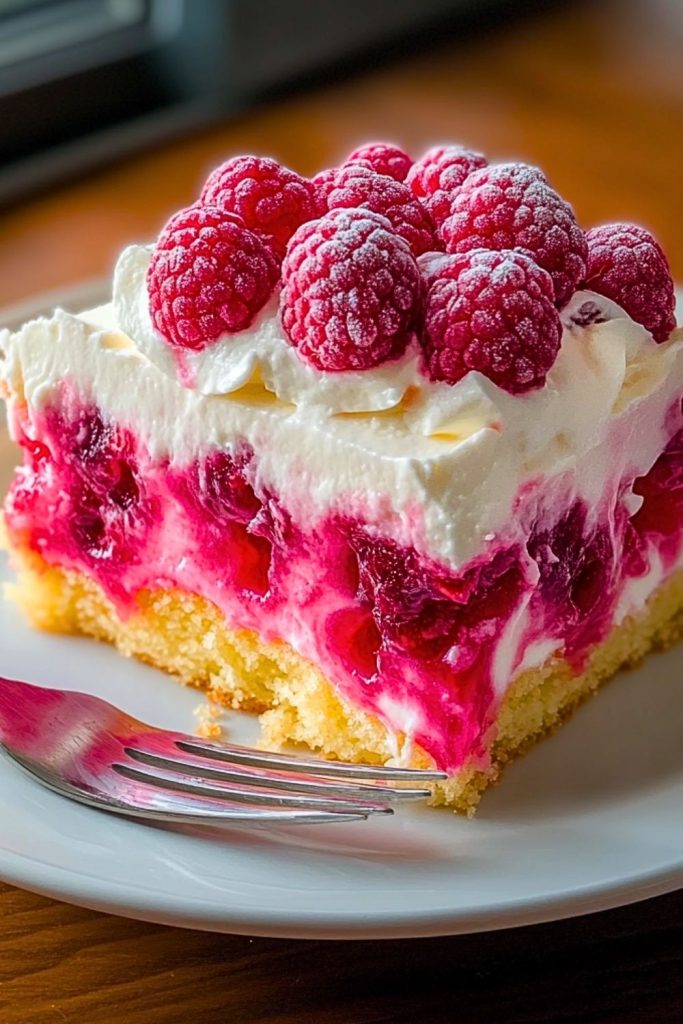
Few desserts capture the essence of summer quite like the Raspberry Zinger Poke Cake. With its vibrant layers of fluffy vanilla cake, tart raspberry gelatin, creamy whipped topping, and a sprinkling of sweet coconut, this treat is a playful homage to the classic snack cake—only better. Each forkful delivers a delightful contrast of textures: soft cake soaked with raspberry flavor, juicy berries, and a creamy finish that melts in your mouth.

What makes this cake irresistible isn’t just its looks or nostalgic charm—it’s the harmony between tangy fruit and sugary creaminess, grounded by a moist, tender base. Whether you’re serving it at a potluck, barbecue, or birthday celebration, it’s guaranteed to turn heads and leave plates clean.
Why You’ll Love This Raspberry Zinger Poke Cake
- Vibrant Flavor Combo: Sweet whipped topping, tart raspberry, and soft vanilla cake create the perfect balance.
- Easy to Prepare: No complicated steps or fancy techniques required.
- Make-Ahead Friendly: Even better the next day as flavors meld.
- Crowd-Pleaser: Bright, beautiful, and downright delicious—perfect for any gathering.
- Customizable: Easily swap raspberries with strawberries or blackberries.
Preparation Phase & Tools to Use (Essential Tools and Their Importance)
Before diving into the layers of flavor in this Raspberry Zinger Poke Cake, it’s essential to organize your workspace and gather the right tools. Here’s what you’ll need and why each item matters:
- 9×13-inch Baking Dish: This is the heart of the recipe. It shapes the cake perfectly and allows enough depth for the poke method and toppings.
- Hand Mixer or Stand Mixer: For creating a fluffy, smooth cake batter and later whipping up a creamy topping.
- Mixing Bowls: At least two—one for the cake batter and one for preparing the gelatin.
- Wooden Spoon or End of a Spatula: Perfect for poking evenly spaced holes in the cake to absorb the raspberry gelatin.
- Measuring Cups and Spoons: Accurate measurements are key to a perfect bake and balanced flavor.
- Whisk: Helps evenly dissolve the gelatin in boiling water.
- Rubber Spatula: For spreading the whipped topping and raspberry layer smoothly.
- Cooling Rack: Allows your cake to cool uniformly, preventing sogginess.
Using the right tools ensures not just ease but consistency in every batch, so each bite hits the mark.
Preparation Tips
- Cool Completely Before Poking: Allow the cake to cool before adding gelatin so the holes don’t close up or become gummy.
- Use Boiling Water for Gelatin: It must be hot enough to completely dissolve the gelatin powder for a smooth texture.
- Don’t Overpoke: Space your holes about 1 inch apart. Too many and the cake could become overly saturated and soggy.
- Chill Generously: Let the cake set in the fridge for at least 4 hours—overnight is even better.
- Toast the Coconut (Optional): For added depth and texture, lightly toast the shredded coconut before sprinkling it on top.
- Fresh Berries are Best: Garnish with firm, ripe raspberries for the best flavor and visual appeal.
- Whipped Topping vs Whipped Cream: Whipped topping (like Cool Whip) holds its shape longer, but you can use stabilized homemade whipped cream for a fresher touch.
Ingredients for This Raspberry Zinger Poke Cake
To recreate this nostalgic, berry-kissed delight, you’ll need a mix of pantry staples and a few special additions. Here’s the full list broken down by layer:
For the Cake Base:
- 1 box white or yellow cake mix (plus ingredients called for on the box: usually eggs, oil, and water)
For the Raspberry Gelatin Layer:
- 1 package (3 oz) raspberry-flavored gelatin
- 1 cup boiling water
- 1/2 cup cold water
For the Creamy Layer:
- 1 tub (8 oz) whipped topping (like Cool Whip), thawed
- 1/2 package (4 oz) cream cheese, softened (optional, for a richer cream topping)
For the Raspberry Topping:
- 1 to 1½ cups fresh raspberries (plus more for garnish)
For the Final Touch:
- 1 cup sweetened shredded coconut (optional, for topping)
- Pink food coloring (optional, to tint coconut for a signature “Zinger” look)
Optional Notes:
If you want to intensify the raspberry layer, you can add a few spoonfuls of raspberry preserves or jam on top of the gelatin once it sets slightly.
Step 1: Bake the Cake
Preheat your oven according to the directions on the cake mix box, typically to 350°F (175°C). Prepare the cake mix as instructed, using the listed amounts of eggs, water, and oil. Pour the batter into a greased 9×13-inch baking dish and bake until a toothpick inserted into the center comes out clean, usually 25–30 minutes.
Let the cake cool completely in the pan—this is crucial for the poke step.
Step 2: Prepare the Raspberry Gelatin
While the cake is cooling, pour the raspberry gelatin powder into a mixing bowl. Add 1 cup of boiling water and whisk until the gelatin is fully dissolved—about 2 minutes. Stir in 1/2 cup cold water to cool it slightly. Set aside but don’t let it set.
Step 3: Poke the Cake
Once the cake is completely cool, use the handle of a wooden spoon (or similar utensil) to poke holes evenly across the entire surface of the cake. Space them about 1 inch apart. Be sure to poke deep enough to reach most of the way through the cake but not all the way to the bottom.
Step 4: Pour the Gelatin
Slowly and evenly pour the prepared raspberry gelatin mixture over the poked cake, making sure to cover the entire surface so the liquid seeps into the holes. The goal is a juicy, vibrant raspberry stripe in each bite. Chill the cake in the refrigerator for at least 1 hour to allow the gelatin to set.
Step 5: Add the Raspberry Layer
After chilling, scatter a generous layer of fresh raspberries across the surface. If desired, lightly mash a few berries and spread them for more raspberry coverage and juiciness.
Step 6: Spread the Creamy Topping
In a clean bowl, fold together the whipped topping and softened cream cheese (if using) until smooth. Spread the mixture evenly over the raspberry layer. Use a spatula to make it smooth and fluffy.
Step 7: Finish with Coconut and Garnish
If using, tint the shredded coconut with a few drops of pink food coloring in a zip-top bag, then sprinkle it evenly over the whipped topping. Top with additional fresh raspberries for a show-stopping finish.
Chill the finished cake for another hour before serving—or overnight for best flavor and texture.
Notes
- Box Cake Shortcuts Work Beautifully: Don’t feel pressured to bake a cake from scratch—boxed cake mixes yield consistent, tender results.
- Customize with Other Berries: While raspberries are classic, feel free to swap or mix in strawberries, blackberries, or even cherries.
- Coconut Optional but Magical: The shredded coconut adds that signature “Zinger” vibe. You can toast it lightly or tint it for flair—or skip it if preferred.
- Cream Cheese Elevates the Whip: Blending cream cheese with whipped topping adds richness and helps the topping hold its structure longer.
- Let It Sit Overnight: This cake is even better the next day as the layers meld and the flavors deepen.
Watch Out for These Mistakes While Cooking
- Pouring Gelatin Too Early: If the cake is still warm, the gelatin can pool on top instead of soaking in. Wait until the cake is fully cool.
- Skipping the Chill Time: If you don’t let the gelatin set in the fridge, you risk a soggy cake and runny layers.
- Overpoking: Too many holes can lead to a mushy texture and uneven soaking. Keep them evenly spaced.
- Not Dissolving Gelatin Fully: Tiny undissolved granules can create unpleasant lumps. Whisk thoroughly in boiling water.
- Using Frozen Berries Directly: Frozen berries can become too watery and dull in flavor. If using, thaw and drain them first.
- Heavy Hand with Food Coloring: A little pink goes a long way—add food coloring to coconut gradually to avoid a neon surprise.
- Spreading Topping on Warm Cake: Wait until the cake is cold or the topping will melt and slide off.
- Skipping Garnish: Garnishes like fresh raspberries and colored coconut elevate both look and taste—don’t underestimate presentation!
What to Serve With Raspberry Zinger Poke Cake?
This vibrant dessert pairs wonderfully with a range of beverages and side treats that enhance its fruity, creamy charm. Whether you’re planning a full menu or just want to elevate your dessert spread, here are some great ideas:
8 Recommendations
- Iced Raspberry Lemonade
A tart and refreshing drink that echoes the berry notes of the cake while adding a citrusy contrast. - Vanilla Bean Ice Cream
The ultimate creamy companion—its simple flavor beautifully complements the fruity punch of the cake. - Sparkling Rosé or Moscato
Bubbly, fruity wines like rosé or moscato pair well with the raspberry elements and make the dessert feel extra celebratory. - Mint-Infused Water
A cooling, palate-cleansing drink that refreshes in between sweet bites without overpowering the dessert. - White Chocolate Drizzled Pretzels
Sweet, salty, and crunchy—these treats contrast the softness of the cake for an ideal texture balance. - Lemon Bars
Add a tart citrus option to your dessert table. The brightness of lemon balances out the sweetness of the poke cake. - Fresh Berry Salad
Toss strawberries, blueberries, and raspberries with a splash of lime for a healthy, colorful side dish. - Mini Cheesecake Bites
Creamy and compact, these can serve as a richer counterpoint to the lighter whipped topping of the poke cake.
Storage Instructions
Raspberry Zinger Poke Cake stores exceptionally well, making it a great choice for preparing ahead of time or enjoying leftovers.
- Refrigeration: Store the cake in the refrigerator, covered with plastic wrap or in an airtight container. It stays fresh for up to 4–5 days. The whipped topping and gelatin layers actually improve as they set, deepening the flavor.
- Freezing: You can freeze the cake without the whipped topping layer. After the gelatin layer sets, wrap the cake tightly in plastic wrap and foil, then freeze for up to 2 months. Thaw in the refrigerator overnight and add the whipped topping and garnishes just before serving.
- Portioning: For easy access, slice the cake into squares before storing. This makes it quick to grab a serving without disturbing the rest of the cake.
Tip: Avoid leaving the cake out at room temperature for more than 2 hours, especially if using real cream cheese or whipped cream.
Estimated Nutrition
Keep in mind that these values are approximate and may vary based on specific brands or substitutions used:
| Nutrient | Per Serving (1 slice of 12) |
|---|---|
| Calories | 280–320 |
| Total Fat | 12–15g |
| Saturated Fat | 6g |
| Cholesterol | 30–40mg |
| Sodium | 250–350mg |
| Total Carbohydrates | 40–45g |
| Sugars | 28–32g |
| Protein | 2–4g |
| Fiber | 1g (more if using fresh fruit) |
Note: Using light whipped topping or low-fat cream cheese can reduce calories and fat content.
Frequently Asked Questions
1. Can I make Raspberry Zinger Poke Cake ahead of time?
Absolutely! In fact, it’s better made a day ahead. Letting it chill overnight allows the raspberry gelatin to fully set and the flavors to blend beautifully.
2. Can I use a homemade cake instead of a boxed mix?
Yes. A homemade white or yellow cake works perfectly. Just be sure it’s light and fluffy to soak up the gelatin without becoming too dense.
3. Is it necessary to use whipped topping, or can I use whipped cream?
You can use homemade whipped cream, but stabilize it with gelatin or powdered sugar so it holds up in the fridge. Whipped topping is more stable for make-ahead desserts.
4. How do I tint the coconut pink?
Place shredded coconut in a zip-top bag with a few drops of pink food coloring. Seal and shake until evenly coated. Add more color as needed for your desired shade.
5. Can I make this cake without coconut?
Definitely. The coconut adds texture and nostalgic flair, but the cake is delicious even without it.
6. Can I use other flavors of gelatin?
Yes. Strawberry, cherry, or even mixed berry gelatin will all work well. You can get creative with seasonal berry options too.
7. What’s the best way to poke the cake?
Use the handle of a wooden spoon, spaced about 1 inch apart. You want holes large enough for the gelatin to seep in, but not so many that the cake collapses or becomes soggy.
8. Can I use frozen raspberries?
You can, but it’s best to thaw and drain them first. Otherwise, they’ll water down the topping and soften too much.
Conclusion
Raspberry Zinger Poke Cake is more than a dessert—it’s a celebration of color, nostalgia, and flavor layered into every bite. With its mix of tart raspberry, creamy topping, and sweet coconut, it’s as beautiful to serve as it is satisfying to eat. Perfect for summer picnics, family reunions, or just treating yourself midweek, this cake is as easy to make as it is impressive.
Whether you follow the recipe exactly or tweak it with your favorite berries and touches, the result is guaranteed to earn rave reviews. Make it once, and it’ll become a staple in your dessert lineup.

Raspberry Zinger Poke Cake
- Prep Time: 20 minutes
- Chill Time: 2 hours
- Cook Time: 25 minutes
- Total Time: 2 hours 45 minutes
- Yield: 12 servings 1x
Description
Raspberry Zinger Poke Cake is a vibrant, nostalgic dessert made with moist white or yellow cake soaked in raspberry gelatin, topped with a creamy whipped layer and garnished with sweet coconut and fresh raspberries. It’s easy to prepare, gorgeous to present, and loved by all ages. Whether you’re hosting a summer party or simply want a fruity twist on classic poke cake, this recipe is a guaranteed showstopper.
Ingredients
For the Cake:
- 1 box white or yellow cake mix (plus required eggs, oil, water)
For the Gelatin Layer:
- 1 package (3 oz) raspberry gelatin
- 1 cup boiling water
- 1/2 cup cold water
For the Creamy Topping:
- 1 tub (8 oz) whipped topping (Cool Whip), thawed
- 1/2 package (4 oz) cream cheese, softened (optional)
For the Raspberry & Garnish Layer
- 1–1½ cups fresh raspberries
- 1 cup sweetened shredded coconut (optional)
- Pink food coloring (optional)
Instructions
-
Bake the Cake
Prepare cake according to box instructions. Pour into a 9×13-inch pan and bake until a toothpick comes out clean. Let cool completely. -
Prepare the Gelatin
In a bowl, dissolve raspberry gelatin in 1 cup boiling water. Stir in 1/2 cup cold water. Set aside. -
Poke the Cake
Once cool, poke holes over the entire cake using the handle of a wooden spoon, about 1 inch apart. -
Add the Gelatin
Pour gelatin evenly over the cake, ensuring it fills the holes. Refrigerate for 1 hour. -
Top with Raspberries
Spread a layer of fresh raspberries over the chilled cake. -
Make the Creamy Topping
Mix whipped topping with softened cream cheese (if using). Spread evenly over the raspberry layer. -
Add Coconut
Optional: Tint coconut with pink food coloring and sprinkle over the whipped topping. -
Chill and Serve
Chill the finished cake for at least 1 more hour, preferably overnight. Garnish with additional raspberries before serving.