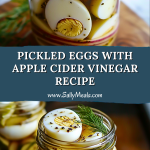
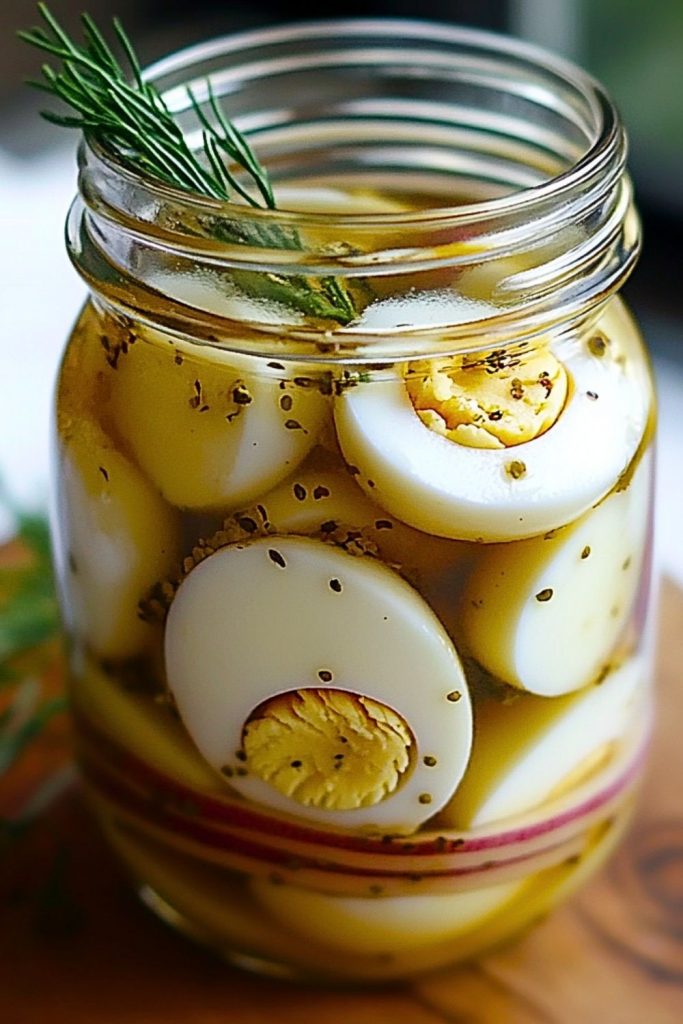
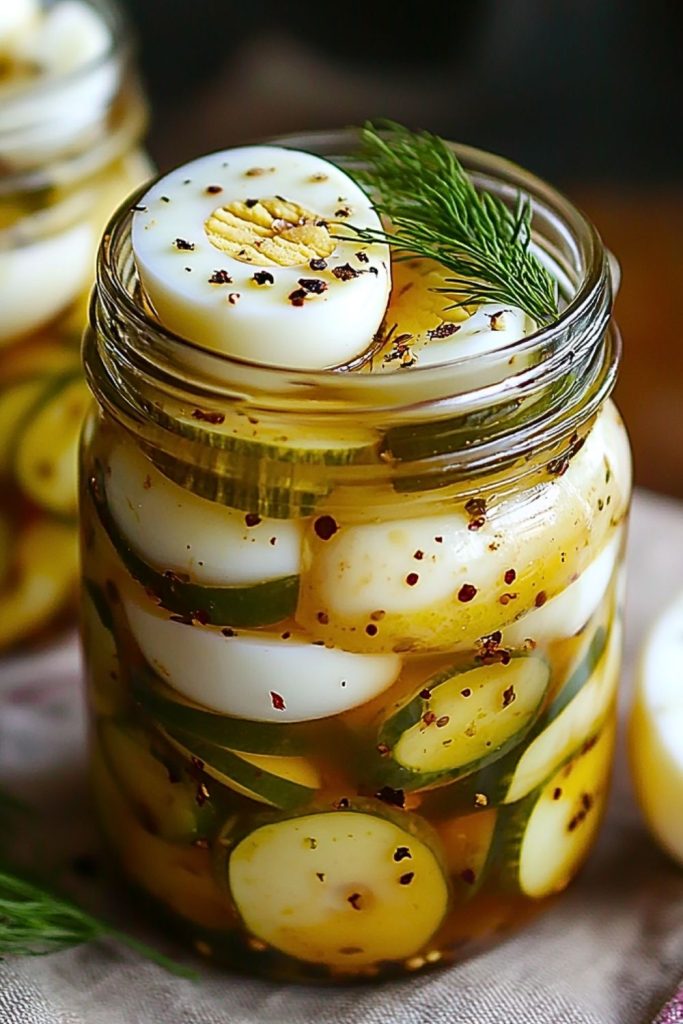
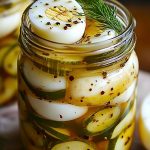
Tangy, savory, and packed with flavor, Pickled Eggs with Apple Cider Vinegar are a classic treat that’s making a big comeback in modern kitchens. With their striking yellow centers and the gentle pink swirl of red onion, these eggs are as visually beautiful as they are delicious. The brine, infused with the natural zing of apple cider vinegar, fresh dill, garlic, and peppercorns, transforms simple boiled eggs into a gourmet snack or side that can be enjoyed anytime.
Whether you’re new to pickling or a long-time fan, this easy recipe delivers satisfying results with minimal effort. They’re great as a protein-packed snack, a bold addition to charcuterie boards, or a zesty topping for salads and sandwiches. The balance of tartness, spice, and aromatic herbs ensures every bite is bright and flavorful. Plus, they keep well in the fridge—perfect for prepping ahead.
Why You’ll Love This Pickled Eggs with Apple Cider Vinegar Recipe
- Bold, zesty flavor: The apple cider vinegar brings a pleasant tang that penetrates the eggs beautifully.
- Protein-rich and low-carb: A great grab-and-go snack for those watching their macros.
- Easy to make ahead: These eggs get better with time and can be made in large batches.
- Visually stunning: The pink-tinged onions and speckled dill make this jar a work of art in your fridge.
- Versatile: Perfect for breakfast, lunchboxes, picnics, or as an appetizer.
Preparation Phase & Tools to Use for Pickled Eggs with Apple Cider Vinegar
Essential Tools and Equipment — And Why Each Matters
To make the best pickled eggs, a few simple kitchen tools are all you need, but each plays a key role in ensuring success:
- Large Saucepan – Needed to boil your eggs evenly. Choose one that allows the eggs to sit in a single layer to prevent cracking.
- Slotted Spoon – Helps remove the eggs gently from boiling water without damaging the shells.
- Large Bowl with Ice Water (Ice Bath) – Crucial for stopping the cooking process instantly and making peeling easier.
- Glass Jar with Lid (Quart-size or larger) – Glass is non-reactive and ideal for holding acidic ingredients like vinegar. A tight-sealing lid ensures the brine stays fresh and leak-free.
- Sharp Knife – For slicing onions and optionally halving the eggs for better brine penetration.
- Measuring Cups & Spoons – Precision matters in pickling. A good balance of acid, salt, and spice is key to flavor and food safety.
Preparation Tips
- Use older eggs: Fresher eggs are harder to peel. Eggs that have been in the fridge for about a week peel more easily after boiling.
- Boil properly: For firm yet creamy yolks, boil your eggs for 10–12 minutes, then transfer immediately into an ice bath.
- Peel while slightly warm: Eggs peel best once cooled slightly but not fully chilled.
- Sterilize your jar: Rinse your jar with boiling water or run it through a dishwasher cycle. Clean jars prevent contamination and extend the shelf life of your pickled eggs.
- Thinly slice the onions: Thin slices allow the onions to soften quickly and release their flavor into the brine.
- Layer for visual appeal: Alternate layers of eggs and onion for a jar that’s as pretty as it is tasty.
Ingredients for This Pickled Eggs with Apple Cider Vinegar Recipe
Creating the perfect jar of pickled eggs requires a simple, flavorful blend of pantry staples and fresh ingredients. Here’s what you’ll need:
Main Ingredients
- 12 large eggs – Hard-boiled and peeled
- 1 small red onion – Thinly sliced for flavor and visual appeal
- 2 cloves garlic – Smashed, for an earthy aromatic infusion
- 1 cup apple cider vinegar – The tangy base that brings bright flavor and natural acidity
- 1 cup water – Balances the acidity of the vinegar
- 1 tablespoon sugar – Adds a gentle sweetness to round out the sharpness
- 1½ teaspoons salt – Enhances all the flavors and acts as a preservative
Herbs & Spices
- 1 teaspoon whole black peppercorns – For a subtle bite and aroma
- ½ teaspoon red pepper flakes (optional) – Adds a bit of heat for those who like it spicy
- 1 teaspoon yellow mustard seeds – Brings a tangy, earthy note to the brine
- A few sprigs of fresh dill – Infuses a vibrant, garden-fresh flavor
- 1 bay leaf – Optional, but lends a rounded, savory undertone
Optional Add-ins: For a creative twist, consider adding beet slices for color, jalapeños for heat, or even pickling spice blends.
Step-by-Step Instructions for Pickled Eggs with Apple Cider Vinegar
Transforming plain hard-boiled eggs into a flavorful, tangy snack is surprisingly easy. Follow these steps to get the best texture, flavor, and presentation every time.
Step 1: Hard-Boil the Eggs
- Place the eggs in a single layer in a large saucepan.
- Cover with cold water by at least an inch.
- Bring to a boil over medium-high heat.
- Once boiling, cover, remove from heat, and let sit for 10–12 minutes.
- Transfer immediately to an ice bath to cool for 10 minutes.
Step 2: Peel the Eggs
- Gently tap each egg on a hard surface to crack the shell, then roll it to loosen.
- Peel under running water if needed to help separate the shell cleanly.
- Set peeled eggs aside on a clean towel or plate.
Step 3: Prepare the Brine
- In a small saucepan, combine:
- 1 cup apple cider vinegar
- 1 cup water
- 1½ teaspoons salt
- 1 tablespoon sugar
- Peppercorns, mustard seeds, red pepper flakes, bay leaf (if using), and smashed garlic.
- Bring the mixture to a light simmer over medium heat, stirring to dissolve salt and sugar.
- Once dissolved and aromatic, remove from heat and let the brine cool to room temperature.
Step 4: Assemble the Jar
- In a clean glass jar, layer sliced onions, eggs, and fresh dill.
- Alternate layers for the most flavor and visual appeal.
- Pour the cooled brine over the eggs and onions until completely submerged.
- Seal the jar tightly with a lid.
Step 5: Refrigerate and Wait
- Place the jar in the refrigerator and let the eggs pickle for at least 3 days before eating.
- For a deeper flavor, allow them to sit for 5–7 days.
- Eggs will keep well refrigerated for up to 3 weeks.
Notes
- Flavor Matures Over Time: These pickled eggs taste best after several days of soaking. The longer they sit (within reason), the more flavorful and well-rounded they become.
- Customizable Brine: Feel free to tweak the flavor profile—swap dill for rosemary, use rice vinegar for a gentler tang, or add a bit of turmeric for golden color.
- Color Variation: Using red onions or beets in your jar will tint the eggs slightly. This is normal and adds a beautiful visual effect.
- Serving Tip: Slice eggs in half before serving for easier presentation and portion control—especially nice on charcuterie boards or picnic spreads.
- Vegan Twist: You can apply the same brine to tofu cubes or vegetables like carrots and cauliflower if you’re seeking plant-based pickling fun.
Watch Out for These Mistakes While Cooking
- Skipping the Ice Bath: Not cooling eggs immediately can lead to overcooked, grayish yolks and make peeling frustrating.
- Hot Brine on Eggs: Pouring hot brine over the eggs can cause rubbery whites. Let the brine cool before assembling the jar.
- Not Sterilizing the Jar: A dirty or poorly cleaned jar can introduce bacteria and shorten the shelf life of your pickled eggs.
- Underseasoning the Brine: Remember, the brine is your flavor base. Don’t skimp on salt or vinegar—these are essential for preservation and taste.
- Improper Storage: These eggs must be kept refrigerated at all times. This is not a shelf-stable preservation method.
- Using Fresh Eggs: Too-fresh eggs are hard to peel and often result in pitted surfaces. Older eggs work best.
- Overcrowding the Jar: Pack the eggs snugly but not too tight—this ensures brine reaches every part of the egg.
- Using Metal Containers: Always use non-reactive containers like glass. Metal can alter the flavor and react with the acidic vinegar.
What to Serve With Pickled Eggs with Apple Cider Vinegar?
Pickled eggs are not just a snack—they’re a surprisingly versatile addition to many dishes. Their tangy bite and firm texture can elevate everything from casual picnics to elegant platters.
8 Delicious Pairing Ideas
- Charcuterie Boards
Add sliced pickled eggs to your cheese and meat boards for a tangy, colorful contrast. They pair beautifully with sharp cheeses, cured meats, olives, and crackers. - Sandwiches & Wraps
Slice them up and layer into sandwiches or wraps for extra flavor. Great in BLTs, roast beef, or veggie wraps. - Salads
Toss chopped pickled eggs into potato salads, green salads, or grain bowls. Their acidity helps balance creamy dressings or hearty greens. - Deviled Eggs (Pickled Style)
Slice and scoop out the yolks, then mix with mustard, mayo, and a touch of the pickling brine for a colorful, tangy deviled egg twist. - Tacos
Top street tacos with slices of pickled egg for a surprising texture and bright bite—especially tasty with pork or fish. - Bar Snacks & Beer Pairings
Serve whole or halved eggs with cold beer and pretzels for a salty, satisfying pub-style snack. - Avocado Toast Upgrade
Add thin slices of pickled egg on top of smashed avocado toast. A drizzle of olive oil and red pepper flakes makes it brunch-worthy. - Bento Boxes or Lunch Packs
Include a halved pickled egg in lunchboxes or meal prep containers for a high-protein, low-carb boost.
Storage Instructions
Proper storage ensures your Pickled Eggs with Apple Cider Vinegar stay safe to eat and taste their best throughout their shelf life.
- Refrigeration is Essential: Always keep your pickled eggs refrigerated at 40°F (4°C) or lower. This recipe is not meant for shelf-stable canning.
- Use a Sealed Glass Jar: Airtight glass containers are ideal for preserving the integrity of the brine and preventing outside contamination.
- Wait Before Eating: Let the eggs pickle for at least 3 days for a mild flavor, or up to 7 days for deeper infusion. They become more flavorful over time.
- Consume Within 3 Weeks: For best quality and safety, eat the pickled eggs within 3 weeks of preparation.
- Avoid Double-Dipping: Always use clean utensils to remove eggs from the jar. Avoid touching the brine directly with fingers to reduce the risk of contamination.
- Check for Spoilage: If the brine becomes cloudy, has an off smell, or shows signs of mold, discard immediately.
Estimated Nutrition (Per One Pickled Egg)
These numbers are approximate and can vary depending on exact ingredients and portion sizes.
- Calories: 70
- Protein: 6g
- Fat: 5g
- Carbohydrates: <1g
- Sugars: 0.3g
- Fiber: 0g
- Sodium: 190mg
- Cholesterol: 185mg
✅ Low-carb, high-protein, and keto-friendly—these pickled eggs are a nutritious snack with minimal ingredients and maximum flavor.
Frequently Asked Questions
1. How long do pickled eggs last in the fridge?
Pickled eggs should be consumed within 3 weeks if stored properly in the refrigerator in a sealed, non-metallic container. Never leave them at room temperature.
2. Can I reuse the brine for another batch?
It’s not recommended. While tempting, reused brine may not have the same acidity and freshness. For safety and consistent flavor, make a fresh brine each time.
3. Are pickled eggs supposed to be rubbery?
No. If the eggs are rubbery, it could be due to pouring the brine over them while it was still hot. Always let the brine cool before adding it to the jar.
4. Can I use white vinegar instead of apple cider vinegar?
Yes, but apple cider vinegar adds a richer, fruitier flavor. White vinegar is more acidic and will produce a sharper-tasting result.
5. Why did my eggs turn pink?
This is likely from the red onions or added beets in the brine. It’s completely normal and adds a beautiful visual touch.
6. Can I add other vegetables to the jar?
Definitely! Carrots, jalapeños, or even beet slices make great additions and add flavor and color.
7. Are these eggs safe to can for pantry storage?
No. This recipe is for refrigerator pickling only. It does not meet safety requirements for shelf-stable canning.
8. Can I make a smaller batch?
Absolutely. Just cut the ingredients in half or even thirds. Make sure the eggs are fully covered with brine in the jar, no matter the amount.
Conclusion
Pickled Eggs with Apple Cider Vinegar are a nostalgic favorite with a gourmet twist—zippy, savory, and easy to personalize. Whether you’re snacking straight from the jar, topping a fresh salad, or impressing guests with your charcuterie game, these eggs offer flavor, nutrition, and beautiful presentation in one jar. Their bold brine and satisfying texture make them a staple you’ll want in your fridge year-round.
Perfect for picnics, protein-packed lunches, or bold breakfast ideas, this easy recipe is as functional as it is flavorful.
Pickled Eggs with Apple Cider Vinegar Recipe
- Prep Time: 20 minutes
- Cook Time: 12 minutes
- Total Time: 32 minutes
- Yield: 12 pickled eggs 1x
Description
Looking for a bold, flavorful snack or an easy appetizer to wow your guests? These Pickled Eggs with Apple Cider Vinegar are a zesty, protein-rich treat that’s as nutritious as it is delicious. Perfect for quick breakfasts, easy dinner pairings, or healthy snacks, this easy recipe transforms basic hard-boiled eggs into something tangy, satisfying, and totally unique. The brine, infused with dill, garlic, and warm spices, brings a rustic yet refreshing flavor with every bite. Whether you’re after lunchbox food ideas, keto-friendly snacks, or just want to level up your brunch recipes, this one is a must-try!
Ingredients
- 12 large eggs (hard-boiled and peeled)
- 1 small red onion, thinly sliced
- 2 cloves garlic, smashed
- 1 cup apple cider vinegar
- 1 cup water
- 1 tablespoon sugar
- 1½ teaspoons salt
- 1 teaspoon whole black peppercorns
- ½ teaspoon red pepper flakes (optional)
- 1 teaspoon yellow mustard seeds
- A few sprigs of fresh dill
- 1 bay leaf (optional)
Instructions
- Place eggs in a large saucepan and cover with cold water. Bring to a boil, then cover, remove from heat, and let sit for 10–12 minutes.
- Transfer eggs to an ice bath to cool completely, then peel.
- In a separate saucepan, combine apple cider vinegar, water, sugar, salt, garlic, and spices. Bring to a light simmer and stir until dissolved. Let cool.
- In a clean glass jar, layer peeled eggs, onion slices, and dill sprigs.
- Pour the cooled brine over eggs until fully submerged.
- Seal the jar with a lid and refrigerate for at least 3 days before serving.
- Enjoy within 3 weeks for best flavor and safety.