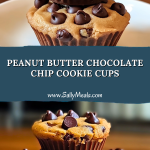
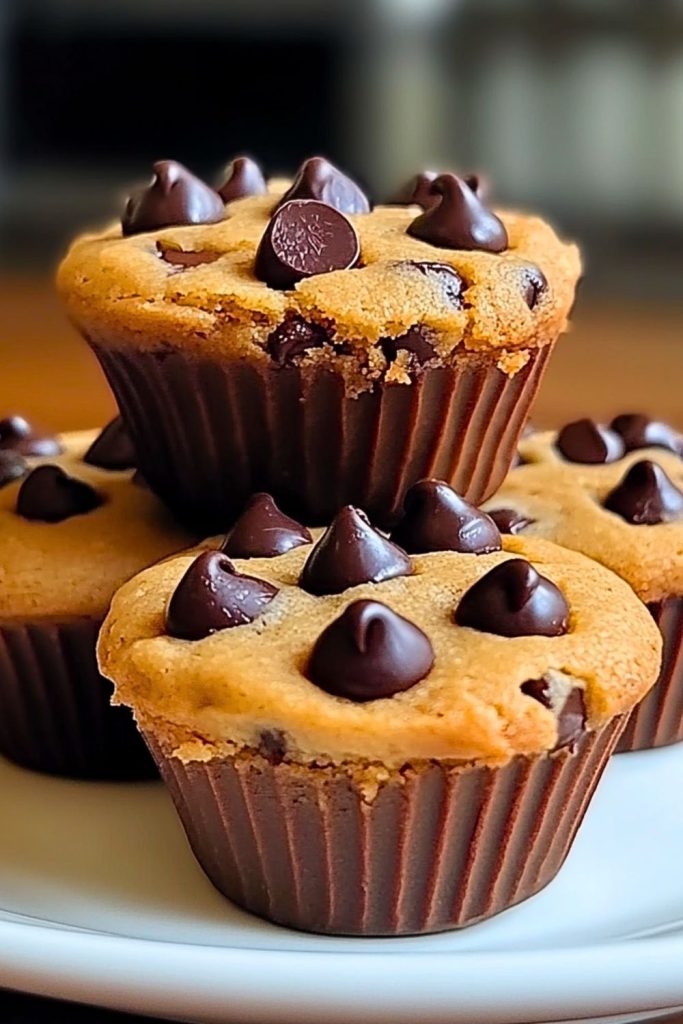
Soft, chewy, and loaded with gooey chocolate chips, these Peanut Butter Chocolate Chip Cookie Cups are the dessert you didn’t know you needed—until now. Baked in muffin liners for that perfect handheld experience, each cup has a golden, rich exterior and a tender, melt-in-your-mouth center. The deep nuttiness of the peanut butter pairs irresistibly with pockets of semi-melted chocolate in every bite.

Perfect for after-school treats, weekend baking sessions, or satisfying midnight cravings, these cookie cups are simple to make and even easier to devour. They strike that beautiful balance between a cookie and a brownie, making them a hit with kids and grown-ups alike. Whether you serve them warm or chilled, they never disappoint.
Why You’ll Love This Peanut Butter Chocolate Chip Cookie Cups Recipe
- Foolproof Texture: Moist, soft, and chewy with a gentle crisp on top.
- One-Bowl Wonder: Minimal mess, maximum payoff.
- Portion Control: Perfectly sized individual servings—no cutting or crumbling.
- Versatile: Can be made gluten-free or dairy-free with simple swaps.
- Crowd-Pleaser: Kids love them, adults sneak seconds.
- Freezer-Friendly: Bake ahead and thaw whenever sweet cravings hit.
Preparation Phase & Tools to Use for Peanut Butter Chocolate Chip Cookie Cups
To make these cookie cups come out just right every time, using the correct tools can make a big difference in both ease and results. Here’s a breakdown of what you’ll need and why each item matters:
- Mixing Bowls (Medium & Large): A large bowl for combining the wet and dry ingredients helps prevent spillage, while a smaller one may be useful for pre-measuring items like flour or sugar.
- Hand Mixer or Stand Mixer (Optional): While you can mix everything by hand, using a mixer saves time and ensures a smooth, creamy peanut butter base.
- Silicone Muffin Liners or Standard Muffin Tin: Silicone liners prevent sticking and ensure an even bake. A regular muffin tin with paper liners works too, but may require greasing.
- Rubber Spatula: Perfect for scraping every last bit of batter—no delicious dough left behind!
- Cookie Scoop or Tablespoon: For uniform cup sizes, a scoop helps you portion evenly, ensuring even baking across all cups.
- Cooling Rack: After baking, transferring the cups to a rack helps them cool evenly and keeps the bottoms from getting soggy.
Preparation Tips
- Use Room Temperature Ingredients: Let your eggs and peanut butter sit out for 20–30 minutes beforehand to mix more smoothly.
- Don’t Overmix: Once you add the dry ingredients, stir just until combined to keep the texture soft and tender.
- Fill Evenly: Fill muffin liners about ¾ of the way full to prevent overflow and allow the tops to puff up perfectly.
- Use Creamy Peanut Butter: Natural peanut butter can be used, but for best consistency, opt for a no-stir creamy variety.
- Chill if Needed: If your batter feels too loose, pop it in the fridge for 10–15 minutes before scooping. This helps hold shape during baking.
Ingredients for Peanut Butter Chocolate Chip Cookie Cups
Creating these delectable cookie cups requires just a handful of pantry staples. Each ingredient plays an important role in texture and flavor—so here’s what you’ll need:
- 1 cup creamy peanut butter (preferably no-stir)
- ½ cup unsalted butter, softened to room temperature
- ¾ cup brown sugar, packed
- ¼ cup granulated sugar
- 1 large egg
- 1 teaspoon vanilla extract
- 1 cup all-purpose flour
- ½ teaspoon baking soda
- ¼ teaspoon salt
- ¾ cup semi-sweet chocolate chips (plus extra for topping)
Optional Add-ins:
- ½ teaspoon cinnamon – for a warm, spiced note.
- Chopped peanuts or walnuts – adds a bit of crunch.
- Mini chocolate chips – for more even chocolate distribution.
These ingredients make approximately 12 cookie cups. The recipe is easy to double if you’re serving a larger group or planning to freeze extras.
Step 1: Preheat and Prepare
Preheat your oven to 350°F (175°C). Line a muffin tin with silicone or paper liners, or lightly grease the cups if you’re skipping liners. This ensures the cookie cups release easily after baking.
Step 2: Cream the Fats and Sugars
In a large mixing bowl, beat the peanut butter, softened butter, brown sugar, and granulated sugar together using a hand mixer or stand mixer on medium speed. Mix until the texture is light and fluffy—this usually takes about 2–3 minutes.
Step 3: Add Egg and Vanilla
Crack in the egg and pour in the vanilla extract. Beat again until fully incorporated. This step ensures that the egg binds the mixture, creating a moist and cohesive batter.
Step 4: Combine Dry Ingredients
In a separate bowl, whisk together the flour, baking soda, and salt. Slowly add the dry ingredients to the wet mixture. Stir or mix on low just until combined—do not overmix.
Step 5: Fold in Chocolate Chips
Using a spatula, gently fold in ¾ cup of the chocolate chips. Reserve a small handful to press on top of the cups just before baking.
Step 6: Scoop and Fill
Using a cookie scoop or tablespoon, divide the dough evenly into the prepared muffin cups, filling each about ¾ full. Press a few extra chocolate chips on top of each portion for that bakery-style finish.
Step 7: Bake
Place the muffin tin in the preheated oven and bake for 12–14 minutes, or until the tops are set and slightly golden. The centers should still look a little soft—that’s how you get that gooey interior.
Step 8: Cool
Let the cookie cups cool in the pan for 5–7 minutes, then transfer them to a wire rack to cool completely. They will firm up as they cool but still stay wonderfully soft in the center.
Notes
- Texture Preference: If you love a fudgier center, lean toward the shorter end of the baking time. For a more cake-like texture, bake a minute or two longer.
- Nut Butter Swaps: Almond or cashew butter can replace peanut butter 1:1, but be mindful of consistency—choose thick, no-stir versions.
- Sweetness Control: You can reduce the sugar by 2–3 tablespoons if you prefer a less sweet version. However, this may slightly affect texture.
- Mini Muffin Option: Want bite-sized versions? Use a mini muffin tin and bake for just 8–9 minutes.
- Freezer Friendly: Once fully cooled, store in an airtight bag or container and freeze for up to 2 months. Reheat in a microwave for 15–20 seconds.
Watch Out for These Mistakes While Cooking
- Overbaking: The #1 culprit behind dry cookie cups. Remember, they continue to bake slightly even after being removed from the oven.
- Using Natural Peanut Butter Without Adjustments: Natural PB can cause separation and oily results. If used, mix it thoroughly and chill the dough before baking.
- Skipping Liners or Grease: These can stick badly to the tin—don’t skip prepping your pan.
- Overmixing the Dough: Overworking the flour can toughen the cookie cups. Stir just until no flour streaks remain.
- Uneven Filling: Uneven portions lead to inconsistent baking. A cookie scoop keeps things uniform.
- Crowding the Chocolate Chips: Stirring in too many chips can disrupt the dough structure. Stick to about ¾ cup in the mix.
- Ignoring Cooling Time: Removing too soon from the pan can lead to crumbling. Let them set before transferring.
What to Serve With Peanut Butter Chocolate Chip Cookie Cups?
These cookie cups are rich and flavorful enough to stand on their own, but pairing them with the right beverage or side can elevate them into an unforgettable treat. Whether you’re serving a crowd or treating yourself, here are some fun and delicious ideas to complement them.
🍽️ 8 Recommendations
1. Cold Milk (Classic Choice)
Nothing balances the richness of peanut butter and chocolate like an ice-cold glass of milk—whole, almond, oat, or soy all pair beautifully.
2. Vanilla Ice Cream
A scoop of creamy vanilla ice cream melting over a warm cookie cup? Yes, please. This combo is indulgent and crowd-pleasing.
3. Coffee or Espresso
The slight bitterness of black coffee or a double shot of espresso perfectly contrasts the sweetness of the cookie cup.
4. Chocolate or Peanut Butter Drizzle
Warm up a spoonful of chocolate sauce or peanut butter and drizzle it over the top for a decadent finish.
5. Fresh Berries
Serve with strawberries, raspberries, or banana slices to add a bright, fruity contrast and a pop of color.
6. Greek Yogurt (Breakfast Twist)
Want to turn these into a fancy brunch item? Cut one in half and top with a dollop of Greek yogurt and honey.
7. Salted Nuts
Sprinkle a few crushed salted peanuts or almonds on top for added texture and a little savory bite.
8. Whipped Cream & Cocoa Powder
A swirl of whipped cream and a dusting of cocoa or cinnamon can add a lovely presentation and creamy touch.
Storage Instructions
Keeping your Peanut Butter Chocolate Chip Cookie Cups fresh is easy with proper storage methods. Whether you’re saving them for a few days or planning ahead for a future sweet tooth, these tips will help preserve texture and flavor.
Room Temperature
- Storage Time: Up to 4–5 days
- Method: Place cookie cups in an airtight container at room temperature. Layer parchment paper between if stacking to prevent sticking.
Refrigerator
- Storage Time: Up to 1 week
- Method: Store in a sealed container. Bring to room temperature before serving, or warm for 10–15 seconds in the microwave for that gooey center.
Freezer
- Storage Time: Up to 2 months
- Method: Freeze on a baking sheet until solid, then transfer to a freezer-safe zip-top bag or container. Label with the date. Thaw at room temp or reheat straight from frozen.
Estimated Nutrition
Note: These values are approximate and may vary based on the exact brands and measurements used.
Per Cookie Cup (based on 12 servings):
- Calories: ~240 kcal
- Fat: 15g
- Saturated Fat: 5g
- Carbohydrates: 22g
- Sugar: 15g
- Protein: 5g
- Fiber: 1g
- Sodium: 120mg
These treats are indulgent, but also contain some protein and healthy fats thanks to the peanut butter. Perfect for an occasional energy boost or sweet fix!
Frequently Asked Questions
1. Can I make these cookie cups gluten-free?
Yes! Just substitute the all-purpose flour with a 1:1 gluten-free baking flour blend. Ensure it’s one that includes xanthan gum for structure.
2. What if I only have natural peanut butter?
You can still use it, but make sure it’s well-mixed and not too runny. The dough might be softer, so chilling it for 15–20 minutes before baking helps maintain shape.
3. Can I make the dough ahead of time?
Absolutely. Prepare the dough and refrigerate it for up to 48 hours. You can also pre-scoop it into muffin liners and refrigerate until ready to bake.
4. How do I know when they’re done baking?
The tops should look slightly golden and set, but the centers can still appear soft. They’ll firm up as they cool—resist the urge to overbake!
5. Can I double the recipe?
Yes, this recipe doubles easily. Use two muffin pans or bake in batches. Keep an eye on baking time—it might increase slightly with more cups in the oven.
6. Do I have to use chocolate chips?
Nope! You can swap them for white chocolate, butterscotch chips, peanut butter chips, or even chopped candy like Reese’s or M&Ms.
7. Can I turn these into bar cookies instead?
Yes! Press the dough into a greased 8×8-inch baking dish and bake for 20–24 minutes at 350°F until the top is golden and the center is slightly soft.
8. How do I reheat them?
Microwave each cup for 10–15 seconds to revive that just-baked texture. If frozen, microwave for about 30 seconds or thaw at room temp first.
Conclusion
Peanut Butter Chocolate Chip Cookie Cups blend the comfort of home-baked cookies with the indulgence of rich, chocolatey bites—all wrapped in a perfectly portioned form. They’re effortless to make, fun to eat, and guaranteed to disappear quickly at any gathering. Whether you’re baking for friends, family, or a sweet solo treat, this recipe delivers every single time.

Peanut Butter Chocolate Chip Cookie Cups
- Prep Time: 10 minutes
- Cook Time: 12 minutes
- Total Time: 22 minutes
- Yield: 12 cookie cups 1x
Description
These soft, gooey, and chewy cookie cups are bursting with rich peanut butter flavor and melty chocolate chips. Baked in muffin tins, they offer perfect portions for parties, after-school snacks, or late-night cravings. A delicious twist on a classic cookie that’s sure to be a family favorite.
Ingredients
- 1 cup creamy peanut butter
- 1/2 cup unsalted butter, softened
- 3/4 cup brown sugar, packed
- 1/4 cup granulated sugar
- 1 large egg
- 1 teaspoon vanilla extract
- 1 cup all-purpose flour
- 1/2 teaspoon baking soda
- 1/4 teaspoon salt
- 3/4 cup semi-sweet chocolate chips (plus extra for topping)
Instructions
- Preheat oven to 350°F (175°C). Line a muffin tin with silicone or paper liners.
- In a large bowl, beat together peanut butter, butter, brown sugar, and granulated sugar until fluffy.
- Add egg and vanilla extract. Mix until combined.
- In a separate bowl, whisk together flour, baking soda, and salt.
- Gradually mix dry ingredients into the wet ingredients until just combined.
- Fold in chocolate chips.
- Scoop dough into muffin liners, filling each about 3/4 full.
- Top with extra chocolate chips.
- Bake for 12–14 minutes until tops are golden and centers are slightly soft.
- Cool in the pan for 5–7 minutes, then transfer to a wire rack.