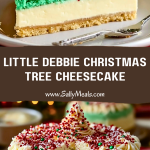
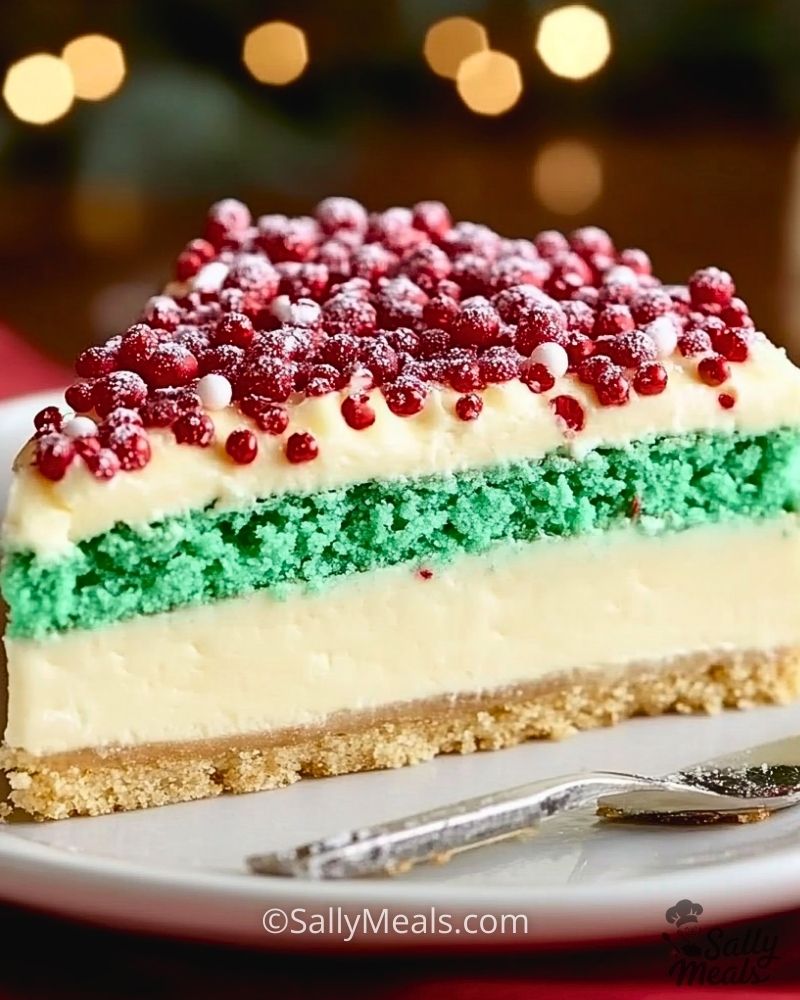
If you’re a fan of nostalgic treats and holiday magic, this Little Debbie Christmas Tree Cheesecake is going to steal your heart. Inspired by the iconic snack cakes that pop up every festive season, this dessert blends creamy cheesecake layers with soft green sponge cake and a cookie crust—topped with the signature red sugar pearls and powdered sugar “snow.” It’s whimsical, beautiful, and honestly tastes just like the holidays should.
I made this cheesecake for a family gathering, and not only did it disappear in minutes, but people kept asking where I bought it. That’s the magic of recreating something so familiar and fun—you surprise everyone with a homemade twist that feels like pure comfort food. This cheesecake is more than dessert; it’s a full-on holiday experience.
Why You’ll Love This Little Debbie Christmas Tree Cheesecake
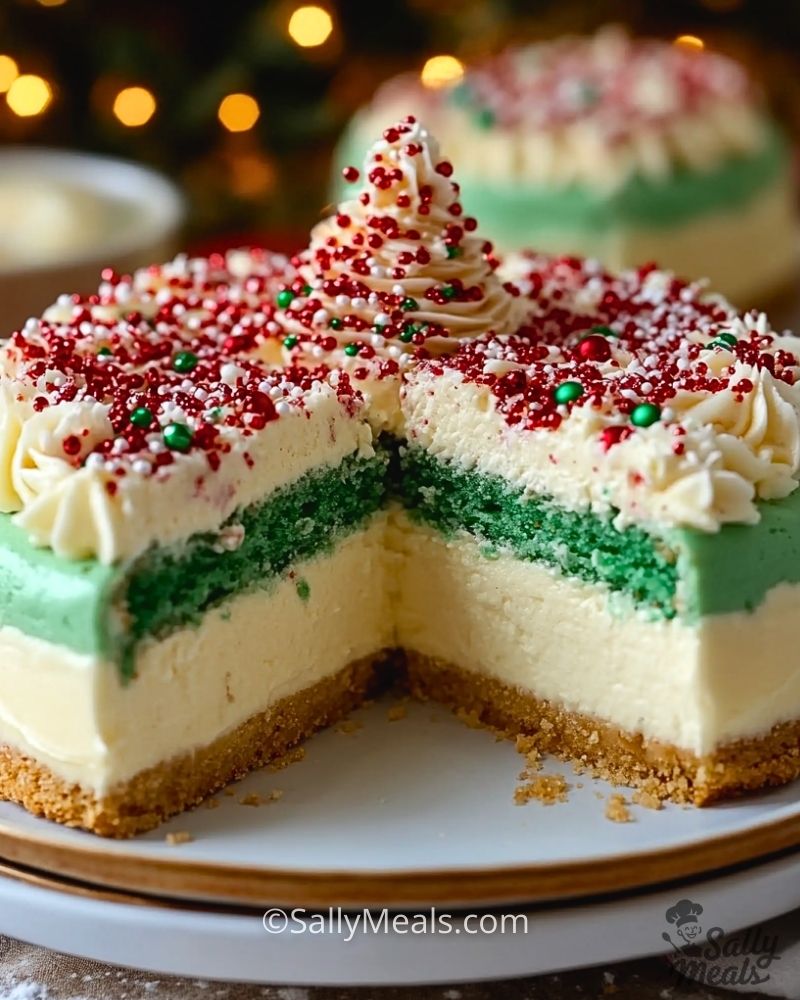
This cheesecake is the perfect balance of creamy, crunchy, and festive. It has a soft cookie crust, a thick and velvety cheesecake center, and a layer of fluffy green cake—just like the real Little Debbie Christmas Tree cakes. Then, it’s topped with red and white sugar pearls to mimic the candy decorations on the original treat. It looks stunning on any dessert table and gives you that childhood-holiday joy in every bite. Whether you’re making it for a party or just want to surprise your family, this dessert is a guaranteed hit.
What Kind of Cheesecake Base Should I Use?
For this Little Debbie Christmas Tree Cheesecake, I went with a classic New York-style cheesecake base. It’s rich, dense, and holds its shape beautifully, which is key when layering with cake and toppings. The smooth texture contrasts perfectly with the soft green cake layer and crunchy cookie crust.
If you prefer something a little lighter, you could go with a no-bake cheesecake version. It’s creamier and more mousse-like, which works too, but you’ll want to make sure it’s set well before adding the cake layer on top. Personally, I find the baked version gives the structure and depth this layered dessert really deserves.
Options for Substitutions
This cheesecake is flexible enough to allow for some creativity or dietary needs:
- Crust Swap: Instead of a classic graham cracker crust, try vanilla wafers or shortbread cookies for a sweeter twist.
- Cake Layer: If you’re short on time, use a boxed vanilla cake mix dyed green. Want to keep it classic? Use actual Little Debbie Christmas Tree Cakes sliced thin as the top layer.
- Topping Alternatives: Can’t find red sugar pearls? Use red sprinkles or even small red candies like mini M&Ms or Sixlets.
- Gluten-Free Version: Swap in gluten-free cookies for the crust and a GF cake mix for the sponge layer.
- No Food Coloring: Skip the vibrant green sponge if you’re avoiding artificial dyes. A plain white or naturally colored matcha sponge still gives a festive vibe.
This is one of those desserts where you can really make it your own while still keeping that iconic holiday look.
Ingredients for This Little Debbie Christmas Tree Cheesecake
Each layer of this cheesecake brings something special, and the ingredients play a huge part in making that magic happen.
- Graham Cracker Crumbs: This creates the buttery, golden crust at the base. It adds a lovely crunch and keeps everything grounded.
- Unsalted Butter: Helps bind the crust and adds rich flavor without extra salt.
- Cream Cheese: The star of the show—smooth, tangy, and essential for a luscious, velvety cheesecake filling.
- Granulated Sugar: Sweetens the cheesecake base and balances the tang of the cream cheese.
- Sour Cream: Adds a subtle tang and creamy texture that makes the cheesecake ultra smooth.
- Vanilla Extract: Enhances all the other flavors and gives the cheesecake its signature warmth.
- Eggs: They bind the filling and give it that firm, sliceable structure.
- All-Purpose Flour: Just a little bit helps stabilize the cheesecake and prevent cracking.
- Green Food Coloring: Gives the sponge cake that classic Christmas tree hue.
- Boxed Vanilla Cake Mix: Speeds things up for the sponge cake layer. You can also go homemade if you like.
- Red Sugar Pearls or Sprinkles: These mimic the decorations from the original snack cake and add a festive crunch.
- Powdered Sugar: A dusting on top gives that snowy, holiday-perfect finish.
Each of these ingredients plays a role in recreating the nostalgic flavors and look of the beloved Christmas treat—only better, because you made it yourself.
Step 1: Make the Crust
Start by combining graham cracker crumbs and melted butter in a bowl until the texture feels like damp sand. Press this mixture into the bottom of a springform pan, creating an even layer. Bake it at 325°F (163°C) for 8–10 minutes, then let it cool while you prepare the filling.
Step 2: Prepare the Cheesecake Layer
In a large mixing bowl, beat the cream cheese until smooth and creamy. Add in the sugar, sour cream, vanilla extract, and a touch of flour. Mix until combined. Then add the eggs one at a time, blending gently to avoid overmixing. Pour the cheesecake mixture over the cooled crust and smooth out the top.
Step 3: Bake the Cheesecake
Place the springform pan in a water bath (wrap the bottom with foil first!) and bake at 300°F (149°C) for 55–65 minutes. The center should still jiggle slightly. Once done, turn off the oven, crack the door, and let it cool slowly inside for about an hour before transferring to the fridge to chill overnight.
Step 4: Make the Green Cake Layer
While the cheesecake chills, prepare the green sponge cake using your boxed mix or homemade recipe. Add a few drops of green food coloring to the batter until it reaches a festive tree-green color. Bake in a thin layer on a parchment-lined sheet pan and let it cool completely.
Step 5: Assemble the Layers
Once the cheesecake is set and the cake is cool, gently layer the green sponge on top of the cheesecake. Trim the edges if needed so it fits neatly.
Step 6: Decorate the Top
Press red sugar pearls or festive sprinkles gently into the top of the cake layer. Finish it off with a generous dusting of powdered sugar to mimic the snowy effect of the Little Debbie Christmas Tree Cakes.
Step 7: Chill Again Before Serving
Let the fully assembled cheesecake chill for another 2–3 hours, so everything settles and slices beautifully.
How Long to Cook the Little Debbie Christmas Tree Cheesecake
The total baking time for the cheesecake portion is 55 to 65 minutes at 300°F (149°C), followed by a gradual cool-down in the oven for about 1 hour. After that, it needs to chill in the fridge overnight (or for at least 6–8 hours) to fully set.
The green cake layer bakes separately, usually 12–15 minutes in a thin sheet at 350°F (177°C), depending on the thickness of your batter layer. Once everything is layered and decorated, give it another 2–3 hours of chilling to make slicing easier and to hold its shape.
Tips for Perfect Little Debbie Christmas Tree Cheesecake
- Room Temperature Ingredients: Always use room temp cream cheese, eggs, and sour cream to avoid lumps in your filling.
- Don’t Overmix: Too much air in your batter can cause cracks. Mix gently and only until just combined.
- Water Bath is Key: Baking the cheesecake in a water bath helps it cook evenly and stay creamy with minimal cracking.
- Cool Gradually: Letting the cheesecake cool slowly in the oven prevents sudden temperature changes that can cause it to split.
- Trim the Cake Layer: Use a serrated knife to level the green sponge cake before placing it on top—an even layer looks much cleaner.
- Chill Time is Crucial: Don’t rush the setting process. Cold cheesecake slices cleaner and holds together better.
- Decorate Last Minute: Add the red pearls and powdered sugar just before serving to keep them fresh and crisp.
- Use a Hot Knife for Slicing: Dip your knife in hot water and wipe it clean between cuts for those perfect, clean layers.
Watch Out for These Mistakes While Cooking
Even a festive cheesecake like this one can go sideways if you’re not careful. Here are some pitfalls to avoid:
- Skipping the Water Bath: Without it, your cheesecake might crack or bake unevenly. It’s worth the extra step.
- Using Cold Ingredients: Cold cream cheese doesn’t blend well and leads to a lumpy texture. Let everything come to room temperature first.
- Overbaking the Cheesecake: When the center is just slightly jiggly, it’s done. Overbaking dries it out and can ruin that creamy texture.
- Adding the Cake While Hot: Placing a warm cake layer on top of chilled cheesecake can make it melt or sweat. Let it cool completely first.
- Forgetting to Trim the Cake: If your green cake layer is too thick or uneven, the cheesecake won’t slice cleanly or layer well.
- Not Letting It Chill Long Enough: Rushing the chill time results in a soft, messy slice. Give it time to firm up properly.
- Using Too Much Food Coloring: A little goes a long way. Too much can alter the taste or give the sponge an artificial bitterness.
- Overloading the Toppings: A light hand with the sugar pearls and powdered sugar gives a cleaner finish and avoids over-sweetening.
What to Serve With Little Debbie Christmas Tree Cheesecake?
Hot Cocoa or Peppermint Mocha
The rich, creamy cheesecake pairs perfectly with a cozy mug of something chocolatey or minty.
Fresh Berries
The tartness of strawberries or raspberries cuts through the sweetness and adds color.
Whipped Cream
A dollop on the side makes this dessert feel extra indulgent and balances the dense texture.
Sparkling Cider
For a festive and family-friendly drink that complements the holiday spirit.
Coffee or Espresso
Helps cleanse the palate and brings out the subtle vanilla and cream cheese flavors.
Holiday Cookies
Serve mini gingerbread men or sugar cookies alongside for a dessert platter that wows.
Mint Ice Cream
The cool mint adds a playful contrast and keeps the dessert refreshing.
Pistachio Crumble
A sprinkle of crushed pistachios gives a salty-sweet crunch that balances the creamy richness.
Storage Instructions
To keep your Little Debbie Christmas Tree Cheesecake fresh and fabulous, follow these storage tips:
- Refrigerator: Store the cheesecake covered in plastic wrap or in an airtight container. It will stay fresh in the fridge for up to 5 days. If you’ve added powdered sugar on top, it may dissolve slightly over time—just dust a bit more before serving leftovers.
- Freezer: Want to save it for later? Slice the cheesecake and wrap each piece tightly in plastic wrap, then foil. Place slices in a freezer-safe container or bag. It can be frozen for up to 2 months. Thaw overnight in the fridge before enjoying.
Avoid leaving the cheesecake at room temperature for more than 2 hours, especially if serving it at a party. The creamy texture is best when chilled!
Estimated Nutrition
Please note, this is an estimate and may vary based on substitutions or portion size.
Per Slice (1 of 12):
- Calories: ~420
- Total Fat: 28g
- Saturated Fat: 16g
- Carbohydrates: 38g
- Sugar: 26g
- Protein: 6g
- Fiber: 1g
- Sodium: 260mg
This holiday dessert is definitely a treat—rich, creamy, and indulgent. But hey, it’s the holidays. Enjoy every bite!
Frequently Asked Questions
What size pan should I use for this cheesecake?
A 9-inch springform pan works best. It gives you the right height for layering and is easy to release without damaging the cheesecake.
Can I use actual Little Debbie Christmas Tree Cakes in this recipe?
Absolutely! You can slice them thin and layer them on top of the cheesecake or even fold crumbled pieces into the batter. It’s a fun shortcut and adds authenticity.
Do I have to use a water bath when baking the cheesecake?
Technically no, but it really helps. A water bath ensures even baking and prevents the cheesecake from cracking or drying out.
Can I make this ahead of time?
Yes! This cheesecake is even better when made a day in advance. It needs plenty of chill time, so making it ahead is actually ideal.
How do I prevent my cake layer from getting soggy?
Make sure your cake layer is completely cool and dry before placing it on top of the cheesecake. You can also chill it separately before assembling.
What’s the best way to get clean slices?
Use a sharp knife dipped in hot water, and wipe it clean between each slice. This helps maintain those clean, Instagram-worthy layers.
Can I use food coloring alternatives?
Yes, natural food dyes made from spinach or matcha can give you a green tint without artificial coloring—though the shade may be more subtle.
Can I decorate it differently for other holidays?
Definitely! Swap the green cake for pink in Valentine’s, or orange for Halloween. Change up the sprinkles to match the theme. It’s a flexible and festive dessert.
Conclusion
This Little Debbie Christmas Tree Cheesecake brings together the joy of a classic snack cake and the indulgence of a creamy, homemade dessert. It’s fun to make, gorgeous to look at, and even better to eat. Whether you’re baking it for a party, a cozy Christmas Eve, or just because—you’re guaranteed smiles all around.
Save this recipe on Pinterest, and don’t forget to share it with your holiday crew. Trust me, they’ll be asking you to make it every year.
Little Debbie Christmas Tree Cheesecake
- Prep Time: 30 minutes
- Cook Time: 1 hour 5 minutes
- Total Time: 1 hour 35 minutes
- Yield: 12 slices 1x
Description
A festive holiday dessert inspired by the nostalgic Little Debbie snack cakes, this cheesecake features a buttery graham cracker crust, creamy vanilla cheesecake filling, vibrant green sponge cake layer, and a whimsical topping of red sugar pearls and powdered sugar. Perfect for Christmas parties, family gatherings, and holiday dessert tables.
Ingredients
- 1 1/2 cups graham cracker crumbs
- 1/2 cup unsalted butter, melted
- 3 (8 oz) blocks cream cheese, softened
- 1 cup granulated sugar
- 1/2 cup sour cream
- 1 tsp vanilla extract
- 3 large eggs
- 2 tbsp all-purpose flour
- 1 box vanilla cake mix (plus ingredients on box)
- Green food coloring
- Red sugar pearls or sprinkles
- Powdered sugar, for dusting
Instructions
- Preheat oven to 325°F (163°C). Mix graham cracker crumbs and melted butter. Press into the bottom of a 9-inch springform pan. Bake for 8–10 minutes. Cool.
- Reduce oven temperature to 300°F (149°C). Beat cream cheese until smooth. Add sugar, sour cream, vanilla, and flour. Blend until combined. Add eggs one at a time, mixing gently.
- Pour cheesecake filling over cooled crust. Wrap pan in foil and place in a water bath. Bake for 55–65 minutes. Let cool in oven for 1 hour, then refrigerate overnight.
- Prepare cake mix as directed. Add green food coloring to achieve desired color. Bake in a thin sheet layer at 350°F (177°C) for 12–15 minutes. Cool completely.
- Trim green cake to fit the cheesecake. Layer on top.
- Decorate with red sugar pearls and a dusting of powdered sugar.
- Chill assembled cheesecake for another 2–3 hours before serving.

