I still remember the first time I made these Japanese Katsu Bowls with Tonkatsu Sauce at home — the crispy golden chicken, the fluffy rice, and that rich, tangy sauce just brought everything together so perfectly. I could hardly believe how something so satisfying could come from such a simple, comforting dish. Ever since then, it’s been a beloved recipe in my kitchen, not just for cozy nights but also for when I want to impress guests without the stress.
Making Katsu Bowls always feels like a little act of care — the sound of the crunch when I slice through the breaded chicken, the warm aroma of freshly cooked rice, and the drizzle of luscious tonkatsu sauce over everything. It’s a meal that’s hearty, flavorful, and guaranteed to make anyone smile with that first bite.
Why You’ll Love This Japanese Katsu Bowls with Tonkatsu Sauce
You’re going to fall hard for this recipe because it hits every note: crispy, juicy, savory, and a little sweet. It’s quick enough for a weeknight but special enough for a weekend treat. Plus, the tonkatsu sauce is so good you’ll want to drizzle it over just about everything. Whether you’re craving something comforting or looking for a new favorite dish to add to your lineup, this one has you covered.
What Cut of Meat Should I Use for Japanese Katsu Bowls with Tonkatsu Sauce?
For the ultimate katsu experience, I recommend using boneless, skinless chicken thighs. They stay incredibly juicy and tender after frying. However, if you prefer a leaner option, boneless chicken breasts work beautifully too — just be careful not to overcook them. Pork cutlets (tonkatsu style) are also a classic choice if you want to stick with a more traditional route. Either way, the key is to pound the meat to an even thickness so it cooks evenly and stays nice and juicy.
Options for Substitutions
Life happens — maybe you don’t have all the traditional ingredients on hand. Here’s how you can tweak this dish without losing its magic:
- Protein Swap: Pork, shrimp, or even firm tofu can replace the chicken if you want to switch things up.
- Gluten-Free: Use gluten-free panko breadcrumbs and a gluten-free flour for breading to make it celiac-friendly.
- Rice Alternatives: Short-grain Japanese rice is the classic base, but you can easily swap in jasmine rice, brown rice, or even cauliflower rice for a low-carb version.
- Sauce Shortcut: No time to make your own tonkatsu sauce? Mix ketchup, Worcestershire sauce, a touch of soy sauce, and sugar for a quick and tasty alternative.
- Egg-Free Coating: Instead of the egg wash, you can use a mixture of plant-based milk and a spoonful of flour if you’re avoiding eggs.
Ingredients for Japanese Katsu Bowls with Tonkatsu Sauce
- Chicken Thighs or Breasts
The heart of the katsu bowl — juicy, tender, and perfect for frying. Choosing a good cut makes all the difference in getting that succulent bite. - Salt and Pepper
Simple but essential. A light seasoning before breading brings out the natural flavor of the chicken. - All-Purpose Flour
The first layer of the breading process; it helps the egg stick and gives the coating that signature crispiness. - Eggs
Beaten eggs create the sticky layer that holds all that lovely panko in place. - Panko Breadcrumbs
The magic ingredient for that unmistakable light, crunchy texture. Regular breadcrumbs just can’t compete here. - Neutral Oil (like vegetable or canola)
Ideal for frying because it has a high smoke point and won’t overpower the delicate flavors. - Short-Grain Japanese Rice
Soft, slightly sticky rice that soaks up the tonkatsu sauce beautifully and completes the comforting base of the bowl. - Tonkatsu Sauce
A sweet, tangy, savory sauce that ties the entire dish together — like the icing on a cake, but better. - Fresh Parsley or Green Onions (Optional Garnish)
A sprinkle of green adds color, freshness, and a little herbal pop to finish everything off beautifully.
Step 1: Prepare the Chicken
Start by trimming any excess fat from your chicken thighs or breasts. If using breasts, slice them horizontally to create thinner cutlets. Lightly pound each piece with a meat mallet to ensure an even thickness, about ½ inch thick. Season both sides generously with salt and pepper.
Step 2: Set Up the Breading Station
Grab three shallow bowls: one for flour, one for beaten eggs, and one for panko breadcrumbs. Dredge each piece of chicken in flour, making sure to coat every surface. Dip it into the beaten egg next, and then press it firmly into the panko, ensuring a thick, even layer of crumbs.
Step 3: Fry the Chicken
Heat about ½ inch of neutral oil in a deep skillet or pan over medium heat. Once the oil reaches 350°F (you can test with a thermometer or a few panko crumbs — they should sizzle immediately), carefully place the breaded chicken into the pan. Fry for 3–4 minutes per side, or until golden brown and cooked through. Transfer to a wire rack to drain any excess oil and maintain that irresistible crispness.
Step 4: Cook the Rice
While the chicken fries, cook your short-grain Japanese rice according to the package instructions. Fluffy, slightly sticky rice is the perfect bed for your crispy katsu.
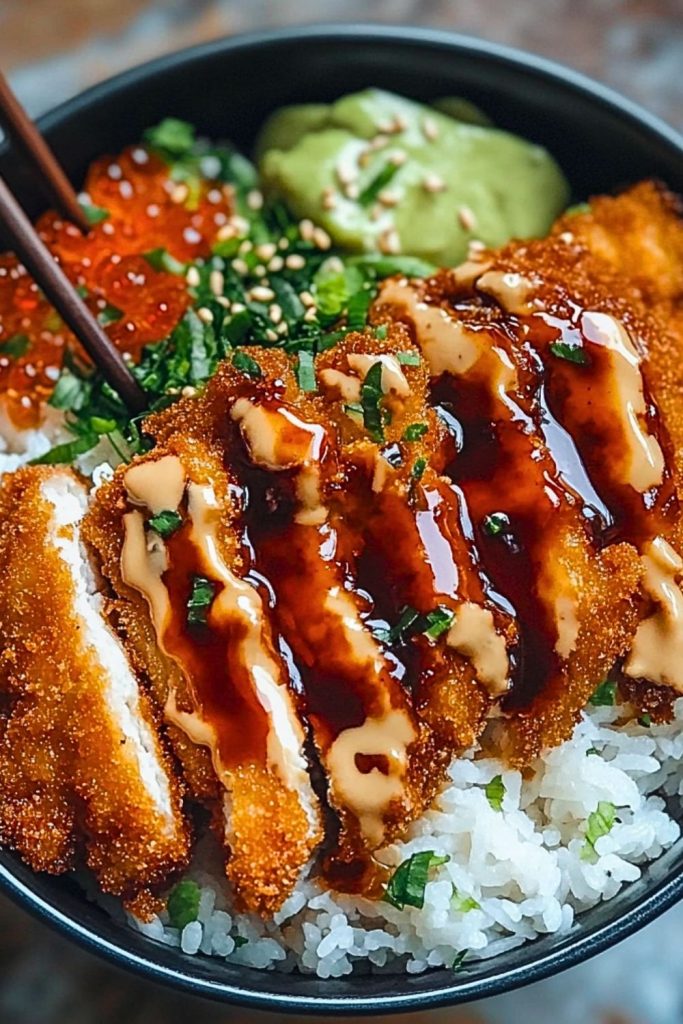
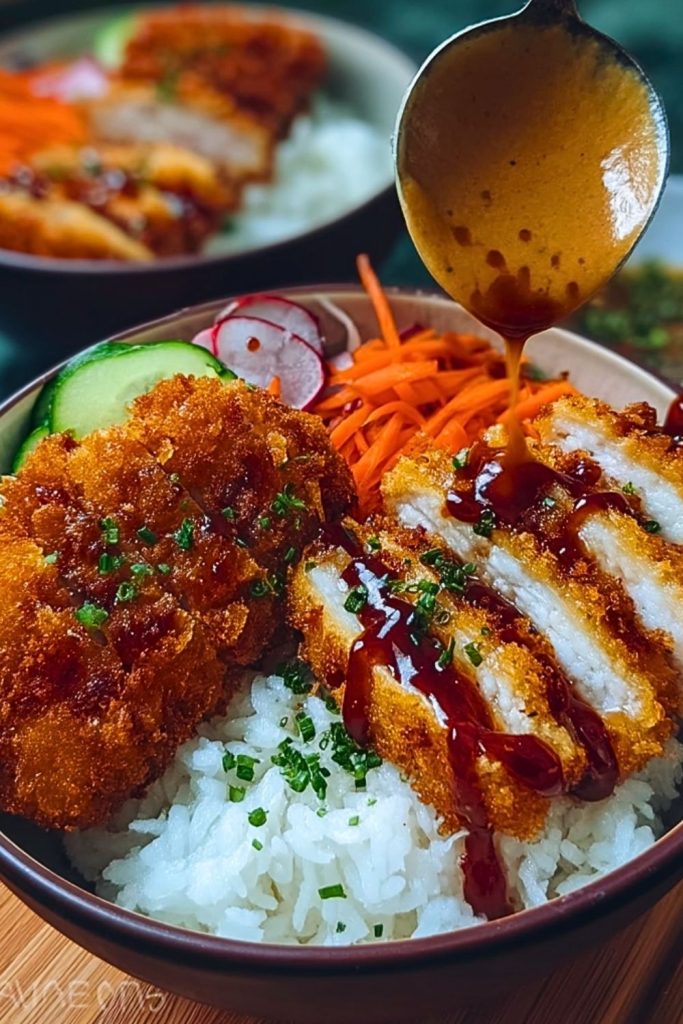
Step 5: Assemble the Bowl
Scoop a generous portion of rice into a deep bowl. Slice the crispy chicken into strips and neatly lay them on top of the rice. Drizzle plenty of tonkatsu sauce over the chicken, and if you like, sprinkle chopped parsley or green onions over everything for a fresh, colorful touch.
How Long to Cook Japanese Katsu Bowls with Tonkatsu Sauce
The actual frying of the chicken doesn’t take long — about 3 to 4 minutes per side. You’ll know it’s done when the outside is a deep golden brown and the internal temperature reaches 165°F (74°C). The rice typically takes about 15 to 20 minutes to cook, depending on your rice cooker or stovetop method. Altogether, you can expect the full dish to come together in about 35 minutes from start to finish, making it a pretty quick option for a satisfying meal.
Tips for Perfect Japanese Katsu Bowls with Tonkatsu Sauce
- Keep the Oil Temperature Steady: Too hot, and the breading burns before the chicken cooks through. Too cool, and the katsu turns out greasy. Aim for that sweet spot around 350°F.
- Don’t Overcrowd the Pan: Fry the chicken in batches if needed. Overcrowding lowers the oil temperature and results in soggy, unevenly cooked katsu.
- Press the Panko Firmly: After coating with panko, gently press it onto the chicken to ensure a thick, even crust that won’t fall off during frying.
- Drain on a Wire Rack: Instead of paper towels, use a wire rack over a baking sheet to drain the fried chicken — it keeps the underside crispy instead of soggy.
- Slice After Resting: Give the fried chicken a minute to rest before slicing. It helps the juices redistribute and keeps everything tender.
- Warm Up the Tonkatsu Sauce: A slightly warmed sauce clings better to the crispy chicken and enhances the overall flavor experience.
- Fluff the Rice: Before serving, fluff the cooked rice gently with a fork or rice paddle to keep it light and airy.
- Garnish Thoughtfully: A sprinkle of finely chopped parsley, sesame seeds, or green onions adds a beautiful final touch and a hint of freshness.
Watch Out for These Mistakes While Cooking
- Skipping the Meat Prep: Not pounding the chicken evenly can lead to uneven cooking — with dry, overcooked edges and undercooked centers. A little effort with the meat mallet makes a huge difference.
- Skipping Seasoning: It’s easy to forget to season the meat before breading, but it’s crucial for flavorful katsu. Always salt and pepper before dredging.
- Wrong Oil Temperature: Frying at too low a temperature will cause the katsu to absorb oil and become greasy. If too high, the coating burns while the inside remains raw.
- Overcrowding the Pan: Cramming too many pieces in the pan drops the oil’s temperature, leading to soggy, uneven frying.
- Thin Breading: A light panko coat won’t give that satisfying crunch. Be generous and press the crumbs in firmly.
- Skipping the Draining Step: Resting the fried chicken on a plate lined with paper towels can cause the bottom to steam and go soft. Always drain on a wire rack if possible.
- Serving with Cold Rice: Cold, clumpy rice doesn’t do justice to the crispy chicken. Freshly cooked or properly reheated rice is a must.
- Forgetting the Sauce: The tonkatsu sauce is more than just a topping — it’s what ties the whole dish together. Don’t skimp!
What to Serve With Japanese Katsu Bowls with Tonkatsu Sauce?
1. Miso Soup
A warm, comforting bowl of miso soup pairs beautifully with the crispiness of the katsu.
2. Pickled Vegetables
Tsukemono (Japanese pickles) add a bright, tangy contrast to the rich, savory flavors of the bowl.
3. Shredded Cabbage Salad
A pile of finely shredded cabbage with a light vinaigrette offers refreshing crunch alongside the hearty chicken.
4. Edamame
Lightly salted steamed edamame pods make a simple, satisfying side.
5. Japanese Potato Salad
Creamy, slightly sweet, and packed with crunchy vegetables — it’s a classic side dish for katsu meals.
6. Seaweed Salad
The briny freshness of seaweed salad provides a lovely balance to the rich katsu.
7. Steamed Broccoli
For a healthy, green side, quickly steamed broccoli drizzled with a little sesame oil works wonders.
8. Gyoza (Japanese Dumplings)
If you’re feeling indulgent, a few pan-fried gyoza on the side turn the meal into a true Japanese feast.
Storage Instructions
If you happen to have leftovers (which honestly is rare because these bowls are that good), here’s how to keep everything fresh:
- Chicken Katsu: Store the fried chicken separately from the rice and sauce whenever possible. Wrap the chicken loosely in foil or place it in an airtight container, then refrigerate. It will stay good for up to 3 days.
- Rice: Keep the rice in a sealed container. To prevent it from drying out, sprinkle a little water over the rice before reheating, then microwave covered.
- Tonkatsu Sauce: The sauce can be stored in a small airtight jar or container in the fridge for about 1 week.
How to Reheat:
- For best results, reheat the chicken katsu in an oven or air fryer at 350°F for about 8–10 minutes to bring back that crispy magic. Microwaving works in a pinch but will make the coating softer.
- Rice and sauce are easy to reheat in the microwave.
Tip: Always reheat the components separately to keep everything at its best.
Estimated Nutrition
Here’s a general estimate for one serving of Japanese Katsu Bowls with Tonkatsu Sauce:
- Calories: ~650 kcal
- Protein: ~32g
- Fat: ~28g
- Carbohydrates: ~65g
- Fiber: ~3g
- Sugar: ~6g
- Sodium: ~900mg
Note: These values can vary depending on the exact portion sizes and specific ingredients you use, especially the amount of tonkatsu sauce and the type of oil absorbed during frying.
Here’s Part 8 for Japanese Katsu Bowls with Tonkatsu Sauce:
Frequently Asked Questions
1. Can I bake the chicken instead of frying it?
Yes! You can bake the breaded chicken at 400°F (200°C) for about 20–25 minutes, flipping halfway through. Spritz it with a little cooking spray to help it crisp up nicely.
2. Can I use pork instead of chicken for this recipe?
Absolutely. Traditional tonkatsu is actually made with pork cutlets! Just follow the same breading and frying steps.
3. Is there a vegetarian version of this bowl?
Yes! Swap the chicken for firm tofu or even thick slices of eggplant. Bread and fry them the same way for a delicious vegetarian katsu bowl.
4. What’s the best rice to use for katsu bowls?
Short-grain Japanese rice is ideal because of its soft, sticky texture. Sushi rice works great too.
5. How do I make the tonkatsu sauce from scratch?
Mix together ketchup, Worcestershire sauce, soy sauce, sugar, and a little Dijon mustard. It’s quick, easy, and tastes amazing!
6. How do I keep the breading from falling off during frying?
Make sure to press the panko firmly into the chicken after dipping it in egg. Also, let the breaded chicken rest for a few minutes before frying to help everything set.
7. Can I freeze leftover katsu?
Yes, you can freeze cooked chicken katsu! Wrap it tightly and store in a freezer-safe bag for up to 2 months. Reheat in the oven or air fryer for best results.
8. Is tonkatsu sauce spicy?
Not really — it’s more sweet, tangy, and savory. If you want some heat, you can add a little sriracha or hot mustard to your sauce!
Conclusion
Japanese Katsu Bowls with Tonkatsu Sauce aren’t just another dinner idea — they’re a soul-warming, belly-filling, pure-comfort kind of meal. Crispy chicken, fluffy rice, and that addictive sauce all come together in the most satisfying way. Whether you’re cooking for yourself, your family, or guests, this dish never fails to impress. Plus, with all the tips, tricks, and variations we’ve covered, you can truly make it your own. It’s quick enough for a weeknight and special enough for the weekend — the ultimate win-win meal!

Japanese Katsu Bowls with Tonkatsu Sauce
- Prep Time: 15 minutes
- Cook Time: 20 minutes
- Total Time: 35 minutes
- Yield: 2 servings 1x
Description
Craving a comforting meal that’s both crispy and flavorful? Look no further than these Japanese Katsu Bowls with Tonkatsu Sauce! Perfect for a quick dinner, an easy lunch, or adding to your list of family favorite dinner ideas, this dish brings the irresistible combination of crunchy chicken katsu, fluffy rice, and rich tonkatsu sauce to your table. Whether you’re looking for easy recipes, weeknight food ideas, or just want a healthy snack with a little indulgence, this bowl delivers satisfaction in every bite. The golden, crunchy coating, the tender juicy meat, and the tangy-savory sauce make this meal a guaranteed crowd-pleaser. It’s comfort food, Japanese-style — and absolutely unforgettable!
Ingredients
- 2 boneless, skinless chicken thighs or breasts
- ½ teaspoon salt
- ½ teaspoon black pepper
- ½ cup all-purpose flour
- 2 large eggs, beaten
- 1 ½ cups panko breadcrumbs
- Neutral oil for frying (vegetable or canola oil)
- 2 cups cooked short-grain Japanese rice
- ½ cup tonkatsu sauce (store-bought or homemade)
- Optional: chopped parsley or green onions for garnish
Instructions
- Trim and pound the chicken to an even ½-inch thickness.
- Season both sides of the chicken with salt and pepper.
- Set up three bowls: flour, beaten eggs, and panko breadcrumbs.
- Dredge each chicken piece in flour, then dip into egg, then coat with panko.
- Heat ½ inch of oil in a pan to 350°F.
- Fry the breaded chicken for 3–4 minutes per side until golden and cooked through.
- Drain fried chicken on a wire rack to maintain crispiness.
- While chicken is frying, cook rice according to package directions.
- Slice fried chicken into strips.
- Assemble bowls with a bed of rice, topped with sliced chicken and a drizzle of tonkatsu sauce.
- Garnish with parsley or green onions if desired.
- Serve immediately and enjoy!