
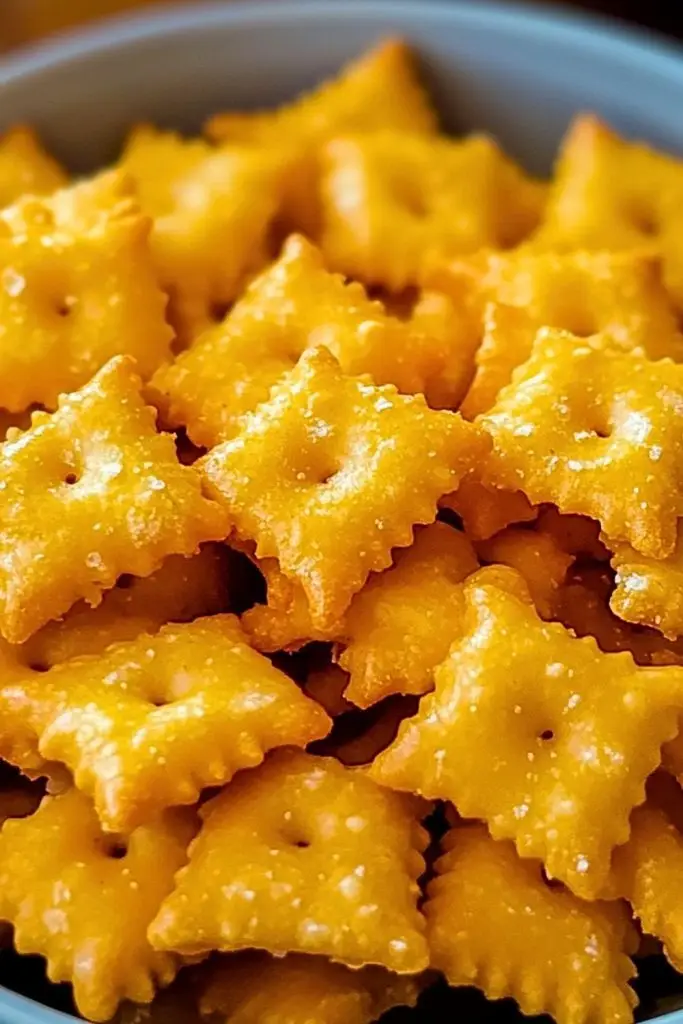
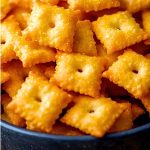
There’s something wildly satisfying about pulling a tray of homemade Cheez-Its out of the oven. I’ve always been obsessed with their sharp cheddar bite, delicate crunch, and that telltale square shape with the center poke. But once I started making them from scratch, I realized they’re not only fun to create, but also taste so much better than store-bought. These crispy, cheesy crackers deliver a real cheddar flavor with none of the additives or preservatives.
The best part? You only need a handful of ingredients and a bit of patience. Whether you’re baking these for a kids’ snack, a party platter, or just to satisfy your own craving, this recipe brings serious flavor and nostalgia. You’ll be amazed at how close they are to the real thing—maybe even better.
Why You’ll Love This Homemade Cheez-Its Recipe
These homemade Cheez-Its are the perfect mix of savory and crispy. They’re made with real cheddar, so the flavor is bold and cheesy without any artificial taste. Plus, they’re surprisingly easy to make! The dough comes together in a food processor, and once rolled and cut, the baking process is quick. They’re also endlessly customizable—you can tweak the cheese, spices, or even turn them into a spicy version if you like.
Another reason to love them? They store well, making them a great make-ahead snack. And if you enjoy baking projects with satisfying results, this one checks all the boxes.
What Kind of Cheese Should I Use?
The signature flavor of Cheez-Its comes from sharp cheddar cheese—and that’s exactly what you’ll want to use here. I recommend going for a block of extra-sharp cheddar and shredding it yourself. Pre-shredded cheese often contains anti-caking agents that can affect how the dough comes together and bakes.
You can also experiment with white cheddar, aged cheddar, or even a smoky cheddar for a more adventurous batch. Just make sure whatever cheese you choose is firm and full of bold flavor—this isn’t the place for mild cheese or soft varieties like mozzarella or brie.
Options for Substitutions
While the original version uses extra-sharp cheddar, there are some great substitutions you can try depending on your taste or dietary needs:
- Cheese Alternatives: Try gouda, gruyère, or pepper jack for a twist. You can even mix cheeses for layered flavor.
- Butter Substitutes: Use plant-based butter if you’re aiming for a dairy-free version. Coconut oil could work too, though it might subtly change the taste.
- Flour Options: All-purpose flour is standard, but you can substitute with whole wheat flour for a nuttier taste or use a 1:1 gluten-free flour blend for a GF version.
- Spice It Up: Add a pinch of cayenne pepper, smoked paprika, or even a bit of garlic powder for extra flavor.
Flexibility is part of what makes this recipe fun—customize it based on what’s in your fridge or pantry and your snack cravings.
Ingredients for This Homemade Cheez-Its Recipe
Each ingredient in this recipe plays a key role in creating the authentic flavor and crispy texture that makes Cheez-Its so addictive. Here’s what you’ll need and why it matters:
- Extra-Sharp Cheddar Cheese
This is the heart of the recipe. It delivers the intense, tangy, savory flavor that defines a true Cheez-It. Shred it fresh for the best melt and taste. - All-Purpose Flour
Flour gives the crackers their structure. It binds the dough and helps create a crisp finish once baked. - Unsalted Butter
Butter adds richness and helps create that irresistible flaky, tender texture. It also complements the cheese’s saltiness. - Salt
Just a bit enhances the cheese flavor without overwhelming it. A sprinkle on top before baking is also key to that classic Cheez-It taste. - Cold Water
Added gradually, water helps bring the dough together without making it sticky. The temperature matters—cold water keeps the butter from melting too early. - Optional: Cayenne Pepper or Paprika
A pinch of spice gives your crackers a subtle kick and extra depth, if you’re into a little heat or smoky flavor.
Each ingredient has a purpose, and together they create the magic of homemade Cheez-Its—crispy, cheesy, and totally snackable.
Step 1: Make the Dough
In a food processor, combine the shredded extra-sharp cheddar cheese, all-purpose flour, salt, and optional spices (like cayenne or paprika). Pulse until the mixture resembles coarse crumbs. Add the cold butter and pulse again until the dough starts to come together. Slowly drizzle in cold water, one tablespoon at a time, until the dough forms a ball.
Step 2: Chill the Dough
Transfer the dough onto plastic wrap, form it into a disc, and wrap tightly. Refrigerate it for at least 1 hour. This step is crucial—it helps firm up the butter and relaxes the gluten for easier rolling and better texture.
Step 3: Roll Out and Cut
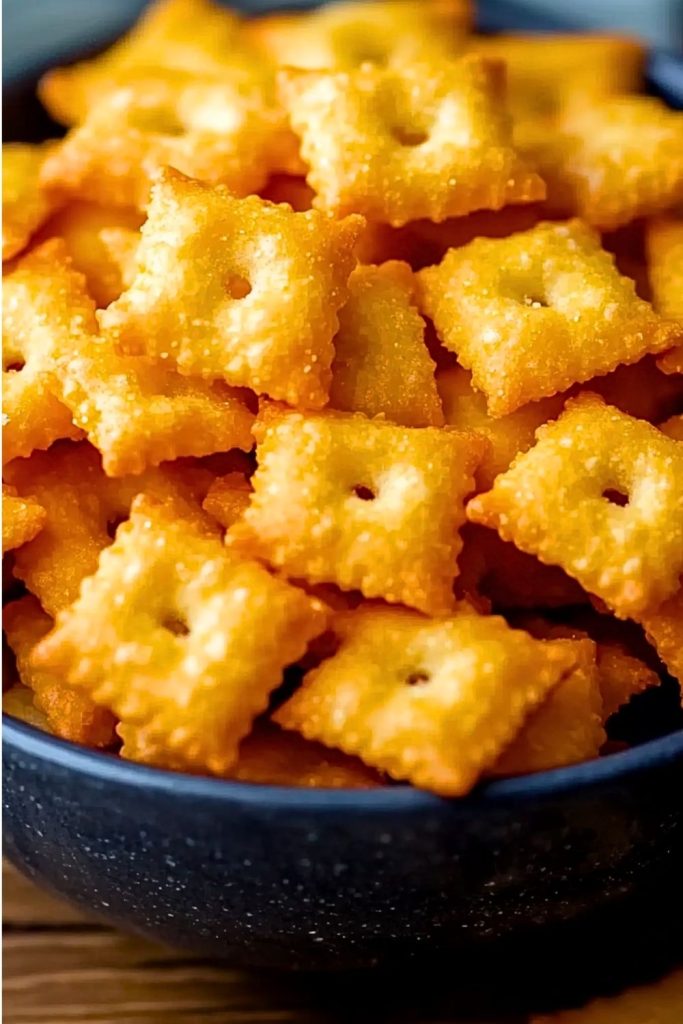
Preheat your oven to 375°F (190°C). On a lightly floured surface, roll out the chilled dough into a thin sheet—about 1/8-inch thick. Using a pastry wheel or knife, cut the dough into 1-inch squares. Use a skewer or straw to poke a hole in the center of each cracker (for that signature Cheez-It look and even baking).
Step 4: Bake
Place the squares on a parchment-lined baking sheet, spaced slightly apart. If you like a bit of extra saltiness, sprinkle a little coarse salt over the top. Bake for 12 to 15 minutes, or until the crackers are puffed and golden around the edges.
Step 5: Cool and Enjoy
Let the crackers cool on the baking sheet for a few minutes before transferring them to a wire rack. They’ll continue to crisp as they cool. Once fully cooled, they’re ready to be devoured—or stored for snacking later.
How Long to Cook the Homemade Cheez-Its
The baking time for homemade Cheez-Its is typically 12 to 15 minutes at 375°F (190°C). You’ll know they’re done when the edges are golden brown and the crackers are slightly puffed.
Keep a close eye around the 12-minute mark—since they’re thin, they can go from perfect to overdone very quickly. If your oven has hot spots, you might want to rotate the pan halfway through to ensure even browning.
Let them cool on the pan for a few minutes before moving to a wire rack. They crisp up even more as they cool, giving you that signature snap.
Tips for Perfect Homemade Cheez-Its
- Use Cold Butter and Water
Keeping these ingredients cold prevents the butter from melting too early, which helps the crackers puff and crisp instead of spreading too much. - Roll Evenly
Aim for uniform thinness when rolling the dough. Uneven spots may burn or underbake. A rolling pin with guides is a handy tool here. - Don’t Skip the Chill Time
Chilling firms up the dough, making it easier to cut cleanly and helping the crackers hold their shape in the oven. - Don’t Overcrowd the Tray
Leave just a bit of space between crackers—enough so they bake evenly without steaming each other. - Add a Light Salt Sprinkle Before Baking
It enhances the cheesy flavor and gives that classic salty bite you expect from Cheez-Its. - Cool Completely Before Storing
Any residual warmth will soften your crackers in storage. Let them fully cool for ultimate crunch.
Watch Out for These Mistakes While Cooking
Even though this recipe is pretty straightforward, a few missteps can affect the final crunch or flavor. Here’s what to watch for:
- Using Pre-Shredded Cheese
It may seem convenient, but pre-shredded cheese has added starches and anti-caking agents that can prevent the dough from binding properly and can dull the flavor. - Overworking the Dough
Too much handling can make the crackers tough. Mix and roll just enough to bring everything together smoothly. - Rolling Too Thick or Too Thin
Thick crackers may not crisp, while ultra-thin ones could burn quickly. Aim for about 1/8 inch thick. - Skipping the Chill Time
This step is vital. Warm dough is harder to cut and won’t bake evenly. - Not Poking the Holes
That little hole isn’t just for looks—it allows steam to escape so the crackers don’t puff too much or become uneven. - Baking Too Long or Not Enough
Timing is everything. Underbake and they’ll be soft, overbake and they’ll taste bitter. Check often during the last few minutes.
What to Serve With Homemade Cheez-Its?
These cheesy crackers are fantastic on their own, but they also pair beautifully with all kinds of snacks and dips. Here are some ideas:
Sliced Apples or Pears
The sweet juiciness of fresh fruit is a perfect contrast to the sharp cheddar bite.
Spicy Mustard or Honey Mustard
A tiny bowl of mustard dip turns these crackers into a fun party snack.
Tomato Soup
Just like grilled cheese and tomato soup, these cheesy crackers are delicious with a warm bowl of soup.
Hummus
The creamy texture and savory spices of hummus pair really well with the crunchy, cheesy base.
Cured Meats
Make a quick charcuterie board with some salami, prosciutto, or pepperoni.
Pickles or Olives
Their briny, acidic bite cuts through the richness of the cheese beautifully.
Ranch or Cheese Dip
Doubling up on cheese? Absolutely. And ranch adds a cool, herby contrast.
Beer or Sparkling Water
For adult snacking, Cheez-Its with a cold beer is an iconic combo. Or go with a flavored sparkling water for a lighter touch.
Storage Instructions
Homemade Cheez-Its store surprisingly well—if you can resist finishing them all at once! Once completely cooled, transfer the crackers to an airtight container. They’ll stay fresh and crispy for up to 5–7 days at room temperature.
If you live in a humid climate, you can toss a piece of parchment or a dry paper towel into the container to absorb moisture and keep the texture crisp. Avoid refrigerating them, as that can soften the crackers. For longer storage, you can freeze them in a sealed freezer bag for up to 1 month, though the texture may not be quite as snappy after thawing.
Estimated Nutrition
The nutritional values will vary depending on the size of your crackers and specific ingredients used, but here’s a general estimate for a 1-ounce (about 25–30 crackers) serving:
- Calories: ~140
- Total Fat: 9g
- Saturated Fat: 5g
- Cholesterol: 20mg
- Sodium: 230mg
- Carbohydrates: 10g
- Fiber: <1g
- Sugar: <1g
- Protein: 4g
These numbers make them a fairly indulgent snack—but with simple, recognizable ingredients, they’re a better alternative to many packaged versions.
Frequently Asked Questions
Can I make these without a food processor?
Yes! You can use a pastry cutter or even your fingers to blend the butter into the flour and cheese. It takes more time, but the results are just as tasty.
Can I freeze the dough instead of baking it right away?
Absolutely. Wrap the dough tightly in plastic wrap and store in the freezer for up to a month. Let it thaw in the fridge overnight before rolling and baking.
How do I make them spicier?
Add ¼ teaspoon of cayenne pepper, chili powder, or crushed red pepper flakes to the dough. You can also sprinkle some on top before baking for extra heat.
My crackers turned out soft. How can I make them crispier?
They were likely underbaked or not cooled properly. Try baking them a minute or two longer next time, and always cool completely before storing.
Can I use pre-shredded cheese?
You can, but I don’t recommend it. Pre-shredded cheese contains starches and anti-caking agents that affect both texture and taste.
How do I make gluten-free Cheez-Its?
Use a 1:1 gluten-free flour blend. Just be mindful that the texture may be slightly different, so you might need to adjust baking time slightly.
What if I don’t have parchment paper?
Lightly greasing your baking sheet will work in a pinch, but parchment helps prevent sticking and encourages even browning.
Can I double the recipe?
Definitely! Just divide the dough into two discs and bake in batches to avoid overcrowding the baking sheet.
Conclusion
Homemade Cheez-Its are one of those small kitchen victories that feel so satisfying. They’re cheesy, crispy, and crafted with simple ingredients you can actually pronounce. Whether you’re making a batch for the kids, a party, or just your own snack stash, these golden little squares never disappoint. Once you try them, you may never go back to the box again.
Homemade Cheez-Its
- Prep Time: 15 minutes
- Cook Time: 12 minutes
- Total Time: 27 minutes
- Yield: About 80 crackers 1x
Description
Homemade Cheez-Its are a nostalgic, cheesy, and crispy snack made with real sharp cheddar, flour, butter, and just a pinch of salt. They’re quick to make, full of bold flavor, and perfect for snacking, lunchboxes, or party platters. These crackers are baked until golden and offer a satisfying crunch with every bite.
Ingredients
- 8 oz extra-sharp cheddar cheese, shredded
- 1 cup all-purpose flour
- 4 tbsp unsalted butter, cold and cubed
- ½ tsp salt (plus extra for sprinkling)
- 2 to 3 tbsp cold water
- Optional: ¼ tsp cayenne pepper or paprika for flavor boost
Instructions
- In a food processor, combine shredded cheese, flour, salt, and optional spice. Pulse to blend.
- Add cold butter and pulse until the mixture resembles coarse crumbs.
- Slowly add cold water, 1 tablespoon at a time, until dough comes together.
- Wrap dough in plastic wrap, form into a disc, and chill for 1 hour.
- Preheat oven to 375°F (190°C).
- Roll out chilled dough on a floured surface to about ⅛-inch thickness.
- Cut into 1-inch squares with a knife or pastry cutter. Poke a hole in the center of each.
- Place on parchment-lined baking sheet. Sprinkle with extra salt if desired.
- Bake for 12–15 minutes, until edges are golden and crackers puff slightly.
- Let cool on baking sheet for 5 minutes, then transfer to wire rack to cool completely.