Golden, bubbling, and perfectly rustic — Hillbilly Pie, also lovingly called Poor Man’s Pie, is the ultimate tribute to simple ingredients transforming into something unforgettable. With a flaky, buttery crust and a sweet filling that often features pantry staples like sugar, flour, and eggs, this Depression-era dessert has long been a symbol of comfort and resourcefulness in American kitchens. You’ll typically find it made with what’s available — sometimes custardy, sometimes fruity — but always humble and delicious.
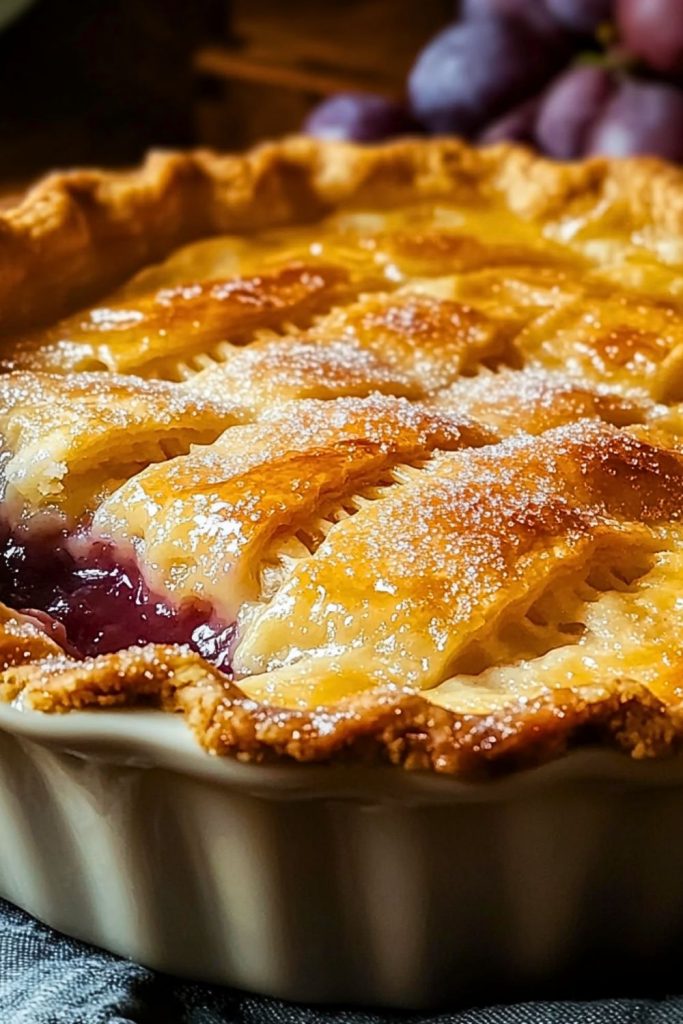
What makes this pie so special isn’t just its taste but its history. Rooted in Southern and Appalachian traditions, it originated during times when store-bought ingredients were luxuries, and ingenuity was a necessity. Today, it carries that spirit forward — a sweet slice of the past that speaks of warmth, resilience, and pure old-fashioned flavor.
Why You’ll Love This Hillbilly Pie Recipe
- Budget-Friendly: Created out of necessity, it uses ingredients you likely already have at home.
- Easy to Make: No need for fancy techniques or equipment — it’s as straightforward as pie can get.
- Incredibly Versatile: Switch up the filling depending on what you have — dried fruits, jam, or even just sugar and butter.
- Nostalgic & Comforting: This pie brings back memories of simpler times and kitchens filled with homemade love.
- Perfect for Any Occasion: Whether it’s Sunday dinner, a potluck, or just a quiet evening, it fits right in.
Preparation Phase & Tools to Use (Essential Tools and Their Importance)
Creating a Hillbilly Pie may be humble in nature, but having the right tools ensures your pie comes out beautifully every time. Here’s what you’ll need and why each tool matters:
- Mixing Bowls (Medium and Large)
You’ll need at least two: one for the filling and another for mixing or sifting dry ingredients. Choose glass or stainless steel for easy cleanup and durability. - Whisk or Wooden Spoon
Vital for blending your sugar, flour, eggs, and milk into a smooth, creamy filling. A whisk works best for eliminating lumps and incorporating air. - Rolling Pin (if making crust from scratch)
Helps you evenly roll out the dough. If you don’t have one, a wine bottle can substitute in a pinch. - Pie Dish (9-inch recommended)
A ceramic or glass pie dish distributes heat evenly, resulting in a golden crust and even bake. - Oven & Rack Placement
Preheat your oven thoroughly and bake on the middle rack to ensure even cooking without burning the crust edges. - Pastry Cutter or Fork (optional)
If you’re making your crust from scratch, a pastry cutter helps blend fat into flour for a flaky base. - Measuring Cups & Spoons
Accuracy matters with a pie like this, especially for the custard-like filling, so have a full set ready.
Preparation Tips
- Use Room Temperature Ingredients
Eggs and milk mix more smoothly at room temperature, reducing clumping in the filling. - Chill Your Crust
If making your own dough, let it rest and chill before rolling it out. This prevents shrinking and helps with flakiness. - Blind Bake the Crust (Optional but Recommended)
Pre-bake your crust for 10 minutes before adding the filling if it tends to get soggy. Use pie weights or dried beans to keep it from puffing. - Don’t Overfill the Pie
Leave a small gap at the top of the crust to prevent spills while baking. - Let it Cool Before Slicing
The filling sets as it cools. Cutting too early can make your slices messy instead of firm and neat.
Ingredients for This Hillbilly Pie Recipe
The beauty of Hillbilly Pie lies in its simplicity. You can make it with minimal ingredients, many of which are pantry staples. Below is a classic version featuring a custard-style filling with optional fruit or jam for added flavor and texture.
For the Pie Crust (if homemade):
- 1 ¼ cups all-purpose flour
- ½ teaspoon salt
- ½ cup cold unsalted butter (cubed)
- 3–4 tablespoons ice water
(You can also use a store-bought 9-inch pie crust for convenience.)
For the Filling:
- 1 cup granulated sugar
- 2 tablespoons all-purpose flour
- 2 large eggs
- 1 cup whole milk (or evaporated milk for richer flavor)
- 1 teaspoon vanilla extract
- 2 tablespoons unsalted butter (melted)
- Pinch of salt
Optional Flavor Add-Ins:
- ¼ cup grape jelly or apple butter (for spreading on the bottom of the crust)
- ¼ teaspoon ground cinnamon or nutmeg
- A handful of raisins or dried fruit (rehydrated in warm water)
This list keeps things traditional, but feel free to adapt based on what’s in your kitchen. The heart of the pie is the sweet, custard-like filling — everything else is a tasty bonus.
Step-by-Step Instructions for Hillbilly Pie (Poor Man’s Pie)
With your ingredients gathered and tools ready, it’s time to bring this classic comfort dessert to life. Whether you’re using a homemade or store-bought crust, this process is all about ease and flavor.
Step 1: Preheat and Prep
Preheat your oven to 350°F (175°C).
If using a homemade crust, roll it out and gently press it into your 9-inch pie dish. Crimp the edges and refrigerate while preparing the filling.
Step 2: (Optional) Blind Bake the Crust
To avoid a soggy bottom, blind bake the crust for 10 minutes. Line the crust with parchment paper and fill with pie weights or dried beans. Remove after 10 minutes, discard the weights, and let it cool slightly.
Step 3: Make the Filling
In a large bowl, whisk together:
- 1 cup granulated sugar
- 2 tablespoons all-purpose flour
- Pinch of salt
Add in:
- 2 large eggs
- 1 cup milk
- 1 teaspoon vanilla extract
- 2 tablespoons melted butter
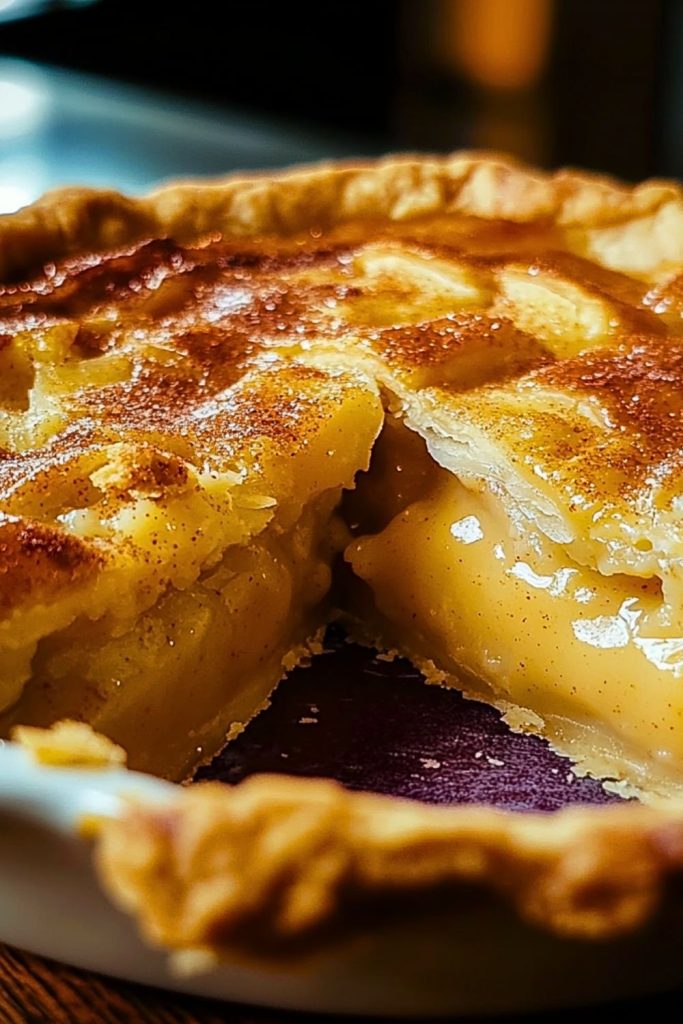
Whisk until smooth and well combined. The mixture should be pourable and custardy.
Step 4: Add Optional Layer
If using grape jelly, apple butter, or jam, spread a thin layer over the base of your pie crust. This adds a rich and slightly tart depth to the otherwise sweet custard.
Step 5: Pour and Bake
Slowly pour the custard filling into the pie crust. Place the dish on the center oven rack and bake for 35–40 minutes, or until the filling is set and the center jiggles just slightly when shaken.
Step 6: Cool Completely
Remove the pie from the oven and allow it to cool at room temperature for at least 1 hour. The custard will firm up further as it cools, making it easier to slice.
Step 7: Slice and Serve
Once cooled, slice into wedges and serve as-is or with a dusting of powdered sugar. For an extra treat, add a dollop of whipped cream or a scoop of vanilla ice cream.
Notes
Hillbilly Pie isn’t fussy — and that’s the charm. But a few thoughtful tips can elevate your results and ensure a pie that’s truly memorable.
- Sweetness Level: This pie leans on the sweet side. If you prefer a milder dessert, reduce the sugar slightly (to about ¾ cup).
- Milk Variations: Whole milk gives the creamiest texture, but you can use evaporated milk for a richer taste or 2% if that’s what’s on hand.
- Egg Size Matters: Use large eggs for the proper custard texture. Too small, and the filling might not firm up enough.
- Add a Crust Sprinkle: For added texture, some cooks like to sprinkle a pinch of cornmeal or sugar on the crust before baking.
- Custard Test: The center should jiggle like gelatin when it’s done, not slosh. Overbaking can cause cracks.
Watch Out for These Mistakes While Cooking
Even a simple pie can go sideways if you’re not mindful. Avoid these common pitfalls:
- Skipping the Preheat: Putting a pie into a cold oven disrupts the bake time and affects texture.
- Overmixing the Filling: Whisk until smooth, but don’t whip too much air into the mixture — it can create bubbles and uneven baking.
- Overfilling the Crust: The filling will puff and settle; too much can lead to spillage and a messy oven.
- Underbaking: A pale, jiggly center means the custard isn’t done. Bake until the edges are firm and the center just quivers.
- Serving Too Soon: Let it cool completely — slicing too early will give you a runny mess.
- Using Cold Butter in the Filling: If the melted butter isn’t fully liquid, it won’t blend well and may cause curdling.
- Storing While Still Warm: Sealing a warm pie can trap steam, making the crust soggy.
What to Serve With Hillbilly Pie?
This classic, sweet, custardy pie pairs beautifully with a variety of accompaniments — from warm drinks to fresh toppings. Whether you’re dressing it up for guests or keeping it cozy for a weeknight treat, the right pairing makes each bite even more satisfying.
8 Recommendations:
- Whipped Cream
A light, airy topping that balances the dense sweetness of the pie. Homemade is best, but store-bought will do in a pinch. - Vanilla Ice Cream
The contrast of cold ice cream with warm or room-temperature pie is a nostalgic comfort combination. - Stewed Apples or Pears
Add a warm, gently spiced fruit compote on the side to complement the pie’s creamy filling. - Fresh Berries
Strawberries, raspberries, or blueberries lend a fresh, tangy brightness that cuts through the sweetness. - Hot Coffee or Chicory Brew
A strong, slightly bitter cup balances the sugary filling and pays homage to the pie’s Southern roots. - Chai or Spiced Tea
Cinnamon, cardamom, and cloves mirror the optional spice notes often added to the filling. - Toasted Pecans or Walnuts
Sprinkle on top just before serving for added texture and a nutty richness. - Salted Caramel Drizzle
For a modern twist, lightly drizzle some salted caramel over each slice. The salt enhances the sweetness without overpowering.
Storage Instructions
Hillbilly Pie stores exceptionally well, which makes it a perfect make-ahead dessert for gatherings or a sweet treat throughout the week. Here’s how to keep it fresh and delicious:
- At Room Temperature: If you plan to serve it the same day, you can leave it covered on the counter for up to 6–8 hours. Make sure it’s in a cool spot and loosely covered with foil or a pie dome.
- In the Refrigerator: For longer storage, refrigerate the pie. Wrap it tightly with plastic wrap or aluminum foil and store it for up to 4–5 days. The custard will firm up even more and the flavor deepens over time.
- Freezing: You can freeze Hillbilly Pie, though the texture may change slightly. Wrap it securely in plastic wrap and foil, or place slices in airtight containers. Freeze for up to 2 months. Thaw overnight in the fridge and reheat gently if desired.
- Reheating Tips: Warm slices in a 300°F (150°C) oven for 10–15 minutes or microwave for 20–30 seconds. Avoid overheating to preserve the smooth custard texture.
Estimated Nutrition
Note: Values are approximate and based on 1 slice (1/8 of a 9-inch pie).
- Calories: 280–320 kcal
- Fat: 12–15g
- Saturated Fat: 6g
- Carbohydrates: 38–42g
- Sugars: 25–30g
- Protein: 4–5g
- Cholesterol: 80–100mg
- Sodium: 120–160mg
- Fiber: 0.5–1g
The exact nutritional breakdown may vary depending on whether you use whole milk, evaporated milk, additional fillings like jam, or a store-bought crust.
Frequently Asked Questions
1. Can I make Hillbilly Pie without a crust?
Yes! You can turn it into a crustless custard pie by greasing a pie dish and pouring the filling directly in. It will set like a baked pudding.
2. What’s the origin of the name “Poor Man’s Pie”?
The name reflects its roots during the Great Depression when cooks had to rely on cheap, accessible ingredients. It’s a symbol of ingenuity and simplicity.
3. Can I use evaporated milk instead of regular milk?
Absolutely — and many traditional recipes do. It gives a richer, creamier texture and adds depth to the flavor.
4. Is this pie supposed to be jiggly in the center when done?
Yes, a slight jiggle (like Jell-O) is normal. It will continue to firm up as it cools. If it sloshes like liquid, it needs more baking time.
5. Can I make this pie gluten-free?
Yes. Use a gluten-free pie crust and replace the flour in the filling with a 1:1 gluten-free flour blend or cornstarch.
6. What can I use instead of butter in the filling?
You can substitute melted coconut oil or margarine if you’re avoiding dairy, though it may slightly change the flavor.
7. How do I know when it’s fully baked?
The top will look golden and slightly puffed. Insert a toothpick near the center — it should come out mostly clean, not wet.
8. Can I double the recipe for a crowd?
Yes! Use two pie dishes and double all ingredients. Bake both pies side by side and rotate them halfway through for even cooking.
Conclusion
Hillbilly Pie (Poor Man’s Pie) is more than just a dessert — it’s a testament to resourcefulness, comfort, and the timeless power of homemade baking. Whether you serve it at a family gathering or enjoy a quiet slice with coffee, it brings a warmth that’s deeply nostalgic and wholly satisfying.
With minimal ingredients, forgiving steps, and a melt-in-your-mouth texture, this pie proves you don’t need fancy techniques or expensive ingredients to make something truly special. Simple. Sweet. Soulful.

Hillbilly Pie (Poor Man’s Pie)
- Prep Time: 15 minutes
- Cook Time: 35 minutes
- Total Time: 50 minutes
- Yield: 1 9-inch pie (8 slices) 1x
Description
Hillbilly Pie, also known as Poor Man’s Pie, is a nostalgic, custard-style dessert that harks back to the Great Depression era. Made from pantry staples like sugar, flour, eggs, and milk, it delivers rich, creamy comfort in every bite. Its simplicity and old-fashioned charm make it perfect for any occasion.
Ingredients
For the Pie Crust (Optional – use store-bought or homemade):
- 1 1/4 cups all-purpose flour
- 1/2 teaspoon salt
- 1/2 cup cold unsalted butter (cubed)
- 3–4 tablespoons ice water
For the Filling:
- 1 cup granulated sugar
- 2 tablespoons all-purpose flour
- Pinch of salt
- 2 large eggs
- 1 cup whole milk (or evaporated milk)
- 1 teaspoon vanilla extract
- 2 tablespoons unsalted butter (melted)
Optional Add-Ins:
- 1/4 cup grape jelly or apple butter
- 1/4 teaspoon cinnamon or nutmeg
- Handful of raisins or rehydrated dried fruit
Instructions
- Preheat oven to 350°F (175°C).
- Prepare pie crust: If making from scratch, mix flour and salt, cut in butter, and add ice water until dough forms. Roll out and place into a 9-inch pie dish.
- (Optional) Blind bake crust for 10 minutes using pie weights, then cool slightly.
- In a bowl, mix sugar, flour, and salt. Add eggs, milk, vanilla, and melted butter. Whisk until smooth.
- (Optional) Spread grape jelly or apple butter on bottom of crust.
- Pour filling into crust.
- Bake for 35–40 minutes, until edges are set and center jiggles slightly.
- Cool for at least 1 hour before slicing.

