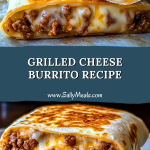
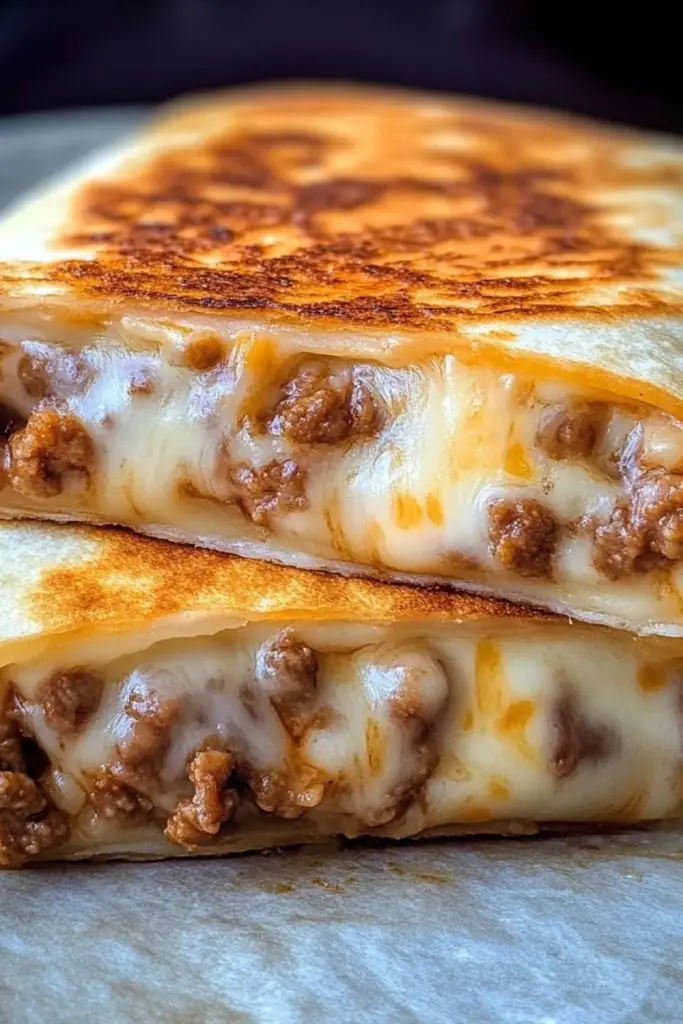
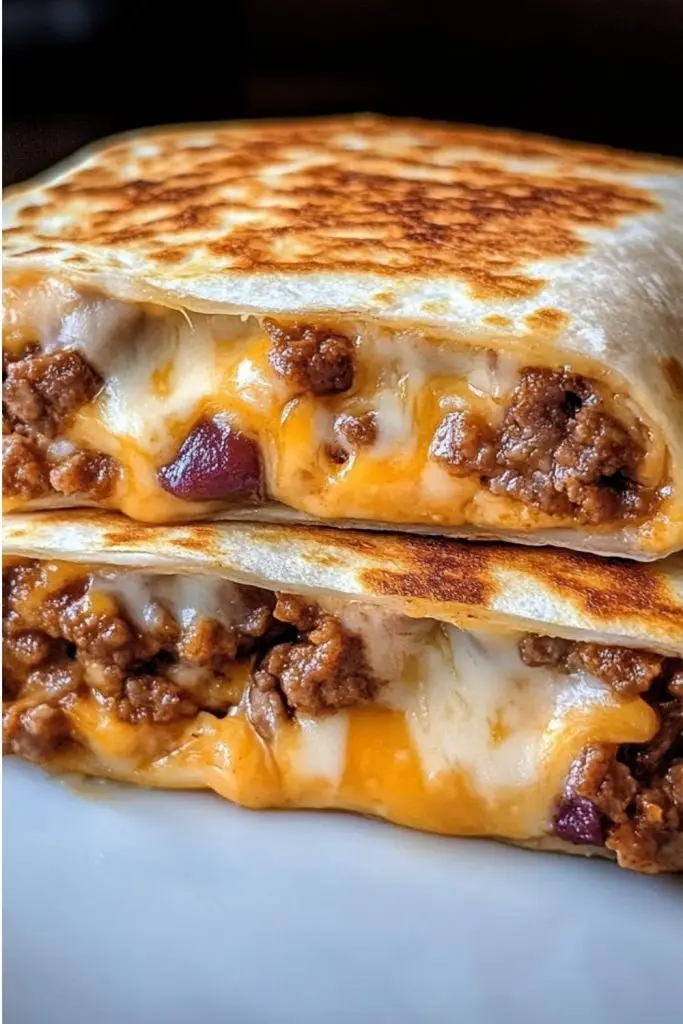
Golden, melty, and packed with seasoned beef and gooey cheese, the Grilled Cheese Burrito is a comfort food masterpiece that brings together two favorites—grilled cheese and burritos—into one unforgettable bite. The crisp, buttery tortilla exterior gives way to a rich filling of spicy ground beef, creamy cheese blend, and a subtle kick of seasoning, creating the ultimate fusion of textures and flavors.
Whether you’re whipping up a quick dinner, looking for a hearty lunch option, or just want a satisfying snack, this recipe delivers big-time. It’s quick to prepare, irresistibly cheesy, and endlessly customizable—making it a weeknight go-to or a perfect crowd-pleaser for game day.
Why You’ll Love This Grilled Cheese Burrito
- Ultimate Comfort Food: Combines the nostalgic joy of grilled cheese with the savory punch of a loaded burrito.
- Easy and Fast: Requires basic ingredients and simple steps, ready in under 30 minutes.
- Customizable: Swap beef for chicken, black beans, or veggies for your ideal version.
- Crispy + Gooey: That griddled exterior meets a molten cheesy interior—you’ll crave it again and again.
Preparation Phase & Tools to Use
Essential Tools and Equipment for Grilled Cheese Burrito
To achieve the perfect Grilled Cheese Burrito—crispy outside, melty inside—having the right tools on hand makes a big difference. Here’s what you’ll need and why:
- Large Skillet or Griddle: A nonstick or cast iron skillet ensures even browning and that classic grilled finish. A flat-top griddle can handle multiple burritos at once—perfect for feeding a crowd.
- Spatula: A wide, sturdy spatula helps you flip the burrito without tearing the tortilla or losing filling.
- Mixing Bowl: For combining the cooked beef with seasoning and cheese before wrapping.
- Knife & Cutting Board: For dicing ingredients like onions or slicing the burrito cleanly.
- Foil or Parchment Paper (Optional): Useful if prepping ahead for reheating or serving on-the-go.
These tools streamline the process and help ensure a smooth cook from start to finish.
Preparation Tips
- Warm Your Tortillas: Heating tortillas briefly in the microwave or on a pan makes them more pliable and less likely to tear during rolling.
- Drain the Beef: If your cooked beef is too greasy, be sure to drain the excess fat to prevent soggy burritos.
- Cheese Placement Matters: Spread cheese evenly and near the edges so that every bite gets that gooey melt and it helps “seal” the burrito shut when grilled.
- Preheat the Pan: Always let your skillet heat up before placing the burrito—this guarantees a crispy golden crust.
- Roll Tightly: Wrap your burrito snugly to prevent it from falling apart while flipping or biting in.
Taking a few extra moments during prep makes a huge difference in texture, taste, and overall success.
Ingredients for This Grilled Cheese Burrito
To make this indulgent, cheesy, and hearty Grilled Cheese Burrito, here’s everything you’ll need. Most ingredients are pantry-friendly or easy to find at any grocery store.
For the Filling:
- 1 lb ground beef – Use 80/20 for a juicy, flavorful bite.
- 1 packet taco seasoning – Or use a homemade blend of chili powder, cumin, garlic powder, and paprika.
- ½ cup water – Helps blend and simmer the seasoning into the meat.
- ½ cup sour cream – Adds creaminess and a tangy contrast to the beef.
- ½ cup nacho cheese sauce or shredded cheddar – For extra melty goodness.
- 1 cup shredded Mexican cheese blend – A mix of Monterey Jack, cheddar, and more.
- ½ cup cooked rice (optional) – Great for added texture and to make the burrito more filling.
- 1 small red onion, diced (optional) – Adds a mild crunch and sweetness.
For Assembly and Grilling:
- 4–6 large flour tortillas (burrito size) – Soft and pliable for easy folding and wrapping.
- ½ cup shredded cheddar or Monterey Jack (for the grilled cheese crust) – This is what crisps up on the outside.
- 2 tablespoons butter or oil – For toasting the burrito golden-brown.
These ingredients combine for layers of texture and flavor—savory, creamy, cheesy, and slightly crisp with every bite.
Step-by-Step: How to Make the Grilled Cheese Burrito
Follow these steps to create a Grilled Cheese Burrito that’s crispy on the outside and irresistibly melty inside.
Step 1: Cook the Beef
- In a large skillet over medium-high heat, add the ground beef.
- Break it apart with a spatula and cook until browned and fully cooked (about 6–8 minutes).
- Drain any excess fat from the pan.
- Stir in taco seasoning and water. Simmer for 2–3 minutes until thickened and well combined.
Step 2: Mix the Filling
- Remove the skillet from heat.
- Stir in the sour cream and nacho cheese sauce (or shredded cheese) until everything is creamy and blended.
- Add cooked rice and diced onions, if using.
- Let the mixture cool slightly—it makes wrapping easier and prevents the tortillas from tearing.
Step 3: Assemble the Burritos
- Warm tortillas slightly to make them more flexible.
- Spoon the beef filling down the center of each tortilla.
- Sprinkle with shredded Mexican cheese blend.
- Fold the sides inward, then roll tightly from the bottom up into a burrito shape.
Step 4: Griddle the Burritos with Cheese
- Heat a clean skillet or griddle over medium heat.
- Add a small handful of shredded cheddar or Monterey Jack directly onto the pan in a shape roughly the size of a burrito.
- Place the burrito seam-side down onto the cheese.
- Let cook for 1–2 minutes, pressing gently, until the cheese melts and forms a crispy crust.
- Flip and toast the other side for 1–2 minutes until golden brown.
Step 5: Slice and Serve
- Remove the burrito from the pan and let it rest for a minute to seal.
- Slice in half diagonally for a classic, mouthwatering presentation.
Notes
- Make It Spicy: Add diced jalapeños, chipotle peppers in adobo, or a dash of hot sauce to the beef mixture if you like a kick.
- Vegetarian Option: Replace ground beef with black beans, refried beans, or plant-based crumbles and add sautéed veggies.
- More Fillings: You can layer in chopped lettuce, diced tomatoes, or avocado slices after grilling—just be careful when slicing.
- Make-Ahead Friendly: These burritos can be assembled in advance and grilled just before serving.
- Use Leftovers: Leftover taco meat or rotisserie chicken work great in this recipe.
- Cheese Varieties: Experiment with cheeses like pepper jack, Colby, or mozzarella for different flavor profiles.
Watch Out for These Mistakes While Cooking
- Overfilling the Burrito: This makes it difficult to wrap and increases the risk of tearing or spilling during grilling.
- Skipping Tortilla Warming: Cold tortillas tend to crack or break—warming makes them more pliable.
- Too Much Grease: Not draining beef can cause the burrito to become soggy, especially when grilled.
- Using Low Heat: Low temps may prevent the cheese from crisping up properly; medium heat works best.
- Inconsistent Cheese Placement: Spread cheese evenly on the griddle for a golden crust that sticks to the burrito.
- Flipping Too Soon: Let the cheese melt and crisp before flipping. Rushing will cause cheese to stick or fall apart.
- Not Letting It Rest: Slicing immediately can let the fillings spill out. A minute or two of rest helps seal everything inside.
What to Serve With Grilled Cheese Burrito?
A Grilled Cheese Burrito is rich, cheesy, and packed with bold flavors—so the best sides either complement its richness or offer a refreshing contrast. Whether you’re serving it for dinner or lunch, these pairings elevate your meal into something truly satisfying.
8 Recommendations
- Mexican Street Corn (Elote)
Grilled corn slathered with mayo, lime juice, cotija cheese, and chili powder adds smoky, tangy balance. - Cilantro Lime Rice
Light and zesty, this rice offers a refreshing contrast to the cheesy burrito filling. - Guacamole & Tortilla Chips
The cool creaminess of guac with the crunch of chips is a timeless combo that pairs beautifully. - Pico de Gallo or Salsa Fresca
Fresh tomato salsa with onions, lime, and cilantro cuts through the richness with brightness. - Refried Beans or Black Beans
A hearty and classic side that keeps the meal grounded in Tex-Mex tradition. - Simple Garden Salad with Lime Vinaigrette
A crisp salad lightens up the meal and adds crunch and freshness. - Churros or Cinnamon Sugar Chips
For a sweet finish, these cinnamon treats hit the spot after a savory, cheesy main. - Horchata or Agua Fresca
These refreshing drinks cleanse the palate and complement the spicy, savory profile of the burrito.
Storage Instructions
Grilled Cheese Burritos are best enjoyed fresh off the skillet, but they store surprisingly well if you need to prep ahead or deal with leftovers.
- Refrigeration: Wrap each cooled burrito in foil or plastic wrap, then store in an airtight container in the refrigerator for up to 3 days.
- Freezing: For longer storage, wrap tightly in foil and place in a freezer-safe bag. Freeze for up to 2 months.
- Reheating:
- Stovetop: Reheat on a skillet over medium heat for 4–5 minutes per side to regain crispiness.
- Oven: Wrap in foil and heat at 350°F (175°C) for 10–15 minutes. Uncover the last few minutes for a crisper texture.
- Microwave (least recommended): Use only if in a hurry. Microwave on medium for 1–2 minutes, but note the tortilla may turn soft.
Pro Tip: If freezing, avoid adding raw veggies or sour cream before freezing—add those fresh after reheating.
Estimated Nutrition (Per Burrito, Approximate)
Note: These values may vary depending on specific brands and portion sizes used.
- Calories: 620–700 kcal
- Protein: 28–32g
- Fat: 35–40g
- Saturated Fat: 15–18g
- Carbohydrates: 45–50g
- Fiber: 3–5g
- Sugars: 2–4g
- Sodium: 950–1100mg
This is a hearty, protein-rich dish ideal for fueling up after a long day or when you’re craving serious comfort food.
Frequently Asked Questions
1. Can I make the Grilled Cheese Burrito ahead of time?
Yes! You can fully assemble the burritos and refrigerate or freeze them before the final grilling step. When ready to serve, just griddle them straight from the fridge (or thawed from frozen) for a crispy, hot finish.
2. What’s the best type of cheese to use for the outside crust?
Cheddar, Monterey Jack, or a Mexican blend work best. They melt easily and brown into a crisp layer without burning quickly.
3. Can I make this vegetarian?
Definitely. Swap the beef for black beans, refried beans, or sautéed vegetables. Add extra cheese or rice for heartiness.
4. How do I prevent the burrito from falling apart while cooking?
Wrap the burrito tightly, place seam-side down in the pan first, and let it rest before slicing. This helps seal everything together.
5. Can I use corn tortillas instead of flour?
Flour tortillas are strongly recommended due to their flexibility and size. Corn tortillas tend to crack and are too small for a stuffed burrito like this.
6. How spicy is this burrito?
It’s mildly spicy depending on your taco seasoning. You can adjust the heat by adding hot sauce, jalapeños, or spicy cheese.
7. What sauces go well with this?
Sour cream, salsa verde, chipotle mayo, or even queso dip make amazing sides or drizzles for this burrito.
8. Is this good for kids?
Absolutely! Just reduce or eliminate spicy ingredients for a kid-friendly version. Kids love the melty cheese and soft filling.
Conclusion
The Grilled Cheese Burrito takes the comforting nostalgia of a grilled cheese sandwich and fuses it with the bold, hearty satisfaction of a burrito. Each bite delivers crispy, cheesy texture on the outside, and a savory, creamy filling on the inside. It’s the perfect weeknight recipe—quick, customizable, and irresistibly satisfying. Whether you’re making it for the family, a weekend hangout, or meal prepping for busy days, this dish will quickly earn a place in your regular rotation.

Grilled Cheese Burrito
- Prep Time: 10 minutes
- Cook Time: 15 minutes
- Total Time: 25 minutes
- Yield: 4–6 burritos 1x
Description
Looking for the ultimate comfort food mashup? This Grilled Cheese Burrito is the perfect blend of gooey, cheesy goodness and bold, savory flavor—ideal for a quick dinner, hearty lunch, or a crave-worthy snack. This easy recipe combines the crunch of grilled cheese with the hearty fillings of a loaded burrito, making it one of the best easy dinner ideas or quick lunch recipes out there. With melted cheese inside and out, seasoned beef, and customizable toppings, it’s a surefire crowd-pleaser. Whether you’re feeding kids, hosting game night, or just want food ideas that bring serious satisfaction, this is a must-try. It’s easy to make, packed with flavor, and totally unforgettable.
Ingredients
For the Filling:
- 1 lb ground beef
- 1 packet taco seasoning
- ½ cup water
- ½ cup sour cream
- ½ cup nacho cheese sauce or shredded cheddar
- 1 cup shredded Mexican cheese blend
- ½ cup cooked rice (optional)
- 1 small red onion, diced (optional)
For Assembly:
- 4–6 large flour tortillas
- ½ cup shredded cheddar or Monterey Jack (for the crust)
- 2 tablespoons butter or oil
Instructions
-
In a skillet over medium heat, cook ground beef until browned. Drain excess fat.
-
Add taco seasoning and water. Simmer until thickened, about 2–3 minutes.
-
Stir in sour cream and cheese sauce. Add rice and onions if using.
-
Warm tortillas slightly. Spoon beef mixture in center, sprinkle with cheese, and roll into burritos.
-
Heat a clean skillet. Add shredded cheese directly onto pan in a rectangle.
-
Place burrito seam-side down over cheese. Cook until cheese is golden and crispy, about 2 minutes.
-
Flip and toast the other side until browned.
-
Let rest for 1–2 minutes, then slice and serve hot.