Golden, tender, and delicately spiced, Fluffy Eggnog Scones are the perfect way to bring a festive twist to your breakfast or afternoon tea. These scones combine the rich, creamy flavor of traditional eggnog with warm holiday spices like nutmeg and cinnamon. Drizzled with a simple eggnog glaze, each bite melts in your mouth and tastes like a cozy December morning.
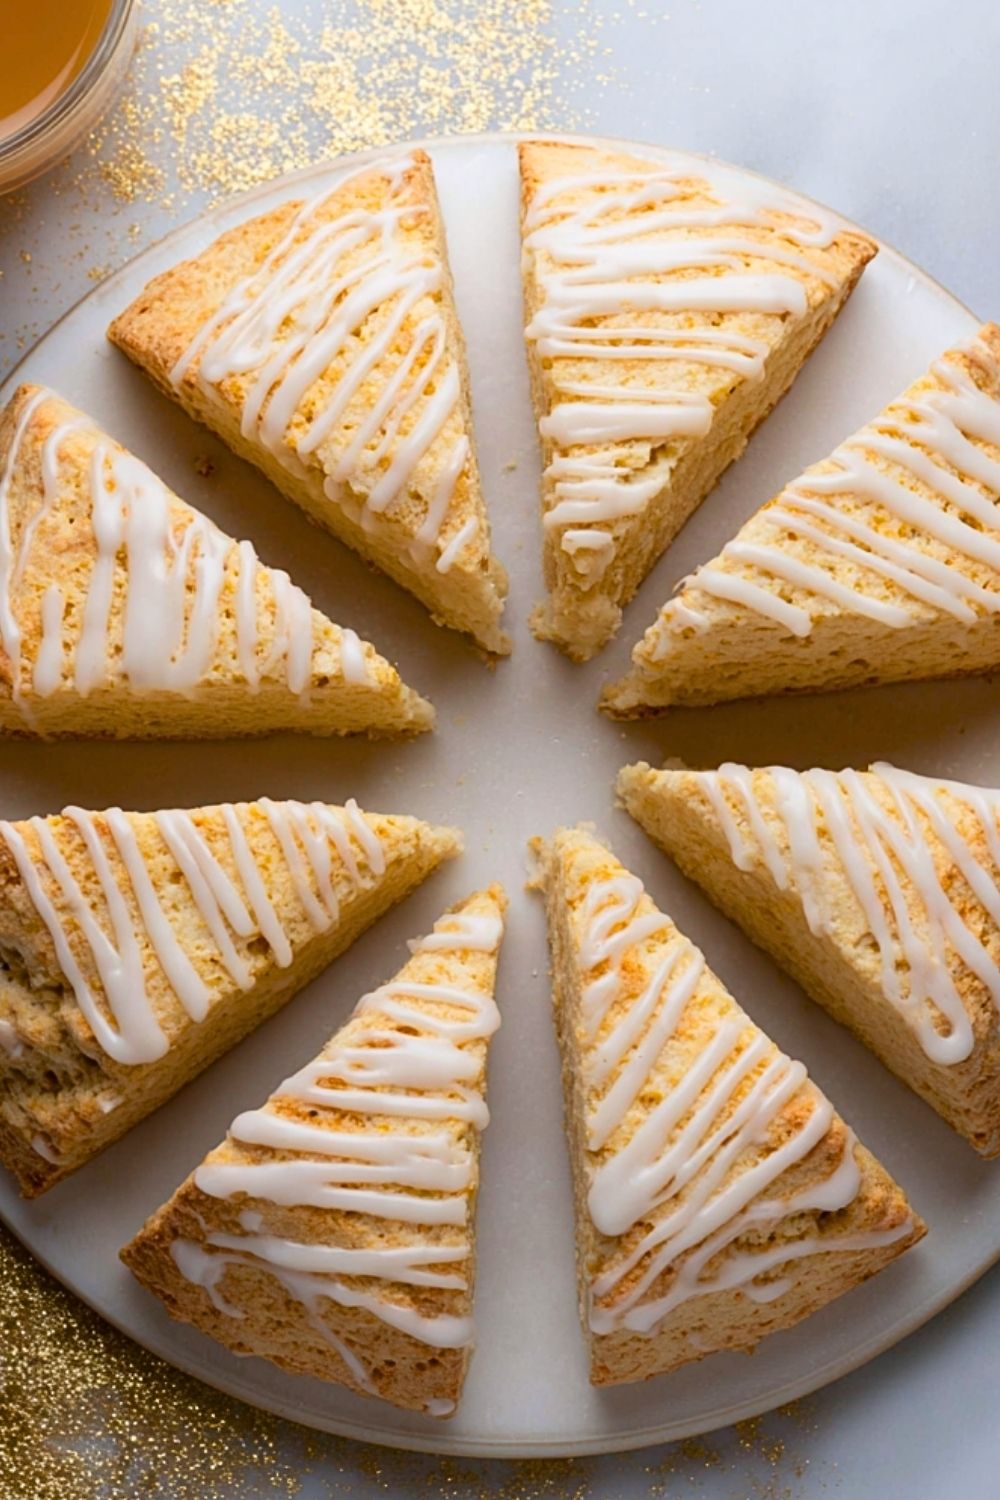
These scones are slightly crisp on the outside, pillowy on the inside, and subtly sweet — making them a dreamy treat for any time of day. Whether you’re serving them at a holiday brunch, packaging them as edible gifts, or just looking for something special to enjoy with your coffee, this recipe will quickly become a seasonal favorite.
Why You’ll Love This Fluffy Eggnog Scones Recipe
- Holiday flavor in every bite – infused with classic eggnog and warming spices.
- Easy to make – simple ingredients, minimal fuss.
- Versatile – perfect for breakfast, brunch, or dessert.
- Make-ahead friendly – freezes beautifully for stress-free holiday prep.
- Customizable – great with add-ins like white chocolate chips or dried cranberries.
Preparation Phase & Tools to Use
To make the perfect Fluffy Eggnog Scones, having the right tools makes all the difference:
- Mixing Bowls: You’ll need a large one for the dry ingredients and a smaller one for the wet ingredients.
- Pastry Cutter or Fork: Essential for cutting cold butter into the flour — this is key for achieving that flaky scone texture.
- Measuring Cups and Spoons: Accuracy is crucial in baking.
- Whisk: Helps combine the eggnog, egg, and vanilla smoothly.
- Baking Sheet and Parchment Paper: Keeps the scones from sticking and ensures even baking.
- Bench Scraper or Knife: To divide and shape the dough easily.
- Cooling Rack: Allows air to circulate around the scones so they cool without becoming soggy.
Each tool ensures consistency and helps you achieve a professional, bakery-style result at home.
Preparation Tips
Start by chilling your butter and even your mixing bowl if possible — cold ingredients are essential for flaky scones. Don’t overmix the dough; once it comes together, gently pat it into a circle and slice it into wedges. Brushing the tops with a bit of eggnog before baking adds a golden sheen. Allow the scones to cool slightly before drizzling the glaze so it sets beautifully without melting completely. If you want extra height and fluffiness, place the cut scones in the freezer for 10–15 minutes before baking — it helps prevent spreading and encourages a better rise.
Ingredients for this Fluffy Eggnog Scones Recipe
For the Scones:
- 2 cups all-purpose flour
- 1 tablespoon baking powder
- 1/2 teaspoon ground nutmeg
- 1/4 teaspoon ground cinnamon
- 1/4 teaspoon salt
- 1/3 cup granulated sugar
- 1/2 cup unsalted butter, cold and cut into cubes
- 1/2 cup eggnog (store-bought or homemade)
- 1 large egg
- 1 teaspoon vanilla extract
Optional Add-ins:
- 1/3 cup white chocolate chips
- 1/3 cup dried cranberries
For the Glaze:
- 1 cup powdered sugar
- 2 to 3 tablespoons eggnog
- 1/4 teaspoon vanilla extract (optional)
Step 1: Preheat and Prep
Preheat your oven to 400°F (200°C). Line a baking sheet with parchment paper or a silicone baking mat. This ensures the scones bake evenly and don’t stick to the pan.
Step 2: Mix the Dry Ingredients
In a large mixing bowl, whisk together the flour, baking powder, nutmeg, cinnamon, salt, and sugar. These dry ingredients are the base for your scone dough and should be evenly mixed to avoid clumps.
Step 3: Cut in the Butter
Add the cold, cubed butter to the dry ingredients. Using a pastry cutter or fork, cut the butter into the flour until the mixture resembles coarse crumbs. Cold butter is crucial to creating those tender, flaky layers.
Step 4: Combine Wet Ingredients
In a separate bowl, whisk together the eggnog, egg, and vanilla extract until smooth. This mixture will bind your dough and infuse it with rich eggnog flavor.
Step 5: Mix Wet and Dry Together
Pour the wet ingredients into the dry ingredients and gently mix just until a dough forms. If you’re adding white chocolate chips or cranberries, fold them in now. Be careful not to overmix, as this can make the scones tough.
Step 6: Shape the Dough
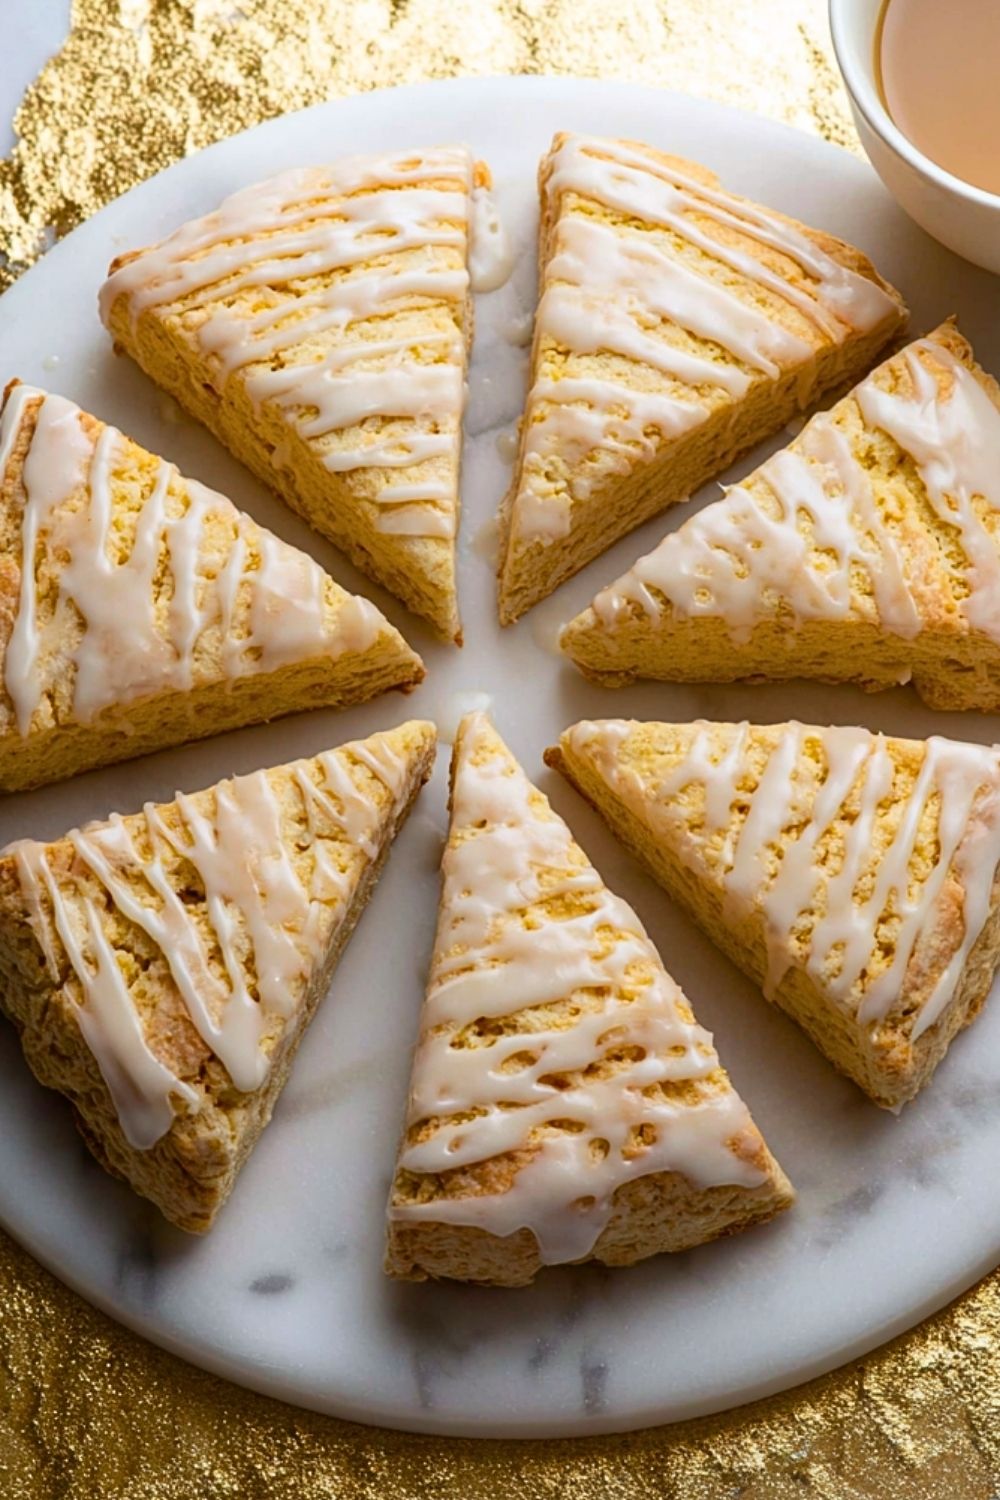
Turn the dough out onto a lightly floured surface. Gently knead it a few times to bring it together. Pat the dough into a 1-inch thick round disc. Using a bench scraper or sharp knife, cut the disc into 8 equal wedges.
Step 7: Chill for Fluffier Scones (Optional but Recommended)
For taller, fluffier scones, place the wedges onto the prepared baking sheet and chill in the freezer for 10-15 minutes. This prevents spreading during baking and helps the scones rise higher.
Step 8: Bake to Perfection
Brush the tops with a little eggnog for a golden finish. Bake in the preheated oven for 15-18 minutes or until the scones are golden brown around the edges and cooked through. Transfer to a wire rack to cool.
Step 9: Make the Glaze
In a small bowl, whisk together powdered sugar and 2 tablespoons of eggnog until smooth. Add a little more eggnog if needed to reach drizzling consistency. For a richer glaze, add a drop of vanilla extract.
Step 10: Glaze and Serve
Once the scones have cooled slightly (about 10 minutes), drizzle the glaze over the tops. Allow it to set for a few minutes before serving. Enjoy your fluffy eggnog scones warm or at room temperature!
Notes
For the most tender and fluffy scones, always start with very cold butter and avoid overworking the dough. Letting the dough rest in the fridge or freezer before baking gives the scones more lift and keeps their shape. You can easily adapt the recipe with mix-ins like chopped nuts, dried fruits, or flavor extracts. For an extra festive touch, dust the finished scones with a pinch of nutmeg or cinnamon sugar after glazing.
Watch Out for These Mistakes While Cooking
- Overmixing the dough: This can lead to dense, tough scones. Mix until just combined.
- Using warm butter: Soft butter blends into the flour and won’t create the flaky layers scones are known for.
- Skipping the chill step: It’s optional, but skipping it can result in spreading rather than rising.
- Too much flour on the surface: Adding excess flour while kneading can dry out the dough.
- Glazing too soon: If the scones are too hot, the glaze will melt completely instead of creating a sweet finish.
Storage Instructions
Once baked and fully cooled, store Fluffy Eggnog Scones in an airtight container at room temperature for up to 2 days. For longer storage, refrigerate for up to 5 days or freeze unglazed scones for up to 2 months. When freezing, wrap each scone individually in plastic wrap and place in a freezer-safe bag or container. To serve, thaw overnight or reheat in a 300°F oven for 5–8 minutes. Always glaze after reheating if frozen.
Estimated Nutrition (Per Scone, based on 8 servings)
- Calories: 310
- Total Fat: 14g
- Saturated Fat: 8g
- Unsaturated Fat: 5g
- Trans Fat: 0g
- Cholesterol: 55mg
- Sodium: 180mg
- Carbohydrates: 42g
- Fiber: 1g
- Sugars: 17g
- Protein: 4g
Frequently Asked Questions
Can I make these scones without eggnog?
Yes, you can substitute heavy cream or milk with a bit of nutmeg and vanilla extract to mimic the eggnog flavor.
Can I make these scones ahead of time?
Absolutely. You can prepare and cut the dough, then freeze the unbaked scones for up to 1 month. Bake straight from the freezer, adding a few extra minutes to the bake time.
How do I know when the scones are done?
They should be lightly golden on top and firm to the touch. A toothpick inserted in the center should come out clean.
What’s the best way to reheat scones?
Use a low oven (around 300°F) for a few minutes to warm them up without drying them out.
Can I use gluten-free flour?
Yes, a 1:1 gluten-free flour blend works well. Just be sure to avoid overmixing, as gluten-free doughs can become gummy.
How do I get my scones to rise higher?
Make sure your baking powder is fresh, your butter is cold, and chill the shaped dough before baking.
What if I don’t have a pastry cutter?
You can use two forks or even your hands—just work quickly to keep the butter from warming.
Is it okay to skip the glaze?
Of course. The scones are slightly sweet on their own, but the glaze does add a nice finish.
Conclusion
Fluffy Eggnog Scones bring together the comforting richness of eggnog and the charm of homemade baking in one delicious package. Whether you’re hosting a brunch, looking for a festive breakfast idea, or simply craving something cozy and flavorful, this recipe offers everything you need. With its easy method, customizable options, and beautiful presentation, these scones are sure to impress both guests and family alike.

Fluffy Eggnog Scones
- Prep Time: 15 minutes
- Cook Time: 18 minutes
- Total Time: 33 minutes
- Yield: 8 scones 1x
- Category: Breakfast, Snack, Dessert
- Method: Baked
- Cuisine: American
- Diet: Vegetarian
Description
Bring holiday magic to your kitchen with these Fluffy Eggnog Scones—tender, golden, and full of warm spice. This easy recipe turns classic eggnog into a rich, buttery scone with a soft crumb and just the right amount of sweetness. Drizzled with a creamy eggnog glaze, they’re perfect for a quick breakfast, cozy brunch, or festive snack. Whether you’re hunting for holiday breakfast ideas, winter treats, or an easy recipe to impress your guests, these scones check every box.
Ingredients
2 cups all-purpose flour
1 tablespoon baking powder
1/2 teaspoon ground nutmeg
1/4 teaspoon ground cinnamon
1/4 teaspoon salt
1/3 cup granulated sugar
1/2 cup unsalted butter, cold and cubed
1/2 cup eggnog
1 large egg
1 teaspoon vanilla extract
1/3 cup white chocolate chips
1/3 cup dried cranberries
1 cup powdered sugar
2 to 3 tablespoons eggnog
1/4 teaspoon vanilla extract
Instructions
1. Preheat the oven to 400°F (200°C) and line a baking sheet with parchment paper.
2. In a large bowl, whisk together flour, baking powder, nutmeg, cinnamon, salt, and sugar.
3. Add cold cubed butter and cut into the flour until the mixture resembles coarse crumbs.
4. In a separate bowl, whisk together eggnog, egg, and vanilla extract.
5. Pour wet ingredients into the dry mix and stir until just combined. Fold in any optional add-ins.
6. Turn dough onto a floured surface and gently shape into a 1-inch thick disc.
7. Cut into 8 wedges and place on the baking sheet. Chill in the freezer for 10–15 minutes.
8. Brush tops with eggnog and bake for 15–18 minutes or until golden. Cool slightly on a rack.
9. Whisk together powdered sugar and eggnog to make the glaze. Add vanilla if desired.
10. Drizzle glaze over cooled scones and let set before serving.
Notes
Use very cold butter to keep the scones flaky and light.
Chilling the shaped dough before baking results in higher, fluffier scones.
Add-ins like cranberries or white chocolate make a delicious variation.
Nutrition
- Serving Size: 1 scone
- Calories: 310
- Sugar: 17g
- Sodium: 180mg
- Fat: 14g
- Saturated Fat: 8g
- Unsaturated Fat: 5g
- Trans Fat: 0g
- Carbohydrates: 42g
- Fiber: 1g
- Protein: 4g
- Cholesterol: 55mg
Keywords: easy recipe, fluffy eggnog scones, holiday breakfast, winter treats, breakfast ideas