Looking for a festive and fun Halloween food idea that’s both kid-friendly and easy to make? These Easy Mummy Pizzas are the ultimate spooky snack—simple to prepare, deliciously cheesy, and irresistibly cute! They feature a soft pizza crust, zesty marinara, stretchy mozzarella cheese “bandages,” and edible eyes for that perfectly ghoulish look. Whether you’re hosting a party or just want a themed dinner before trick-or-treating, this recipe is guaranteed to be a hit.
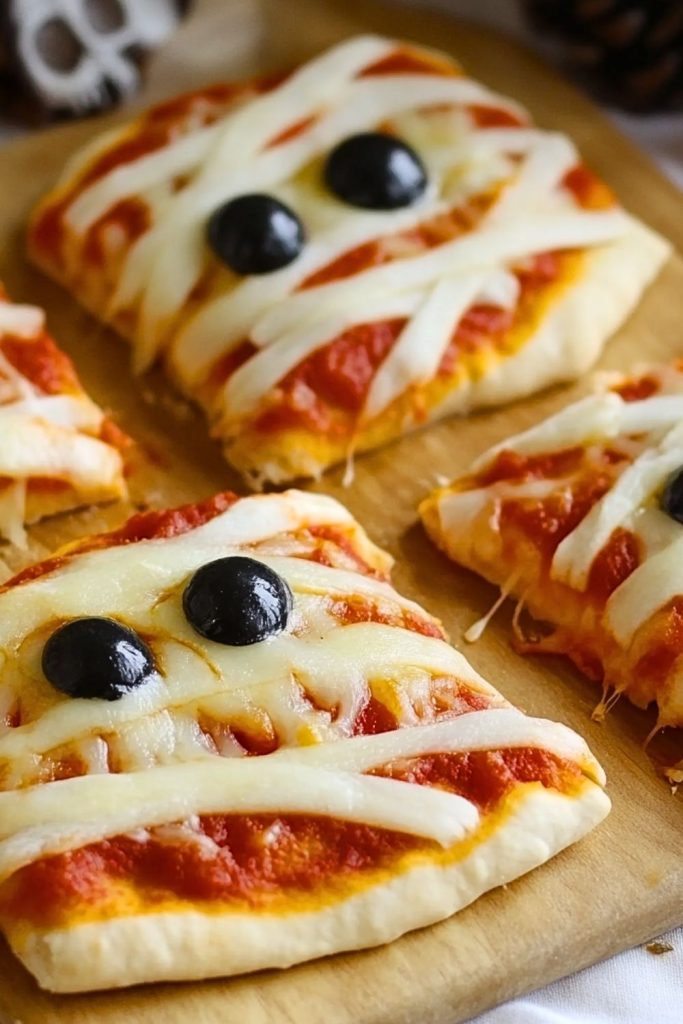
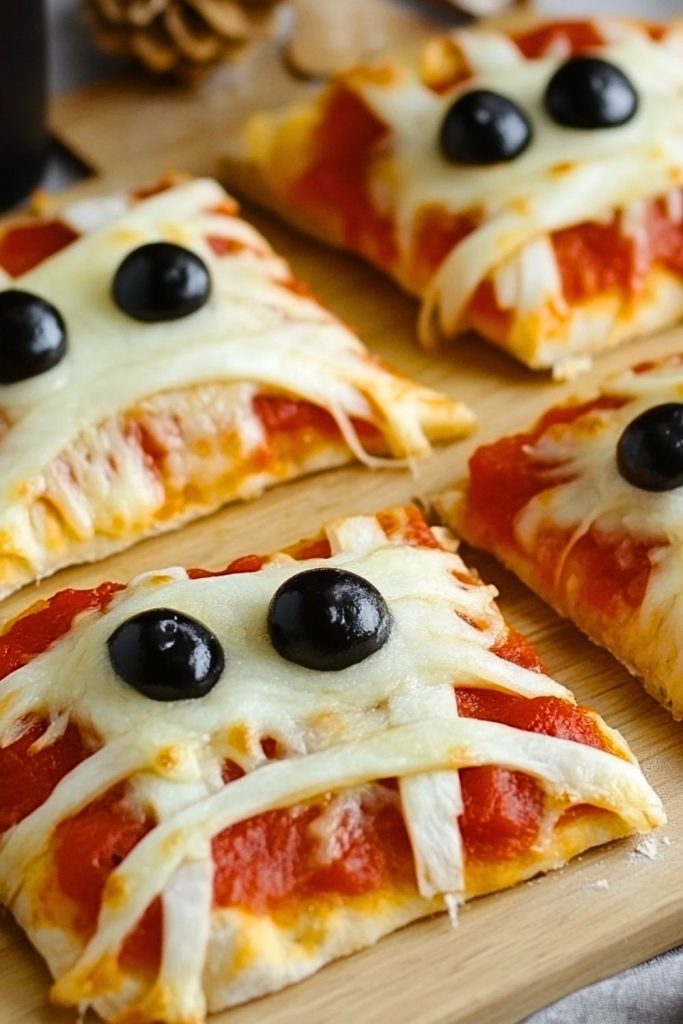
These mini mummy pizzas are more than just adorable—they’re totally customizable too. Use store-bought dough for a quick version or homemade if you’re feeling fancy. Add your favorite toppings beneath the “bandages” for extra flavor, or keep it simple with just sauce and cheese. They bake up golden and gooey in minutes, making them the perfect last-minute Halloween dinner idea.
Why You’ll Love This Easy Mummy Pizza Recipe
- Super Fun for Kids: With goofy edible eyes and cheesy wrappings, kids will love making and eating these.
- Quick and Simple: Ready in under 30 minutes, perfect for busy weeknights or Halloween party prep.
- Customizable: Make it vegetarian, add pepperoni, or go gluten-free—whatever suits your crowd!
- Perfect for Parties: These bite-sized pizzas are great for serving on a spooky platter at gatherings.
Preparation Phase & Tools to Use for Easy Mummy Pizza
Creating these spooky little mummy pizzas doesn’t require any complicated equipment, but having the right tools makes the process smoother and more fun.
Essential Tools and Their Importance:
- Baking Sheet or Pizza Stone: You’ll need a sturdy surface to bake your mummy pizzas. A baking sheet works just fine, but a pizza stone can help you achieve a crispier crust.
- Rolling Pin (Optional): If you’re using dough instead of pre-made crusts, a rolling pin helps you flatten it evenly.
- Pizza Cutter or Sharp Knife: Ideal for cutting dough into square or rectangular mummy shapes, and for slicing cheese strips.
- Parchment Paper: Prevents sticking and makes cleanup a breeze.
- Small Spoon or Spreader: For evenly spreading marinara or pizza sauce across the dough.
- Cooling Rack: To allow the crust to breathe and prevent sogginess after baking.
Having these basic tools on hand keeps the prep mess-free and ensures your mummy pizzas bake evenly and look adorably creepy!
Preparation Tips
- Use Refrigerated Dough for Speed: Crescent roll sheets, pre-made pizza dough, or even flatbread can save time.
- Cheese Strip Trick: Use a knife or pizza cutter to cut mozzarella cheese into thin, uneven strips—this mimics the mummy’s bandages better than shredding.
- Eyes That Pop: Candy eyes work for a sweet-and-savory twist, but sliced black olives or dots of cream cheese with olive centers also make great edible eyes.
- Don’t Overload With Sauce: A light layer of marinara is enough—too much will cause soggy crust.
- Customize Hidden Toppings: Add tiny slices of pepperoni, mushrooms, or bell peppers under the cheese strips to sneak in more flavor.
- Work in Batches: If you’re making a large batch for a party, prepare and assemble them all first, then bake together.
Ingredients for This Easy Mummy Pizza Recipe
Here’s everything you’ll need to make these cute and creepy mini mummy pizzas. The quantities can be adjusted based on how many you plan to make—this list assumes about 4–6 small mummy pizzas.
Base Ingredients
- 1 sheet of refrigerated pizza dough (or crescent roll sheet, flatbread, or homemade dough)
- 1/2 cup pizza sauce or marinara sauce
- 1 cup shredded mozzarella cheese (or mozzarella sticks cut into thin strips for better mummy “bandages”)
Toppings & Decorations
- Candy eyes(found in baking aisles, ideal for visual impact)
- Alternatively: use sliced black olives, or dots of cream cheese with a black olive piece inside.
- Optional hidden toppings:
- Mini pepperoni slices
- Sautéed mushrooms
- Diced bell peppers
- Cooked sausage crumbles
Optional Seasoning
- 1/2 tsp Italian seasoning
- A pinch of garlic powder (for extra flavor if using plain dough)
These ingredients strike a perfect balance between easy prep and maximum spooky charm. You can stick with the basics or experiment with the toppings to fit your taste or dietary needs.
Step-by-Step Instructions for Easy Mummy Pizza
Let’s bring your mummy pizzas to life (or the afterlife)! Follow these steps to transform simple ingredients into spooky, cheesy fun.
Step 1: Preheat and Prep
- Preheat your oven to 375°F (190°C).
- Line a baking sheet with parchment paper or lightly grease it to prevent sticking.
Step 2: Shape the Dough
- Roll out your pizza dough to about ¼ inch thick.
- Use a sharp knife or pizza cutter to slice the dough into rectangle or square shapes—these will be the base of your mummies.
- Transfer them to your baking sheet with some space between each.
Step 3: Add the Sauce
- Spoon a thin layer of marinara or pizza sauce onto each dough rectangle.
- Spread it gently using the back of the spoon or a small spreader, leaving a small border around the edges.
Step 4: Add Toppings (Optional)
- If using extra toppings (like mini pepperoni or diced veggies), sprinkle them now over the sauce.
- Keep it light so the mummy “bandages” can lay flat on top.
Step 5: Create the Mummy Bandages
- Cut mozzarella cheese slices or sticks into thin, uneven strips.
- Lay the strips diagonally or crisscross over each pizza to mimic mummy wrappings, leaving space for the eyes.
Step 6: Bake
- Place the baking sheet in the preheated oven.
- Bake for 10–14 minutes, or until the cheese is melted and the edges of the dough are golden brown.
Step 7: Add the Eyes
- Once baked, remove the pizzas from the oven and immediately add candy eyes or olive slices.
- Press them gently into the melted cheese while it’s still soft so they stay in place.
Step 8: Cool Slightly & Serve
- Let the mummy pizzas cool on a rack for 5 minutes before serving.
- Serve warm for the best gooey-cheese experience!
Notes
- Kid-Friendly & Involvement-Ready: This is a perfect recipe to get little hands involved. Let kids place the cheese bandages and eyes themselves—it’s a fun Halloween activity as much as it is a meal.
- Make-Ahead Tip: You can prep the dough rectangles and store them in the fridge with sauce and toppings (except cheese strips and eyes) up to 1 day ahead. Add the cheese and bake fresh when ready.
- Cheese Variation: While mozzarella is classic, feel free to use Monterey Jack or even string cheese strips for that melted mummy effect.
- Vegan Option: Swap in your favorite vegan cheese and dairy-free dough for a plant-based version.
Watch Out for These Mistakes While Cooking
- Overloading the Sauce: Using too much sauce can lead to soggy bottoms and cheese that slips around. Stick to a light layer.
- Cheese Strip Thickness: If your mozzarella strips are too thick or too short, they won’t melt evenly or resemble mummy wraps. Thin and long strips work best.
- Adding Eyes Before Baking: Candy or olive eyes should always be added after baking. Baking them can cause melting or burning.
- Dough Not Separated Enough: Leave enough space between pizzas on the baking sheet to avoid them merging together during baking.
- Baking Too Long: Keep an eye on your pizzas, especially near the 10-minute mark. Overbaking can brown the cheese too much and ruin the mummy effect.
- Uneven Layering: Crisscrossing the cheese strips too heavily in one area can cause uneven melting and prevent the middle from cooking through properly.
What to Serve With Easy Mummy Pizza?
These fun-sized mummy pizzas are festive enough to stand alone, but if you’re serving them as part of a Halloween spread or a casual dinner, pairing them with a few sides can turn them into a full meal. Whether you’re aiming for balance, fun, or more spooky vibes, there’s something to complement every bite.
8 Delicious Recommendations
- Witchy Veggie Sticks & Dip
Serve colorful carrot, cucumber, and bell pepper sticks in a cauldron-style bowl with ranch or hummus. It’s a healthy and crunchy contrast to the cheesy pizza. - Pumpkin Soup
A warm bowl of spiced pumpkin soup adds a cozy fall touch, especially for chilly October nights. - Spooky Mozzarella Eyeballs
Use mini mozzarella balls topped with sliced olives to make edible “eyeballs” as a fun, eerie side dish. - Ghost-Shaped Garlic Bread
Use a ghost-shaped cookie cutter on flatbread or pizza dough, bake with garlic butter, and serve as crispy dippers. - Apple Slices with Caramel Dip
Add a little sweetness with fresh apple slices and gooey caramel for dipping. Bonus points for using red or green apples for Halloween color contrast. - Monster Punch or Themed Drink
Whip up a green or purple juice-based drink with gummy worms or floating eyeballs (lychee and blueberry combo works great!). - Caesar or Mixed Greens Salad
A light side salad with a zesty dressing balances the richness of the pizza and adds freshness to the meal. - Sweet Potato Fries
Their natural orange color is perfect for Halloween, and their crispiness complements the soft, cheesy mummy pizzas.
Storage Instructions
Whether you’re prepping these mummy pizzas ahead of time or storing leftovers after the party, they hold up well with a little care.
To Store in the Refrigerator
- Let the pizzas cool completely before storing.
- Place them in an airtight container or wrap tightly with foil or plastic wrap.
- Store in the fridge for up to 3 days.
- Reheat in a toaster oven or regular oven at 350°F (175°C) for about 5–7 minutes to revive the crispiness.
To Freeze
- Assemble the mummy pizzas but do not bake or add the eyes.
- Lay them flat on a baking sheet and freeze until solid.
- Transfer to a freezer-safe bag or container.
- When ready to serve, bake directly from frozen at 375°F (190°C) for 15–17 minutes, then add eyes after baking.
Reheating Tip
Microwaving is not ideal—it makes the crust chewy. For the best texture, always reheat in the oven or toaster oven.
Estimated Nutrition (Per 1 Mummy Pizza)
Please note: nutrition will vary slightly depending on your dough, toppings, and cheese quantity.
- Calories: ~180–220 kcal
- Total Fat: ~8–10g
- Saturated Fat: ~3.5g
- Carbohydrates: ~20–25g
- Sugar: ~2g
- Protein: ~8–10g
- Sodium: ~350–500mg
- Fiber: ~1g
This makes them a relatively balanced snack or small meal—fun, festive, and not overly heavy.
Frequently Asked Questions
1. Can I make mummy pizzas ahead of time?
Yes! You can prep the dough, sauce, and cheese strips in advance. Assemble them without baking, and store in the fridge for up to 24 hours. Just add the eyes after baking.
2. What type of cheese works best for mummy bandages?
Mozzarella is ideal because it melts well and stretches. Use sliced mozzarella or string cheese cut into strips for the best “bandage” look.
3. Can I use puff pastry instead of pizza dough?
You can, but puff pastry will result in a flakier, softer texture. It’s great for an appetizer twist, but won’t be as crisp or chewy as pizza dough.
4. Are these mummy pizzas freezer-friendly?
Yes! You can freeze them before baking. Just add the eyes after baking and reheating. They can last in the freezer for up to a month.
5. What are good eye alternatives if I can’t find candy eyes?
Sliced black olives, peppercorns (for looks only), or dots of cream cheese with an olive piece in the center make great substitutes.
6. Can I make these gluten-free?
Absolutely! Just use a store-bought gluten-free dough or make your own gluten-free crust. All other toppings are naturally gluten-free.
7. Are they safe for toddlers?
Yes, as long as ingredients are age-appropriate and eyes are edible (like olives). Cut into smaller pieces if needed for easy chewing.
8. Can I turn this into a larger pizza?
Definitely. Shape a large oval base, add sauce and toppings, and layer cheese strips across it. Add two big eyes near the top after baking for a giant mummy effect!
Conclusion
Easy Mummy Pizzas are more than just a Halloween gimmick—they’re tasty, playful, and totally customizable. Whether you’re hosting a spooky dinner, looking for a creative lunchbox idea, or planning a themed party menu, these mini pizzas deliver both fun and flavor.
With just a few ingredients and a touch of creativity, you can turn everyday pizza night into something magical and memorable. Add your favorite toppings, get the kids involved, and don’t forget the ghoulish sides to make it a complete meal. Whether it’s your first time making them or a returning Halloween tradition, these mummy pizzas will always cast a delicious spell.

Easy Mummy Pizza – A Spooky Treat That’s Big on Flavor
- Prep Time: 10 minutes
- Cook Time: 10 minutes
- Total Time: 20 minutes
- Yield: 4–6 mini mummy pizzas 1x
Description
Get ready to transform your Halloween night with these Easy Mummy Pizzas—the ultimate spooky snack that’s equal parts cute and delicious! Whether you’re throwing a Halloween party, looking for quick dinner ideas, or want fun food ideas for kids, this easy recipe is sure to charm ghosts and goblins of all ages. With just a few ingredients like pizza dough, marinara sauce, mozzarella cheese, and fun edible eyes, you’ll whip up a batch of mummy-inspired mini pizzas in no time. These mummy pizzas are perfect for themed treats, quick Halloween lunches, or a kid-friendly activity. Soft, cheesy, and hauntingly good—this is one of those Halloween food ideas you’ll come back to year after year.
Ingredients
- 1 sheet of refrigerated pizza dough (or flatbread/crescent roll sheet)
- 1/2 cup pizza or marinara sauce
- 1 cup shredded or sliced mozzarella cheese (cut into strips)
- Candy eyes, black olives, or cream cheese + olive pieces for eyes
- Optional toppings: mini pepperoni, diced veggies, cooked sausage
- Optional seasoning: Italian herbs, garlic powder
Instructions
- Preheat oven to 375°F (190°C). Line a baking sheet with parchment paper.
- Roll out the pizza dough to about 1/4 inch thick.
- Cut into rectangular shapes using a knife or pizza cutter. Transfer to baking sheet.
- Spread a thin layer of pizza sauce on each dough rectangle.
- Add optional toppings like pepperoni or veggies.
- Layer mozzarella strips diagonally to create mummy “bandages,” leaving space for the eyes.
- Bake for 10–14 minutes or until cheese is melted and dough is golden.
- Remove from oven and immediately place candy eyes or olives into the warm cheese.
- Let cool slightly and serve warm.


