
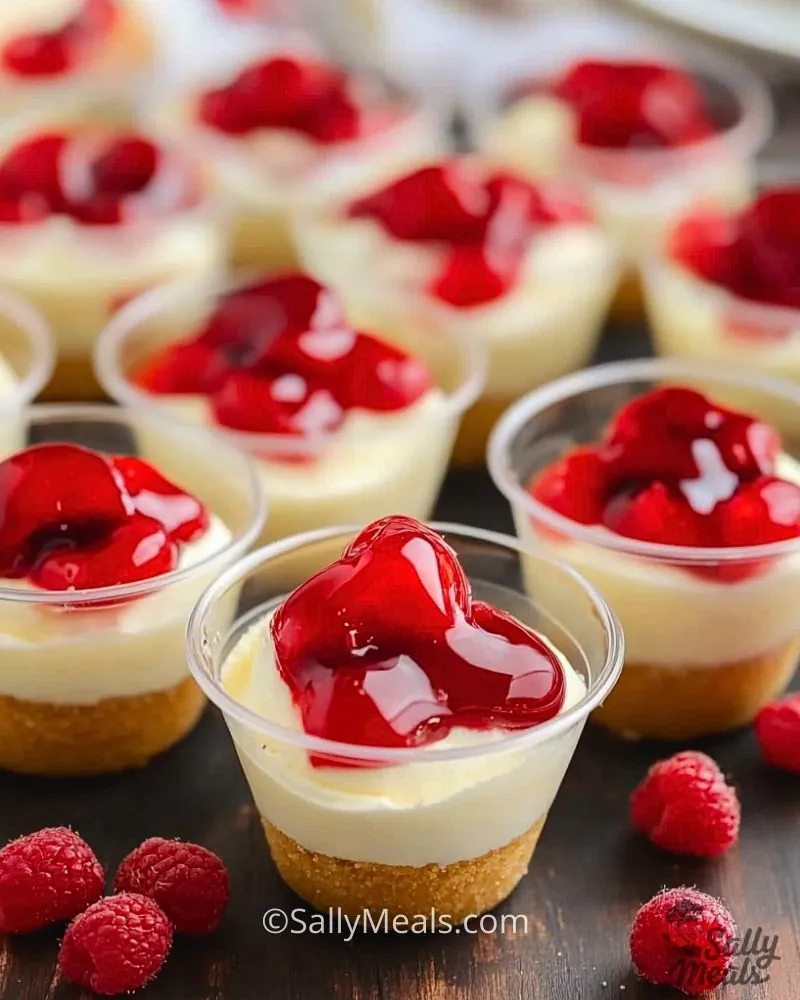
Cheesecake has always been one of my favorite desserts, but making a full-sized version can be time-consuming and requires patience while it sets. That’s why I love these Easy Cheesecake Cups! They deliver all the creamy, tangy, and sweet goodness of a classic cheesecake but in a fraction of the time. Plus, their individual servings make them perfect for parties, gatherings, or a quick personal treat.
What makes these mini cheesecake cups even better is their versatility. You can top them with anything—fruit compote, chocolate drizzle, or even crushed cookies for extra crunch. They don’t require baking, which means you can whip up a batch with minimal effort. Whether you’re a cheesecake lover or just looking for a no-fuss dessert, these little cups will be a game-changer!
Why You’ll Love This Easy Cheesecake Cups Recipe
- No-Bake Convenience – No need to turn on the oven, making it ideal for hot days.
- Quick & Simple – Comes together in just a few steps with minimal effort.
- Perfectly Portioned – Individual servings mean no messy slicing and easy grab-and-go treats.
- Customizable Toppings – Switch up the flavors with different fruits, sauces, or cookie crumbles.
- Crowd-Pleaser – Great for parties, potlucks, or family desserts.
What Kind of Crust Should I Use?
The crust is the foundation of any great cheesecake, and for these easy cheesecake cups, a classic graham cracker crust works perfectly. It’s buttery, slightly crunchy, and pairs wonderfully with the creamy cheesecake filling. If you prefer something different, you can swap it out for crushed vanilla wafers, Oreos, or even digestive biscuits. The key is to mix the crumbs with melted butter so they hold together in the cup.
If you want to skip the crust altogether, you can pour the cheesecake filling directly into the cups and serve them as crustless cheesecake cups. This is a great option for those looking for a gluten-free alternative or a lighter version of the dessert.
Options for Substitutions
One of the best things about this recipe is how flexible it is! Here are some easy substitutions you can make:
- Crust Alternatives – Swap graham crackers for Oreos, vanilla wafers, or shortbread cookies for a different flavor.
- Dairy-Free Option – Use dairy-free cream cheese and coconut cream instead of regular cream cheese and heavy cream.
- Sweeteners – Replace granulated sugar with honey, maple syrup, or a sugar substitute for a refined sugar-free version.
- Toppings – Instead of fruit topping, try melted chocolate, caramel, or crushed candy for a unique twist.
- Flavor Boost – Add a splash of lemon juice for extra tang or mix in vanilla bean paste for a richer flavor.
Ingredients for This Easy Cheesecake Cups Recipe
Each ingredient plays a key role in creating the perfect balance of flavor and texture. Here’s what you’ll need:
- Graham cracker crumbs – The base of the crust, providing a sweet and slightly crunchy contrast to the creamy filling.
- Melted butter – Helps bind the graham cracker crumbs together to form a solid crust.
- Cream cheese – The star ingredient, giving the cheesecake its signature creamy and tangy taste.
- Powdered sugar – Sweetens the filling while keeping it smooth and lump-free.
- Vanilla extract – Enhances the flavor with a warm and slightly floral note.
- Heavy whipping cream – Adds lightness and a fluffy texture to the cheesecake filling.
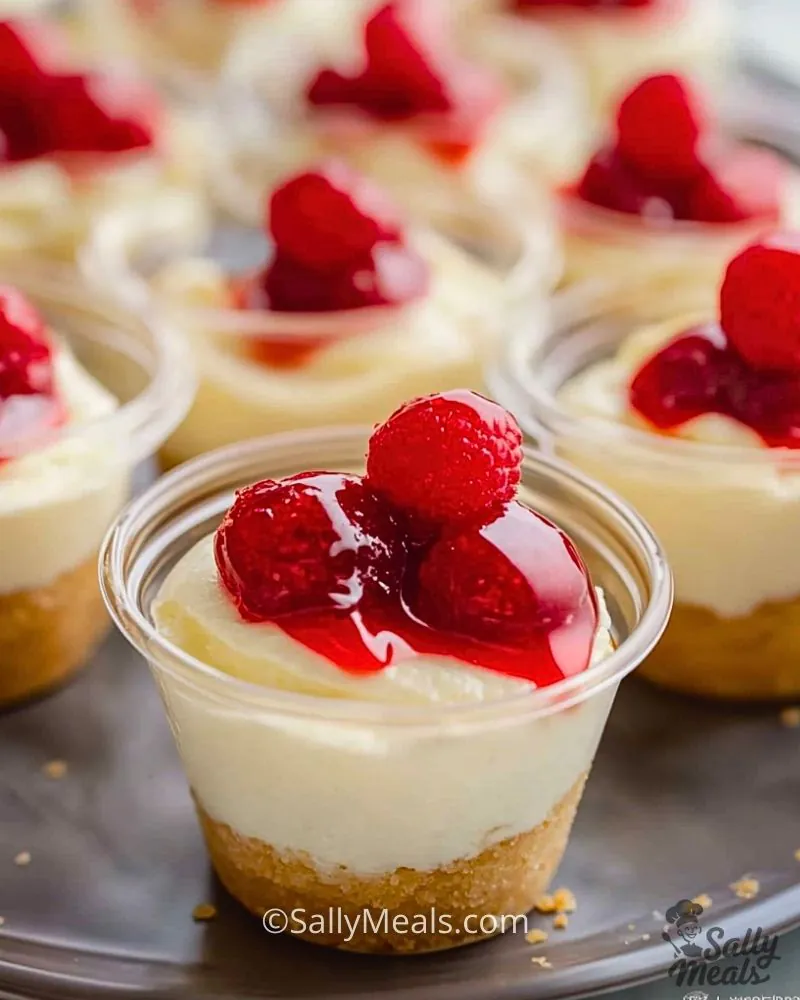
- Cherry pie filling (or any fruit topping of choice) – Brings a burst of sweetness and color to each cup, making them visually appealing and delicious.
With just these simple ingredients, you can create a dessert that looks fancy but is incredibly easy to make!
Step 1: Prepare the Crust
Start by mixing the graham cracker crumbs with melted butter until the texture resembles wet sand. This helps the crust hold together in the cups. Divide the mixture evenly into small dessert cups or muffin liners, pressing it down firmly to create a solid base. Let them chill in the refrigerator while you prepare the filling.
Step 2: Make the Cheesecake Filling
In a large mixing bowl, beat the softened cream cheese with powdered sugar until smooth and creamy. Add vanilla extract for extra flavor. In a separate bowl, whip the heavy cream until it forms stiff peaks. Gently fold the whipped cream into the cream cheese mixture, making sure not to deflate the airy texture.
Step 3: Assemble the Cheesecake Cups
Spoon or pipe the cheesecake filling into the prepared crust cups, smoothing the tops for an even finish. Once filled, refrigerate for at least 2 hours to allow the cheesecake to set properly.
Step 4: Add the Toppings
Just before serving, spoon a generous amount of cherry pie filling (or your topping of choice) over each cheesecake cup. You can also get creative with chocolate shavings, crushed cookies, or fresh fruit.
How Long to Chill the Easy Cheesecake Cups
These no-bake cheesecake cups need at least 2 hours in the refrigerator to set properly. If you have extra time, chilling them for 4 hours or overnight will give you an even firmer and creamier texture. Avoid rushing this step, as it helps the flavors develop and ensures the perfect consistency.
Tips for Perfect Easy Cheesecake Cups
- Use Softened Cream Cheese – Let the cream cheese come to room temperature before mixing to ensure a smooth and creamy texture without lumps.
- Whip the Cream Properly – Whipping the heavy cream to stiff peaks before folding it into the cheesecake mixture makes the filling light and fluffy.
- Press the Crust Firmly – A well-packed crust prevents crumbling when eating the cheesecake cups. Use the back of a spoon to press it down tightly.
- Chill Long Enough – Patience is key! Chilling the cheesecake cups for at least 2 hours helps them set and hold their shape.
- Customize Your Toppings – Swap the cherry topping for fresh berries, caramel sauce, or even crushed cookies for a unique twist.
- Use a Piping Bag – For a neat and professional look, pipe the cheesecake filling into the cups instead of spooning it in.
- Make Ahead Friendly – These cheesecake cups store well in the fridge, making them a perfect make-ahead dessert for parties.
Watch Out for These Mistakes While Cooking
- Not Softening the Cream Cheese – If the cream cheese is too cold, it won’t mix smoothly, leading to a lumpy filling. Always let it sit at room temperature before using.
- Overmixing the Filling – While you want the mixture to be smooth, overmixing can cause the filling to lose its light and airy texture. Fold in the whipped cream gently.
- Skipping the Chilling Step – Cheesecake needs time to set. Rushing this step will result in a soft, runny texture instead of a firm and creamy consistency.
- Using Too Much Butter in the Crust – Too much butter can make the crust overly greasy or cause it to harden too much when chilled. Stick to the recommended ratio.
- Not Packing the Crust Firmly Enough – If the crust is too loose, it may crumble when you try to eat the cheesecake cups. Use a spoon to press it down well.
- Adding Toppings Too Early – If you add fruit toppings before chilling, the moisture can seep into the filling and make it too soft. Add toppings just before serving.
What to Serve With Easy Cheesecake Cups?
1. Fresh Berries
Strawberries, raspberries, or blueberries add a natural sweetness and a pop of color to your dessert.
2. Whipped Cream
A light dollop of homemade whipped cream makes the cheesecake even more indulgent.
3. Chocolate Drizzle
Melted chocolate or a chocolate ganache drizzle gives a rich and elegant touch.
4. Caramel Sauce
For a sweet, buttery contrast, drizzle warm caramel sauce over the cheesecake cups.
5. Crushed Nuts
Sprinkle chopped almonds, pecans, or walnuts for added texture and nutty flavor.
6. Graham Cracker Crumbs
A little extra sprinkle of graham cracker crumbs on top enhances the crust flavor.
7. Espresso or Coffee
Pairing cheesecake with a strong espresso or iced coffee balances the sweetness.
8. Mini Chocolate Chips
A handful of mini chocolate chips adds crunch and extra chocolatey goodness!
Storage Instructions
To keep your Easy Cheesecake Cups fresh and delicious, follow these storage tips:
- Refrigeration: Store the cheesecake cups in an airtight container in the refrigerator for up to 5 days. This keeps them firm and prevents the flavors from absorbing any fridge odors.
- Freezing: If you want to store them for longer, freeze the cheesecake cups without toppings for up to 2 months. Wrap each cup in plastic wrap and place them in a sealed container. When ready to eat, let them thaw in the fridge overnight.
- Toppings: If using fruit or syrup toppings, add them just before serving to avoid sogginess.
Estimated Nutrition
(Per serving, based on a standard recipe with graham cracker crust and cherry topping)
- Calories: ~250-300
- Carbohydrates: ~30g
- Protein: ~3g
- Fat: ~15g
- Saturated Fat: ~9g
- Sugar: ~18g
- Fiber: ~1g
- Sodium: ~150mg
Note: Nutrition values may vary based on ingredient choices and portion sizes.
Frequently Asked Questions
1. Can I make these cheesecake cups ahead of time?
Yes! These cheesecake cups can be made up to 2 days in advance and stored in the fridge. Just add the toppings before serving to keep them fresh.
2. Can I use store-bought whipped topping instead of heavy cream?
Absolutely! If you want a shortcut, you can use whipped topping like Cool Whip instead of whipping your own cream. However, homemade whipped cream gives a fresher taste.
3. How can I make this recipe gluten-free?
Simply swap the graham cracker crust for gluten-free cookies or use a crustless version for a naturally gluten-free dessert.
4. Can I use low-fat cream cheese?
Yes, but keep in mind that low-fat cream cheese will make the cheesecake filling slightly less creamy and rich.
5. Do I need to bake the crust?
Nope! The crust sets in the fridge with the melted butter binding it together—no baking required.
6. What other toppings work well for these cheesecake cups?
Try strawberry sauce, caramel drizzle, crushed Oreos, lemon curd, or chopped nuts for different flavors!
7. Can I make these in a muffin tin instead of cups?
Yes! Line a muffin tin with cupcake liners and follow the same steps. It makes for easy serving and cleanup.
8. How do I prevent the filling from being too soft?
Make sure the cheesecake cups are chilled for at least 2 hours before serving. If the filling is too soft, chill them longer or whip the cream to stiff peaks before folding it into the mixture.
Conclusion
These Easy Cheesecake Cups are the perfect no-bake dessert that’s simple, creamy, and incredibly delicious. Whether you’re making them for a party or just treating yourself, they’re guaranteed to be a hit. Save this recipe on Pinterest, share it with your family and friends, and let them enjoy these delightful mini cheesecakes too!
Easy Cheesecake Cups
- Prep Time: 15 minutes
- Chilling Time: 2 hours
- Total Time: 2 hours 15 minutes
- Yield: 6–8 servings 1x
Description
These Easy Cheesecake Cups are a delicious no-bake dessert, perfect for any occasion. With a buttery graham cracker crust, a creamy cheesecake filling, and a sweet fruit topping, they are simple to make and full of flavor. Great for parties, potlucks, or a quick treat!
Ingredients
- 1 1/2 cups graham cracker crumbs
- 1/4 cup melted butter
- 8 oz cream cheese, softened
- 1/2 cup powdered sugar
- 1 teaspoon vanilla extract
- 1 cup heavy whipping cream
- 1 cup cherry pie filling (or preferred topping)
Instructions
- In a bowl, mix graham cracker crumbs with melted butter until combined.
- Divide the mixture into small dessert cups and press down to form a crust. Refrigerate while preparing the filling.
- In a large bowl, beat softened cream cheese with powdered sugar and vanilla extract until smooth.
- In a separate bowl, whip the heavy cream until stiff peaks form.
- Gently fold the whipped cream into the cream cheese mixture.
- Spoon or pipe the cheesecake filling into the prepared crust cups.
- Refrigerate for at least 2 hours to allow the cheesecake to set.
- Top with cherry pie filling or your favorite topping before serving.