Easter is one of my favorite times of year to experiment with festive and indulgent desserts, and this Easter Oreo Cookie Casserole is easily one of the most delightful treats I’ve whipped up. It combines rich creaminess, layers of crunchy Oreos, and the playful surprise of candy-coated eggs for a dessert that’s as charming to look at as it is delicious to devour. Whether you’re hosting brunch, bringing a dish to a gathering, or just want to treat your family, this casserole brings smiles all around.
What I love most is how simple it is to assemble, yet the result feels extravagant. It’s a chilled, no-bake dessert that’s all about texture and flavor harmony—sweet creaminess, cookie crunch, and pops of Easter candy. If you’ve got a sweet tooth and a love for holiday flair, this one’s for you.
Why You’ll Love This Easter Oreo Cookie Casserole
This isn’t just a dessert—it’s a showstopper. The Oreo layers soak just enough moisture to become soft but still hold structure, while the creamy filling makes every bite luscious. The pastel Easter candies on top add not only a festive look but a surprise crunch and chocolatey bonus in every scoop. It’s no-bake, kid-friendly, and can be made ahead of time—perfect for a busy holiday.
What Kind of Oreos Should I Use?
Classic chocolate Oreos are the perfect base for this Easter cookie casserole. Their iconic crunch and deep cocoa flavor pair beautifully with the creamy layers. However, you can definitely play around—Golden Oreos offer a vanilla twist, and seasonal varieties like Carrot Cake or Confetti Cake can add extra flair. Just make sure to use regular stuffed versions rather than double-stuffed to maintain the right balance in texture.
Options for Substitutions
This recipe is wonderfully flexible, which makes it easy to customize based on what you have or dietary needs:
- Cream cheese: You can swap it for mascarpone for a richer, slightly sweeter flavor.
- Whipped topping: Use homemade whipped cream if you prefer something less processed.
- Milk: Any dairy or non-dairy milk works here—almond, oat, or whole milk all blend well.
- Oreos: Try gluten-free Oreos if needed, or switch things up with another cookie like chocolate chip or graham crackers.
- Easter candies: No mini eggs on hand? Use pastel M&M’s, jellybeans, or chopped chocolate bars instead.
The key is keeping the balance of crunchy, creamy, and sweet.
Ingredients for This Easter Oreo Cookie Casserole
Each ingredient in this dessert plays an important role in building layers of flavor and texture:
- Oreos
These are the base of the casserole, offering the essential cookie crunch and chocolate flavor that anchors the entire dessert. - Cream cheese
Adds tanginess and rich creaminess to the filling, making the dessert feel luxurious and indulgent. - Powdered sugar
Helps sweeten the cream cheese without making the texture grainy, blending in smoothly for a luscious layer. - Vanilla extract
Enhances the overall flavor, bringing warmth and depth to the creamy filling. - Whipped topping (like Cool Whip)
Lightens the cream cheese mixture and adds that fluffy, melt-in-your-mouth texture. - Milk
Softens the Oreos slightly as the dessert sets, so you get that cake-like tenderness. - Easter candy eggs (chocolate-coated or candy shell)
These add festive color, crunch, and surprise bites of chocolate—perfect for that springtime cheer. - Mini Oreos (optional, for topping)
Adds extra crunch and visual charm on top. They also give each serving that cute, picture-perfect finish.
Step 1: Crush the Oreos
Start by placing most of your Oreos in a large zip-top bag and lightly crush them using a rolling pin or the bottom of a glass. You want a mix of crumbs and small chunks—not fine dust—so the texture holds up in layers.
Step 2: Make the Creamy Filling
In a large bowl, beat the cream cheese until smooth and fluffy. Add the powdered sugar and vanilla extract, mixing until fully incorporated. Gently fold in the whipped topping until you have a light and creamy mixture.
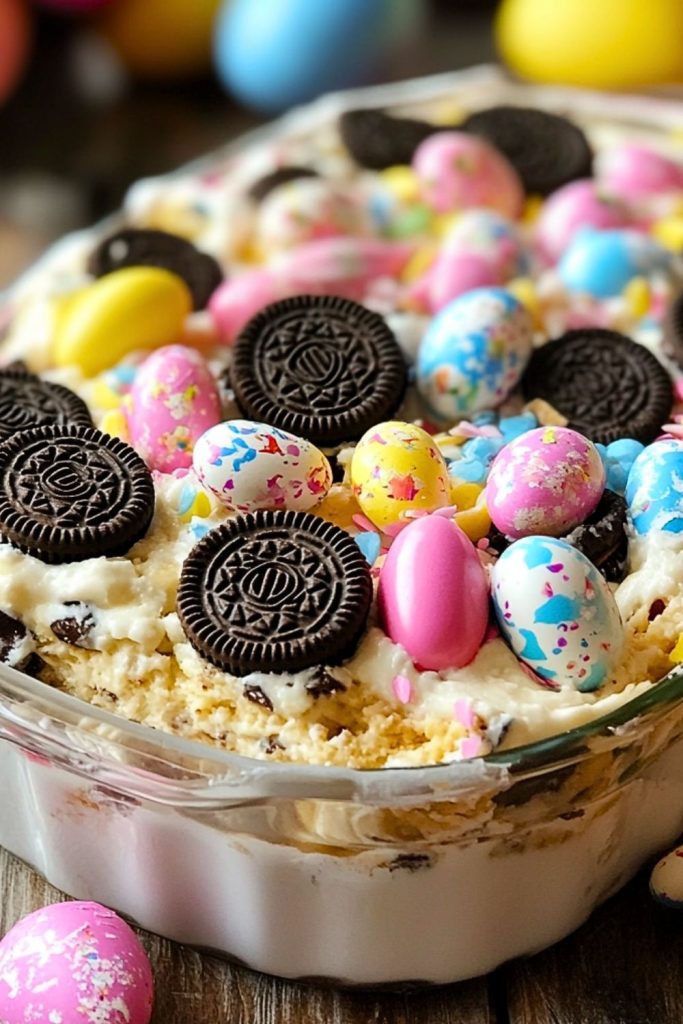
Step 3: Layer the Casserole
In a glass trifle dish or 9×13-inch pan, spread half of the crushed Oreos across the bottom. Pour in half of the cream cheese mixture and smooth it out. Repeat with the remaining crushed Oreos and top with the rest of the creamy filling.
Step 4: Add Milk for Moisture
Drizzle a little milk over the layers to help soften the cookies slightly as it chills. This step ensures your casserole is spoonable and moist, not dry.
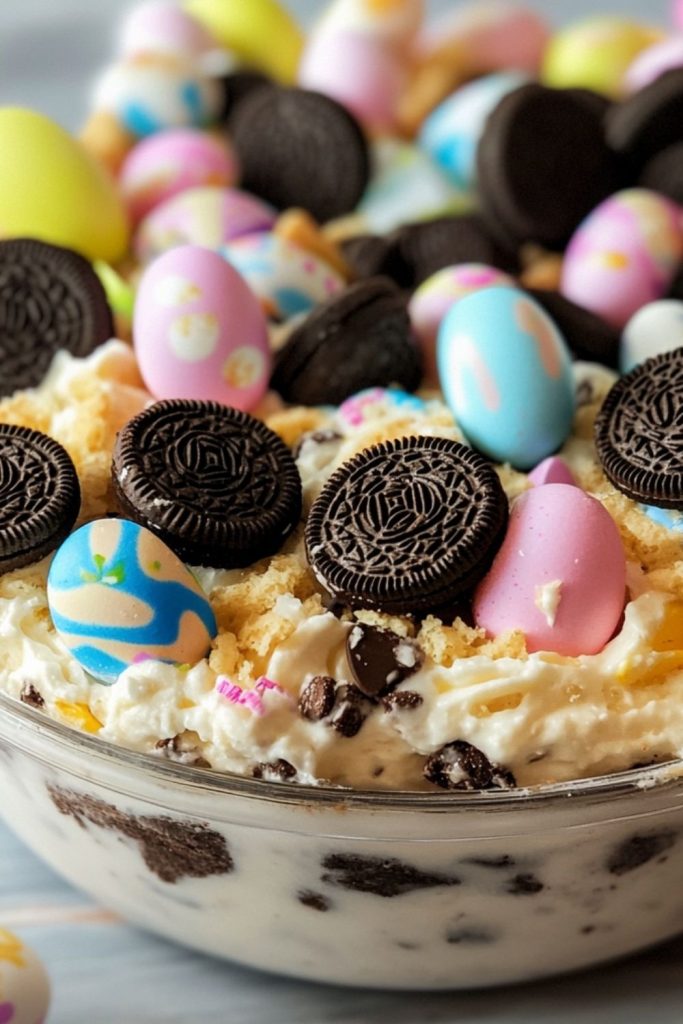
Step 5: Decorate with Easter Candy and Mini Oreos
Finish the top with whole mini Oreos and festive Easter candy eggs. Scatter them across the surface for that irresistible, colorful look.
Step 6: Chill Before Serving
Cover and refrigerate for at least 3 hours, or overnight if possible. This allows the flavors to meld and the cookies to soften to that perfect, cake-like texture.
How Long to Cook the Easter Oreo Cookie Casserole
Technically, this is a no-bake recipe—so there’s no oven involved! But it does need time to chill and set. For best results, let the casserole rest in the refrigerator for at least 3 hours. If you can, let it sit overnight to allow the Oreos to soften and absorb flavor, making each bite perfectly cohesive and creamy.
Tips for Perfect Easter Oreo Cookie Casserole
- Use softened cream cheese: Let it come to room temperature before mixing for the smoothest, lump-free filling.
- Don’t crush Oreos too finely: Leave some chunks for better texture.
- Chill long enough: Patience pays off—the longer it sits, the better it tastes and holds together.
- Fold gently: When mixing in the whipped topping, use a gentle folding motion to keep the filling light and fluffy.
- Decorate just before serving: If you’re using delicate candy shells, wait to decorate until you’re ready to serve to prevent colors from running.
- Try layering in a clear dish: A trifle bowl makes this dessert visually stunning and perfect for entertaining.
Watch Out for These Mistakes While Cooking
Even though this Easter Oreo Cookie Casserole is simple, a few missteps can impact the final result:
- Over-crushing the Oreos: Turning them into dust will make the texture too mushy instead of pleasantly soft with some crunch.
- Skipping the chill time: It might be tempting to dig in early, but without enough time to set, the layers won’t hold or meld properly.
- Not softening the cream cheese: Cold cream cheese can lead to a lumpy filling that’s harder to mix.
- Using too much milk: A light drizzle is enough. Overdoing it can make the bottom layer soggy.
- Forgetting to taste the filling: Always taste the cream mixture before assembling—you may want a touch more vanilla or sugar based on preference.
- Adding candy too soon: Candy-coated eggs can bleed color if added too early. Wait until the end or just before serving.
What to Serve With Easter Oreo Cookie Casserole?
Fresh Fruit Salad
A light and tangy fruit salad balances the richness of the casserole perfectly.
Deviled Eggs
A savory Easter classic that contrasts the sweetness of this dessert.
Hot Cross Buns
A soft, spiced bread that complements the spring holiday table beautifully.
Lemon Bars
Bright and citrusy, they offer a refreshing contrast to the dense Oreo layers.
Iced Coffee or Cold Brew
The bitterness of coffee pairs excellently with the sweet creaminess of the casserole.
Vanilla Ice Cream
If you’re really going for indulgence, a scoop of vanilla ice cream adds cool creaminess that melts into the layers.
Sparkling Lemonade
Light, fizzy, and citrus-forward, it’s a crowd-pleasing drink to serve alongside.
Carrot Sticks and Hummus (for kids’ table)
A simple savory snack to balance out the sugar rush from dessert.
Storage Instructions
This Easter Oreo Cookie Casserole stores beautifully, making it a great make-ahead option for holiday prep. Here’s how to keep it fresh:
- Refrigerator: Cover the dish tightly with plastic wrap or transfer leftovers to an airtight container. It will stay fresh in the fridge for up to 4 days. The cookies will continue to soften slightly, but the flavors will meld even more.
- Freezer: For longer storage, you can freeze the casserole (without the candy toppings) for up to 2 months. Wrap it tightly with both plastic wrap and aluminum foil. Thaw overnight in the refrigerator before serving, and add fresh toppings just before presentation.
Estimated Nutrition
Please note, these values are approximate and can vary based on specific brands and quantities used.
- Calories: ~320 per serving
- Total Fat: 18g
- Saturated Fat: 9g
- Cholesterol: 35mg
- Sodium: 190mg
- Carbohydrates: 36g
- Sugar: 26g
- Protein: 3g
This dessert is rich and indulgent, so smaller portions are often just right to satisfy your sweet tooth without going overboard.
Frequently Asked Questions
Can I make this recipe ahead of time?
Yes! This casserole is actually better when made in advance. Preparing it the night before gives the cookies time to soften and the flavors to develop.
What if I don’t have Easter candy?
No problem. You can use M&Ms, chopped chocolate bars, pastel sprinkles, or even just more Oreos for decoration.
Can I use homemade whipped cream instead of Cool Whip?
Absolutely. Just be sure to stabilize it with a little powdered sugar or gelatin if you plan to make it in advance, so it holds its structure.
Is this dessert kid-friendly?
Totally! It’s sweet, colorful, and fun to eat. Just be cautious with small candies for younger children due to choking hazards.
Can I make this gluten-free?
Yes. Swap out regular Oreos with gluten-free Oreos and double-check your candy choices to ensure they are gluten-free as well.
How many servings does this recipe make?
It serves about 10–12 people, depending on portion size. Perfect for potlucks, family gatherings, or Easter brunch.
Can I use flavored Oreos?
Definitely! Golden, Carrot Cake, or even Lemon Oreos can add a unique twist. Just consider how the flavor will pair with the cream layer and toppings.
How do I keep the top looking fresh?
Decorate with the candies just before serving to maintain their color and crunch. Store leftovers loosely covered to avoid moisture buildup.
Conclusion
Easter Oreo Cookie Casserole is the kind of dessert that makes holidays feel magical. It’s simple to put together, incredibly festive, and always a hit with both kids and adults. With its luscious cream layers, cookie crumble base, and colorful candy topping, every bite brings joy and indulgence. Whether you’re celebrating with family or sharing something sweet at a potluck, this no-bake treat is guaranteed to earn a spot in your seasonal traditions.

Easter Oreo Cookie Casserole
- Prep Time: 15 minutes
- Chill Time: 3 hours
- Total Time: 3 hours 15 minutes
- Yield: 10–12 servings 1x
Description
Looking for a festive no-bake dessert that’s easy, colorful, and crowd-pleasing? This Easter Oreo Cookie Casserole is a perfect addition to your spring celebration. With layers of crushed Oreos, a sweet and creamy filling, and cheerful candy toppings, it’s a showstopping treat that’s rich, fluffy, and packed with fun. Ideal for anyone in need of quick breakfast ideas, easy dinner desserts, or party-ready food ideas. A playful twist on a classic cookie casserole, this easy recipe is a surefire way to make your Easter extra special.
Ingredients
- 1 package (14.3 oz) Oreo cookies (regular, not double-stuffed)
- 8 oz cream cheese, softened
- 1 cup powdered sugar
- 1 tsp vanilla extract
- 8 oz whipped topping (like Cool Whip)
- 1/3 cup milk
- 1 cup Easter candy eggs (chocolate or candy-coated)
- 1/2 cup mini Oreos (optional, for garnish)
Instructions
- Place Oreos in a zip-top bag and crush into coarse crumbs with a rolling pin.
- Beat softened cream cheese until smooth. Add powdered sugar and vanilla extract, and mix until fully combined.
- Gently fold in the whipped topping to create a light, fluffy mixture.
- In a trifle dish or 9×13 pan, layer half of the crushed Oreos.
- Spread half of the cream mixture over the Oreo layer.
- Repeat with the remaining crushed Oreos and top with the rest of the cream mixture.
- Drizzle milk over the layers to slightly soften the Oreos.
- Decorate the top with candy eggs and mini Oreos.
- Chill in the refrigerator for at least 3 hours before serving.