Golden, buttery, and delicately crisp, Classic French Butter Cookies — known in France as Sablés Breton — are the ultimate indulgence in simplicity. Each bite crumbles gently with a soft crunch, melting slowly on the tongue to reveal rich layers of butter flavor subtly balanced by sweetness. Traditionally baked in Brittany, these cookies are a perfect testament to the elegance of French baking: few ingredients, prepared with care, yielding a texture and flavor that transcends their modest appearance.
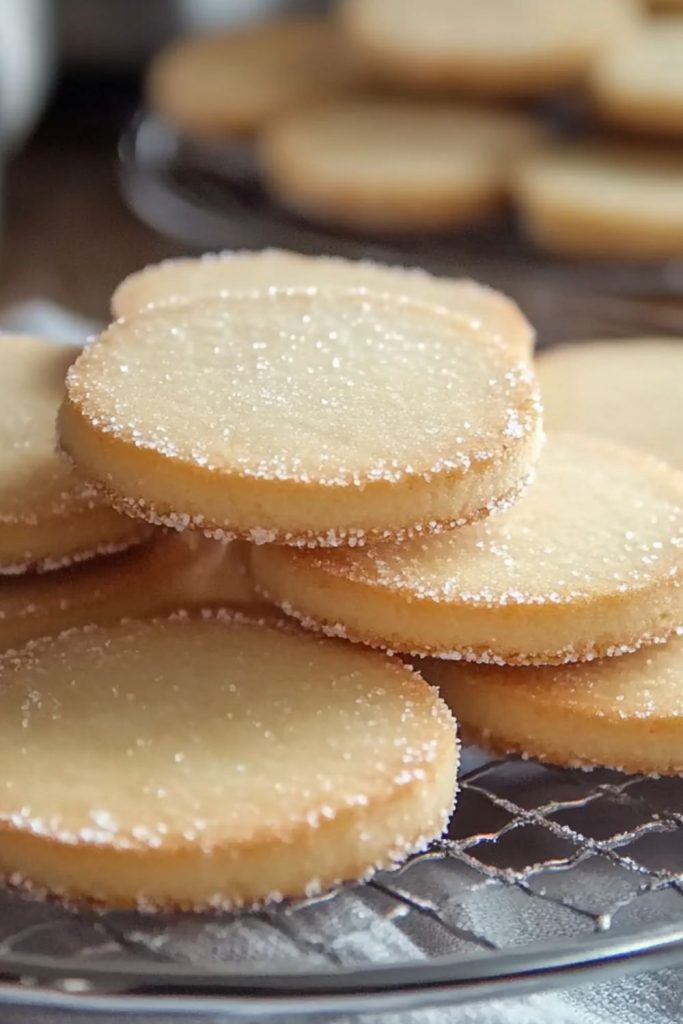
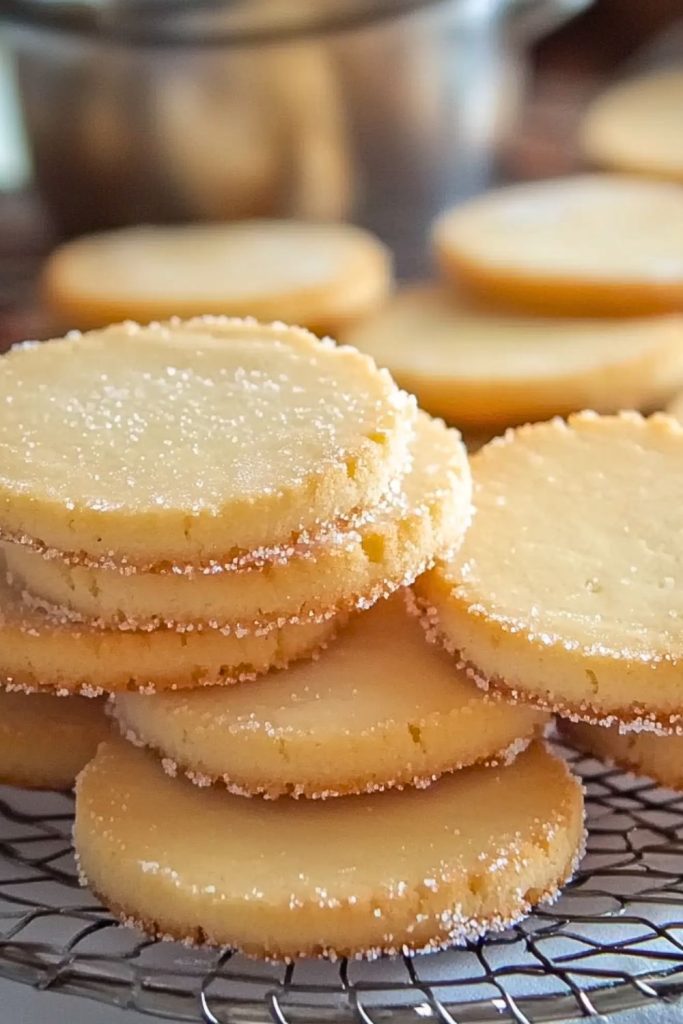
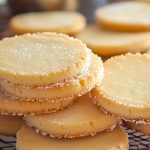
These cookies are ideal for everything from afternoon tea to elegant dessert platters. Their sugar-dusted edges sparkle like tiny jewels, making them as visually delightful as they are delicious. Whether you’re looking for a classic holiday treat or simply a refined snack to accompany your coffee, French butter cookies deliver sophistication and comfort in every bite.
Why You’ll Love This Classic French Butter Cookies Recipe
- Timeless Flavor: The deep, creamy richness of European-style butter is the star of this cookie, enhanced by just a touch of vanilla and sugar.
- Simple Ingredients, Big Impact: With only a handful of pantry staples, this recipe proves that less is more.
- Elegant Appearance: The sugar-coated rims and golden finish give these cookies a chic, bakery-style look.
- Perfect Texture: Crisp on the outside, delicately tender inside—these cookies strike a flawless balance.
- Make-Ahead Friendly: The dough can be made in advance and even frozen, making this a practical option for busy schedules.
Preparation Phase & Tools to Use for Classic French Butter Cookies
Crafting Classic French Butter Cookies is a beautifully simple process, but precision and the right equipment are key to achieving the iconic texture and finish. Here’s what you’ll need and why each item matters.
Essential Tools and Equipment:
- Stand Mixer or Hand Mixer: Creaming butter and sugar thoroughly is crucial for that light, crumbly texture. A stand mixer makes this effortless, but a hand mixer works just as well.
- Mixing Bowls: At least two — one for the creamed mixture and one for the dry ingredients — to keep things tidy and efficient.
- Plastic Wrap or Parchment Paper: Used to shape and chill the dough, which is essential for clean slicing and defined edges.
- Sharp Knife or Dough Cutter: Precision when slicing the chilled dough ensures uniform cookies that bake evenly.
- Wire Cooling Rack: Prevents sogginess by allowing air to circulate under the cookies after baking.
- Baking Sheets: Heavy-duty, flat sheets ensure even browning without warping under heat.
- Parchment Paper or Silicone Baking Mat: Prevents sticking and ensures even browning, while also making cleanup a breeze.
Preparation Tips
- Use High-Quality Butter: This recipe relies heavily on butter for flavor and texture. European-style butter with higher fat content will yield superior results.
- Chill the Dough Thoroughly: Don’t rush this step. Cold dough holds its shape during slicing and baking, which gives the cookies their signature clean edges.
- Weigh Your Ingredients: Precision matters in baking. Using a kitchen scale ensures consistent, reliable results.
- Slice Evenly: Uneven slices lead to uneven baking. If you want that perfect uniform look, consider using a ruler or cookie guide.
- Avoid Overmixing: Once you add the flour, mix just until combined. Overworking the dough can make the cookies tough instead of tender.
- Roll the Dough Log Tightly: This prevents air pockets and helps maintain a round shape when slicing.
Ingredients for This Classic French Butter Cookies Recipe
Creating these refined cookies requires only a short list of quality ingredients. Each plays a vital role in the final texture and flavor, so don’t skimp on quality—especially when it comes to the butter.
Core Ingredients:
- 1 cup (226g) unsalted European-style butter, at room temperature
Rich and creamy, butter is the foundation of both flavor and texture in these cookies. - 2/3 cup (80g) powdered sugar
Gives a tender crumb and smooth sweetness without grittiness. - 2 large egg yolks
Adds richness and helps bind the dough, contributing to that signature melt-in-your-mouth bite. - 1 teaspoon pure vanilla extract
Enhances the buttery base with subtle aromatic depth. - 2 cups (240g) all-purpose flour
The structural backbone of the cookie, delivering that signature sandy texture. - 1/4 teaspoon fine sea salt
Balances the sweetness and brings out the rich butter flavor. - 1/4 cup (50g) granulated sugar (for rolling edges)
This optional but traditional step adds sparkle and crunch to the cookie rims.
Step 1: Cream the Butter and Sugar
In a large mixing bowl, add the softened butter and powdered sugar. Using a stand mixer fitted with the paddle attachment (or a hand mixer), beat on medium speed for 2–3 minutes until the mixture is pale, smooth, and fluffy. This creaming step is essential for the cookies’ delicate texture.
Step 2: Incorporate the Egg Yolks and Vanilla
Add the egg yolks, one at a time, mixing well after each addition. Scrape down the sides of the bowl as needed. Then add the vanilla extract and continue mixing until fully blended. This step enriches the dough and deepens the flavor.
Step 3: Add the Dry Ingredients
Reduce the mixer speed to low and gradually add in the flour and salt. Mix until just combined—do not overwork the dough. The dough should be soft but not sticky, and should come together cleanly without crumbling.
Step 4: Shape the Dough into Logs
Divide the dough in half. On a sheet of parchment paper or plastic wrap, roll each half into a smooth, even log about 1.5 inches in diameter. Wrap tightly and chill in the refrigerator for at least 2 hours, or until very firm. For best results, you can chill overnight.
Step 5: Preheat Oven and Prepare for Slicing
When ready to bake, preheat your oven to 350°F (175°C). Line baking sheets with parchment paper or silicone mats. Remove one dough log from the refrigerator. If desired, roll it in granulated sugar to coat the edges before slicing.
Step 6: Slice and Arrange
Using a sharp knife, slice the dough into 1/4-inch thick rounds. Place them about 1 inch apart on the prepared baking sheets. If any cookies lose their shape, gently reshape the edges with your fingers.
Step 7: Bake and Cool
Bake for 12–15 minutes, or until the edges just begin to turn golden. The centers should remain pale. Let cookies cool on the baking sheet for 5 minutes, then transfer to a wire rack to cool completely. The cookies will crisp up as they cool.
Notes
- Butter Temperature Matters: Make sure your butter is truly room temperature—soft to the touch but not melted. This ensures it creams properly and aerates the dough.
- Flour Accuracy: Too much flour can lead to dense cookies. For best results, spoon the flour into your measuring cup and level it off, or use a kitchen scale.
- Chilling Time: Don’t skip or shorten the chilling process. Firm dough slices cleanly and holds its shape better during baking.
- Edge Sugar Coating: Rolling the dough log in sugar before slicing gives the cookies a classic French finish — a slight crunch and lovely sparkle.
- Flavor Boosts: For a unique twist, you can infuse the dough with a hint of citrus zest (lemon or orange) or a touch of almond extract.
Watch Out for These Mistakes While Cooking
- Overmixing the Dough: Once you add the flour, avoid mixing too long. Overworking the dough can develop gluten and lead to tough cookies instead of a tender, crumbly texture.
- Skipping the Chill: Warm dough spreads too much and will lose its clean, round shape. Always chill for at least 2 hours.
- Using Low-Quality Butter: This is a butter-forward cookie — using cheap or bland butter will drastically affect the flavor.
- Overbaking: These cookies should not be deeply golden. Look for a light golden edge. Overbaking will turn them dry and hard.
- Cutting Uneven Slices: Uneven thickness results in uneven baking. Use a ruler or guide for consistent sizing.
- Crowding the Pan: Give the cookies room to spread slightly. Bake in batches if needed.
- Not Rotating the Pan: If your oven has hot spots, rotate the baking sheet halfway through for even coloring.
- Skipping Cooling Time: Don’t move cookies straight from the oven to your hand — they finish setting as they cool. Use a wire rack to prevent sogginess.
What to Serve With Classic French Butter Cookies?
These elegant cookies are wonderfully versatile — perfect on their own, yet even more delightful when paired with the right drinks or dishes. Whether you’re serving them for guests, during a special occasion, or as a quiet treat for yourself, here are several pairing ideas to elevate the experience.
8 Recommendations
- Afternoon Tea
Pair these cookies with a classic Earl Grey or Darjeeling tea. The buttery richness beautifully complements floral and citrus tea notes. - Espresso or Coffee
A bold espresso or café au lait cuts through the cookie’s buttery depth, creating a balanced and satisfying contrast. - Hot Chocolate
For a comforting indulgence, serve these cookies alongside a thick, European-style hot chocolate — rich, creamy, and utterly decadent. - Champagne or Sparkling Wine
For a touch of sophistication, offer your sablés with a glass of dry sparkling wine. The crisp bubbles balance out the richness. - Fresh Berries and Whipped Cream
Plate the cookies with a small dish of strawberries or raspberries and a dollop of lightly sweetened whipped cream for an easy, elegant dessert. - Vanilla or Honey Ice Cream
Crumble the cookies over a scoop of ice cream to add texture and enhance the vanilla-butter flavor harmony. - French Cheese Board
Add them to a cheese board with Brie or Camembert, nuts, and dried apricots. The sweetness of the cookies acts like a gourmet cracker. - Fruit Compote or Lemon Curd
Serve alongside small jars of compote or lemon curd for dipping — the tartness complements the mellow, buttery profile of the cookies.
Storage Instructions
Classic French Butter Cookies store exceptionally well, making them a great make-ahead option for gatherings or gifting. Their texture even improves slightly after a day, allowing the flavors to meld beautifully.
How to Store:
- Room Temperature: Store the cookies in an airtight container at room temperature for up to 1 week. Keep them away from direct sunlight or heat.
- Refrigeration: Not necessary for baked cookies, but chilled dough logs can be stored in the refrigerator for up to 4 days.
- Freezing Dough: Wrap the dough logs tightly in plastic wrap, then place in a zip-top freezer bag. Freeze for up to 3 months. Thaw overnight in the fridge before slicing and baking.
- Freezing Baked Cookies: Once cooled completely, freeze the baked cookies in layers separated by parchment paper in an airtight container. They’ll keep for up to 2 months. Allow them to come to room temperature before serving.
Estimated Nutrition (Per Cookie – approx. based on 24 cookies)
| Nutrient | Amount |
|---|---|
| Calories | 120 kcal |
| Total Fat | 8 g |
| Saturated Fat | 5 g |
| Cholesterol | 35 mg |
| Sodium | 35 mg |
| Total Carbohydrate | 11 g |
| Sugars | 5 g |
| Protein | 1 g |
Note: Nutritional values are estimates and may vary based on the specific ingredients and sizes used.
Frequently Asked Questions
1. Can I use salted butter instead of unsalted?
Yes, but reduce or omit the added salt in the recipe. However, unsalted butter is recommended for full control over the salt level and cleaner flavor.
2. Why do I need to chill the dough?
Chilling solidifies the butter, making the dough easier to slice and helping the cookies maintain their shape while baking. It also enhances the flavor.
3. Can I make the dough ahead of time?
Absolutely! The dough can be stored in the fridge for up to 4 days or frozen for up to 3 months. Just slice and bake directly from the fridge (or slightly thaw if frozen).
4. How do I keep the cookies from spreading too much?
Make sure the dough is well chilled and your oven is preheated. Also, avoid over-creaming the butter which can trap excess air.
5. Can I flavor the dough differently?
Yes! A touch of citrus zest, almond extract, or even a pinch of cinnamon can complement the buttery base without overpowering it.
6. Why are my cookies dry or crumbly?
Overbaking is the most common culprit. Aim for cookies that are just lightly golden on the edges. Also, avoid adding too much flour.
7. Do I have to roll the dough in sugar?
Not at all — it’s optional. But rolling in sugar adds a crisp, sparkly edge that’s traditional and enhances the texture.
8. What’s the difference between these and shortbread?
While both are buttery cookies, sablés use egg yolks, resulting in a slightly more tender, less crumbly texture than traditional Scottish shortbread.
Conclusion
Classic French Butter Cookies (Sablés Breton) are a masterclass in how simple ingredients can create something truly special. With their crisp edges, delicate crumb, and rich buttery flavor, these cookies bring elegance to any occasion — from casual coffee breaks to formal tea services. They’re make-ahead friendly, adaptable with flavor variations, and endlessly enjoyable.
If you’re looking to impress with minimal fuss, this recipe is your golden ticket. Prepare a batch, savor the aroma as they bake, and enjoy every buttery bite — you may just discover your new favorite cookie.
Classic French Butter Cookies Recipe
- Prep Time: 15 minutes
- Cook Time: 12 minutes
- Total Time: 27 minutes
- Yield: About 24 cookies 1x
Description
Buttery, crisp, and effortlessly elegant, Classic French Butter Cookies are the kind of timeless treat that never goes out of style. With a melt-in-your-mouth texture and golden edges that sparkle from a coating of sugar, these cookies are a delightful addition to any baking repertoire. Whether you’re looking for a quick breakfast nibble, a refined addition to a dessert spread, or easy recipe ideas for afternoon tea, this classic delivers on all fronts. It’s rich with European-style butter, subtly sweet, and just the right amount of crumbly. Perfect for holiday trays, gifting, or elevating your everyday food ideas.
Ingredients
- 1 cup (226g) unsalted European-style butter, at room temperature
- 2/3 cup (80g) powdered sugar
- 2 large egg yolks
- 1 teaspoon pure vanilla extract
- 2 cups (240g) all-purpose flour
- 1/4 teaspoon fine sea salt
- 1/4 cup (50g) granulated sugar (for rolling edges, optional)
Instructions
- In a large bowl, cream together the butter and powdered sugar until light and fluffy (about 2–3 minutes).
- Add egg yolks one at a time, beating well after each addition, then mix in the vanilla.
- Gradually add flour and salt, mixing on low speed until just combined.
- Divide dough in half, roll each into a 1.5-inch diameter log, and wrap in parchment or plastic wrap.
- Chill the dough logs in the fridge for at least 2 hours or overnight.
- Preheat oven to 350°F (175°C) and line baking sheets with parchment.
- Roll chilled logs in granulated sugar if desired, then slice into 1/4-inch thick rounds.
- Place slices on prepared sheets, spacing them 1 inch apart.
- Bake 12–15 minutes, until edges are lightly golden.
- Cool on baking sheet for 5 minutes before transferring to a wire rack.