
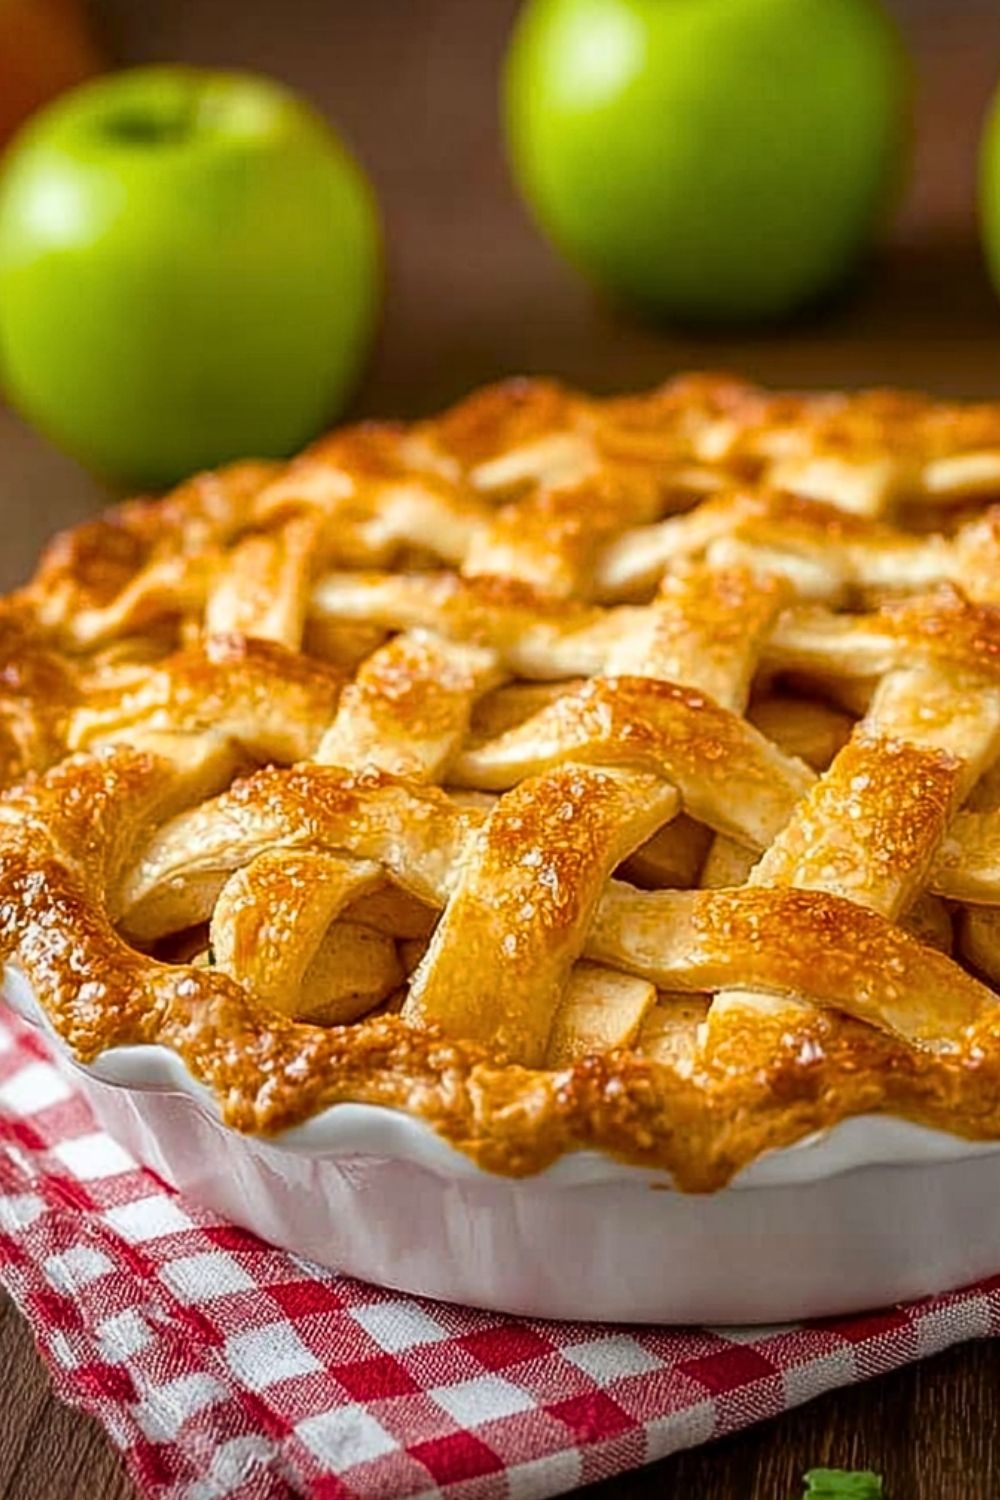
Few desserts evoke the comforting nostalgia of home quite like a warm slice of Classic American Apple Pie. With its flaky golden crust, cinnamon-spiced apple filling, and that unmistakable aroma wafting from the oven, this pie is more than a dessert—it’s a tradition. Whether it’s served at Thanksgiving, the Fourth of July, or just a crisp autumn evening, it always brings smiles and second helpings.
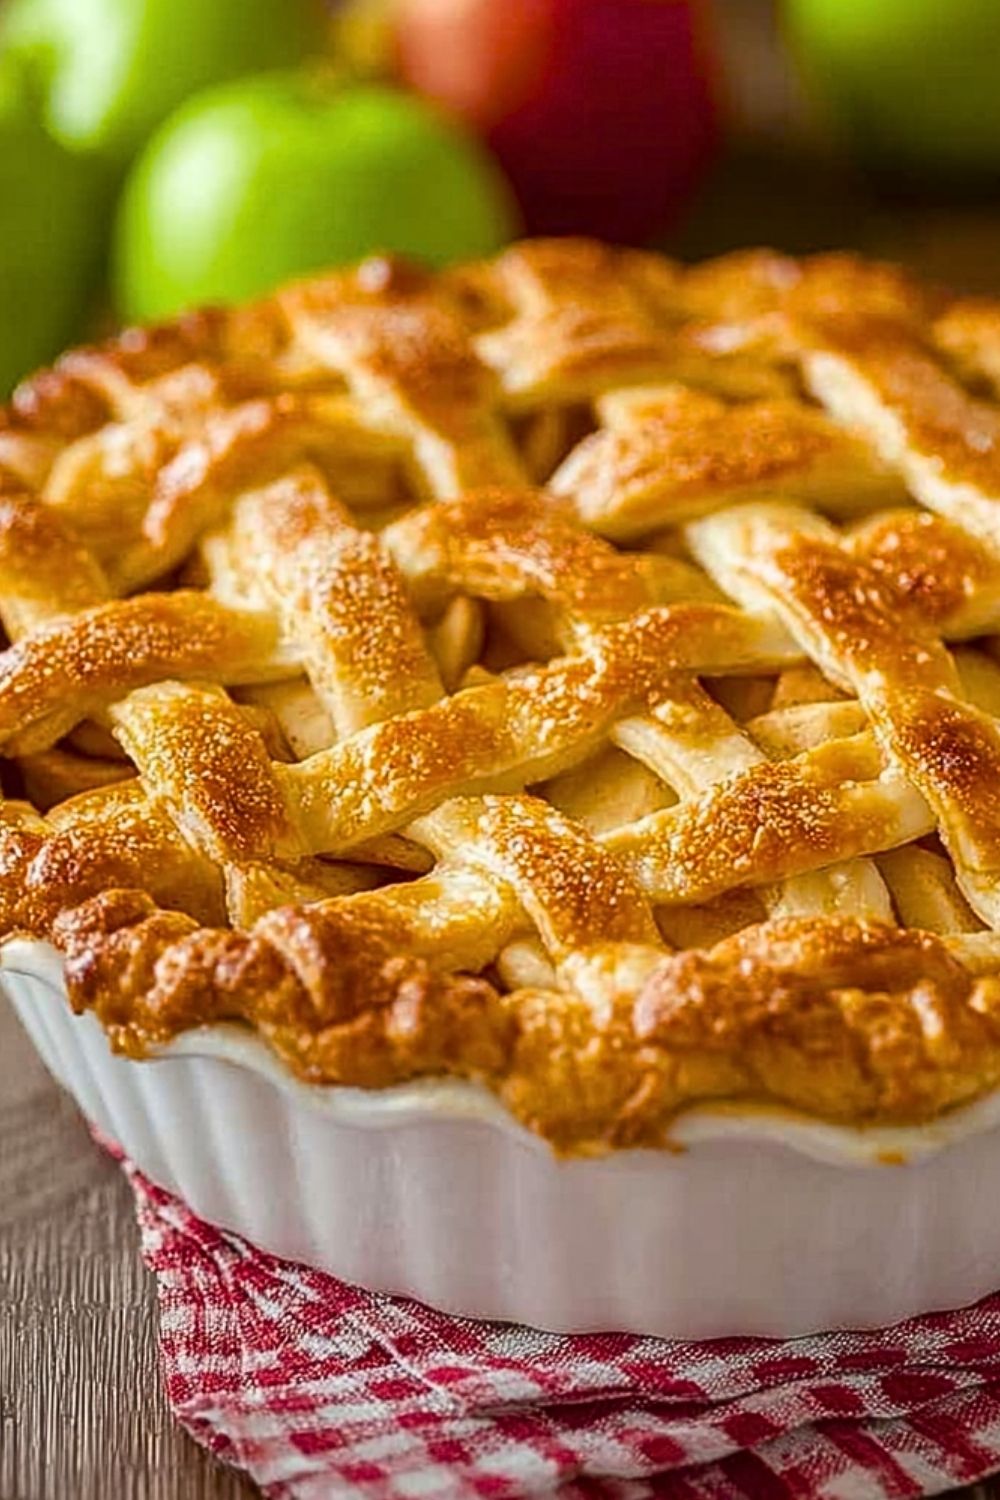
The beauty of this pie lies in its simplicity: tart apples meet sugar and spice, all wrapped in a buttery crust that’s both tender and crisp. Its lattice topping gives it that old-fashioned charm while providing a beautiful golden finish. Served on its own or with a scoop of vanilla ice cream, it’s a treat that never goes out of style.
Why You’ll Love This Classic American Apple Pie
This pie is the perfect blend of sweet and tart, soft and crunchy, comforting and festive. It’s a showstopper on any dessert table yet approachable enough for bakers of all levels. With a perfectly balanced filling and a crust that holds its shape without getting soggy, this is the pie you’ll want to make again and again.
Preparation Phase & Tools to Use (In this headline mention the essential Tools and Equipment, also the importance of Each Tool)
To create the perfect apple pie, you’ll need a few reliable kitchen tools:
- Mixing Bowls: For combining your filling ingredients. A large one is ideal for tossing apple slices without spilling.
- Apple Peeler/Corer/Slicer: Speeds up prep time and ensures uniform slices for even baking.
- Rolling Pin: Essential for rolling out a smooth, even crust. A tapered French-style pin offers better control.
- Pastry Cutter or Food Processor: Helps incorporate butter into the flour when making homemade pie dough.
- Pie Dish (9-inch): Ceramic or glass works best for even baking and browning.
- Pastry Brush: For brushing egg wash onto the crust for that golden finish.
- Cooling Rack: Allows air circulation underneath the pie, preventing soggy bottoms.
Preparation Tips
Start by selecting firm, tart apples like Granny Smiths—they hold their shape during baking and balance the sweetness of the filling. When making the crust, ensure your butter and water are ice-cold; this helps create that desirable flaky texture. Chill your dough before rolling it out to avoid shrinkage during baking. For a pie that’s not overly runny, toss your apple slices in sugar, let them sit for a few minutes, and drain the excess juices before filling the crust. And don’t forget to tent the pie with foil halfway through baking if the crust starts to brown too quickly.
Ingredients for this Classic American Apple Pie
For the Pie Crust:
- 2 1/2 cups all-purpose flour
- 1 teaspoon salt
- 1 tablespoon granulated sugar
- 1 cup (2 sticks) unsalted butter, cold and cut into cubes
- 6 to 8 tablespoons ice water
For the Apple Filling:
- 6 to 7 cups peeled, cored, and sliced Granny Smith apples (about 6 large apples)
- 3/4 cup granulated sugar
- 1/4 cup brown sugar (light or dark)
- 2 tablespoons all-purpose flour
- 1 tablespoon lemon juice
- 1 teaspoon ground cinnamon
- 1/4 teaspoon ground nutmeg
- 1/8 teaspoon ground cloves (optional)
- 1/4 teaspoon salt
- 2 tablespoons unsalted butter (to dot over filling before baking)
For the Egg Wash:
- 1 egg, beaten with 1 tablespoon milk or water
Optional for Topping:
- Coarse sugar for sprinkling
Step 1: Prepare the Pie Dough
In a large mixing bowl, whisk together the flour, salt, and sugar. Add cold butter cubes and cut them into the flour using a pastry cutter or food processor until the mixture resembles coarse crumbs. Gradually add ice water, one tablespoon at a time, mixing just until the dough comes together. Divide the dough into two discs, wrap in plastic, and refrigerate for at least 1 hour.
Step 2: Make the Apple Filling
While the dough chills, peel, core, and slice the apples. Toss them in a large bowl with granulated sugar, brown sugar, flour, lemon juice, cinnamon, nutmeg, cloves (if using), and salt. Let the mixture sit for 10–15 minutes, then drain excess liquid to avoid a soggy pie.
Step 3: Roll Out the Dough
Preheat your oven to 425°F (220°C). On a floured surface, roll out one disc of chilled dough into a 12-inch circle. Carefully transfer it to a 9-inch pie dish, pressing gently to fit without stretching. Trim any excess dough hanging over the edges.
Step 4: Assemble the Pie
Pour the apple filling into the prepared crust, mounding it slightly in the center. Dot the top with small pieces of butter. Roll out the second dough disc and cut into strips to form a lattice top, or leave whole for a traditional double-crust pie. Press the edges to seal and crimp decoratively. Brush the top with egg wash and sprinkle with coarse sugar if desired.
Step 5: Bake the Pie
Place the pie on a baking sheet lined with foil (to catch drips). Bake for 20 minutes at 425°F, then reduce the oven temperature to 375°F (190°C) and bake for another 40–50 minutes, or until the crust is golden and the filling is bubbling. If the crust browns too quickly, tent loosely with foil.
Step 6: Cool and Serve
Remove the pie from the oven and allow it to cool on a wire rack for at least 2 hours before slicing. This helps the filling set properly. Serve warm or at room temperature, optionally with a scoop of vanilla ice cream or a dollop of whipped cream.
Notes
For best results, use a mix of tart and slightly sweet apples like Granny Smith and Honeycrisp for a more balanced flavor. Letting the apple mixture sit before assembling the pie helps release excess moisture, preventing a watery filling. If making your own crust, chilling the dough before rolling keeps the butter cold, leading to a flakier texture. Brushing the crust with an egg wash gives it a shiny, golden appearance that enhances presentation.
Watch Out for These Mistakes While Cooking
- Skipping the chill time for dough: This leads to a tough crust that shrinks while baking.
- Using overly juicy apples: Too much moisture can cause a soggy pie bottom—drain the apples before assembling.
- Not venting the top crust: Without proper ventilation, steam can’t escape, leading to a runny or undercooked filling.
- Overfilling the pie: It might overflow and make a mess in your oven. Always place a baking sheet underneath.
- Opening the oven frequently: This reduces the oven temperature and can affect how evenly the pie bakes.
Storage Instructions
Once cooled, the apple pie can be stored at room temperature for up to 2 days, loosely covered with foil or plastic wrap. For longer storage, refrigerate it for up to 4–5 days. To freeze, wrap the entire pie tightly in plastic wrap and then foil, or store individual slices in airtight containers. Reheat slices in the oven at 350°F (175°C) for 10–15 minutes to refresh the crust.
Estimated Nutrition
Per Slice (1 of 8):
- Calories: 420
- Total Fat: 20g
- Saturated Fat: 12g
- Unsaturated Fat: 6g
- Cholesterol: 65mg
- Sodium: 210mg
- Carbohydrates: 60g
- Fiber: 3g
- Sugars: 28g
- Protein: 4g
Frequently Asked Questions
What are the best apples for apple pie?
Granny Smith, Honeycrisp, and Braeburn are ideal because they hold their shape and offer a balanced sweet-tart flavor.
Can I make this pie ahead of time?
Yes, you can make the pie a day in advance. Bake it fully, let it cool, and cover loosely until ready to serve.
Should I pre-cook the apples?
Not necessary for this recipe. Letting the sliced apples sit with sugar helps them soften naturally.
Why is my pie filling runny?
This usually happens if you skip draining the apple mixture or underbake the pie.
Can I use store-bought pie crust?
Absolutely. While homemade is flakier, store-bought crusts work well for a quicker option.
How do I prevent the bottom crust from getting soggy?
Blind baking isn’t needed, but draining excess juice from the apples and baking on a preheated baking sheet helps.
Can I freeze the apple pie?
Yes. Freeze before or after baking, but if unbaked, don’t thaw before baking—bake straight from frozen.
What’s the best way to reheat leftover pie?
Warm slices in the oven at 350°F for 10–15 minutes to maintain a crispy crust.
Conclusion
Classic American Apple Pie is more than just a dessert—it’s a warm, nostalgic hug in every bite. With its flaky, buttery crust and perfectly spiced apple filling, it’s a treat that never fails to impress. Whether you’re baking it for a holiday gathering, a family dinner, or simply because it’s pie o’clock, this timeless recipe is a true crowd-pleaser. Serve it fresh and warm, and it might just become your most requested dessert of all time.

Classic American Apple Pie
- Prep Time: 30 minutes
- Cook Time: 1 hour 10 minutes
- Total Time: 1 hour 40 minutes
- Yield: 1 9-inch pie (8 slices) 1x
- Category: Dessert
- Method: Baking
- Cuisine: American
- Diet: Vegetarian
Description
Golden, flaky, and filled with spiced apples, this Classic American Apple Pie is the ultimate comfort dessert that never goes out of style. Whether you’re searching for easy dessert ideas, holiday baking inspiration, or just a quick homemade treat, this pie delivers every time. With a perfectly tender crust and sweet-tart filling, it’s ideal for everything from Thanksgiving dinner to cozy fall evenings. Add it to your list of go-to baking recipes, easy food ideas, or American classics—you’ll be glad you did.
Ingredients
2 1/2 cups all-purpose flour
1 teaspoon salt
1 tablespoon granulated sugar
1 cup unsalted butter, cold and cubed
6 to 8 tablespoons ice water
6 to 7 cups Granny Smith apples, peeled, cored, and sliced
3/4 cup granulated sugar
1/4 cup brown sugar
2 tablespoons all-purpose flour
1 tablespoon lemon juice
1 teaspoon ground cinnamon
1/4 teaspoon ground nutmeg
1/8 teaspoon ground cloves
1/4 teaspoon salt
2 tablespoons unsalted butter
1 egg
1 tablespoon milk or water
Coarse sugar (optional)
Instructions
1. In a large bowl, mix flour, salt, and sugar. Cut in cold butter until mixture resembles coarse crumbs. Add ice water gradually until dough forms. Divide in two discs, wrap, and chill for 1 hour.
2. Peel, core, and slice apples. Toss with sugars, flour, lemon juice, cinnamon, nutmeg, cloves, and salt. Let sit 10–15 minutes, then drain juices.
3. Preheat oven to 425°F (220°C). Roll out one dough disc to fit a 9-inch pie dish. Press into pan and trim edges.
4. Pour in the apple filling and dot with butter. Roll out second disc and create lattice or full crust top. Seal and crimp edges. Brush with egg wash and sprinkle sugar if desired.
5. Bake at 425°F for 20 minutes. Reduce to 375°F (190°C) and bake 40–50 more minutes until golden and bubbling. Tent with foil if browning too fast.
6. Cool on a rack for at least 2 hours before serving.
Notes
Chill the dough to keep the butter solid and ensure a flaky crust.
Drain the apple mixture before filling to avoid sogginess.
Use an oven thermometer to make sure your temperature stays accurate for even baking.
Nutrition
- Serving Size: 1 slice
- Calories: 420
- Sugar: 28g
- Sodium: 210mg
- Fat: 20g
- Saturated Fat: 12g
- Unsaturated Fat: 6g
- Trans Fat: 0g
- Carbohydrates: 60g
- Fiber: 3g
- Protein: 4g
- Cholesterol: 65mg
Keywords: apple pie, classic dessert, holiday pie, American pie, baking recipe, homemade apple pie

