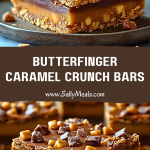
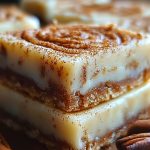
These Butterfinger Caramel Crunch Bars are what candy dreams are made of—layers of buttery crisp base, gooey caramel, and rich chocolate, all topped with that signature Butterfinger crunch. Every bite is a perfect medley of sweet, salty, crunchy, and creamy. Whether you’re baking for a party, a bake sale, or just need a treat-yourself moment, these bars deliver comfort and decadence in equal measure.
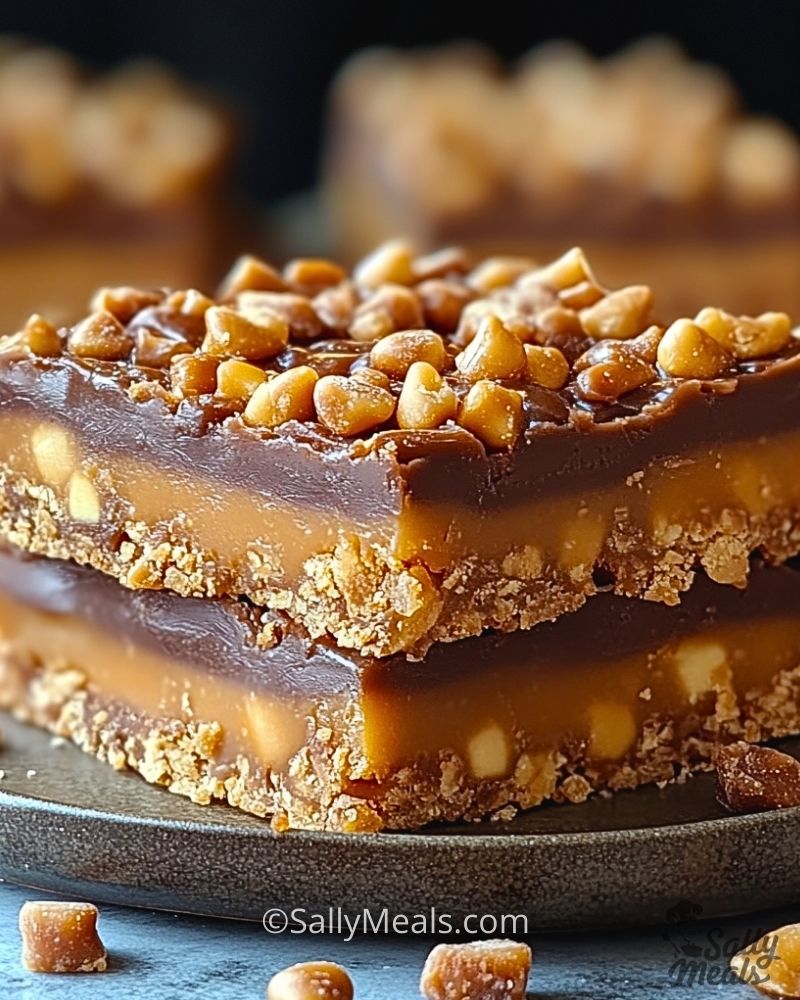
The texture alone is enough to win hearts—crispy bits from the crushed Butterfinger pieces, smooth chocolate that melts just right, and that thick ribbon of caramel that stretches with every pull. These bars don’t just satisfy a craving—they become the craving. And yes, they’re as addictive as they look.
Why You’ll Love This Butterfinger Caramel Crunch Bars Recipe
- Incredible Layers: Each bite gives you a perfect combination of crunch, chew, and smooth chocolate.
- Crowd Favorite: These bars are always the first to disappear at gatherings and potlucks.
- No Fuss Baking: Simple ingredients, straightforward layering, and no fancy equipment required.
- Versatile Treat: Perfect for holidays, gifting, or just keeping in the freezer for late-night dessert emergencies.
- Sweet Nostalgia: That Butterfinger flavor brings back candy bar memories—with a homemade twist.
Preparation Phase & Tools to Use (Essential Tools and Equipment, Plus Their Importance)
Getting the perfect Butterfinger Caramel Crunch Bars starts with the right setup. While the recipe is simple, using the proper tools ensures your layers come out clean, your caramel sets just right, and cutting into bars doesn’t turn into a sticky mess.
- 9×13-inch Baking Pan: This size gives you the perfect thickness for each layer. A metal pan works best for even heat distribution.
- Parchment Paper: Lining your pan makes it easy to lift out the bars and slice them cleanly.
- Medium Saucepan: Crucial for melting the caramel evenly and controlling the heat to avoid burning.
- Microwave-Safe Bowl: Great for melting chocolate chips quickly and smoothly.
- Offset Spatula or Silicone Spatula: Helps spread the layers evenly, especially the gooey caramel and melted chocolate.
- Sharp Knife (preferably serrated): For cutting the bars once they’ve chilled—clean cuts make all the difference in presentation.
- Measuring Cups and Spoons: Precision matters with the caramel and chocolate layers—too much or too little can affect the texture.
Preparation Tips
- Use Room Temperature Butterfinger Pieces: If they’re too cold, they’ll clump together. Room temp allows for even distribution across the top.
- Chill Between Layers: Give the caramel layer a bit of fridge time before adding chocolate so everything stays distinct and firm.
- Spray Your Knife: When slicing, spray your knife with cooking spray or wipe it with a warm, damp towel between cuts to keep edges neat.
- Use Low Heat for Caramel: Rushing the caramel will cause it to seize or burn—slow and steady wins here.
- Don’t Overbake the Crust: It should be lightly golden but still soft enough to bite through easily after chilling.
Ingredients for This Butterfinger Caramel Crunch Bars Recipe
These bars come together with pantry staples and a handful of indulgent treats. Here’s what you’ll need for each luscious layer:
For the Crunchy Base:
- 2 cups graham cracker crumbs
- 1/2 cup unsalted butter, melted
- 1/4 cup granulated sugar
- 1/2 cup chopped roasted peanuts (optional for extra crunch)
For the Caramel Layer:
- 1 (14 oz) can sweetened condensed milk
- 1/2 cup brown sugar
- 1/2 cup unsalted butter
- 1/4 cup light corn syrup
- Pinch of salt
- 1/2 teaspoon vanilla extract
For the Chocolate Layer:
- 1 1/2 cups semi-sweet chocolate chips
- 2 tablespoons unsalted butter
For the Topping:
- 1 1/4 cups crushed Butterfinger candy bars (about 5 fun-size bars)
These layers build a perfect bite: crumbly, creamy, chocolatey, and that unmistakable Butterfinger flair on top.
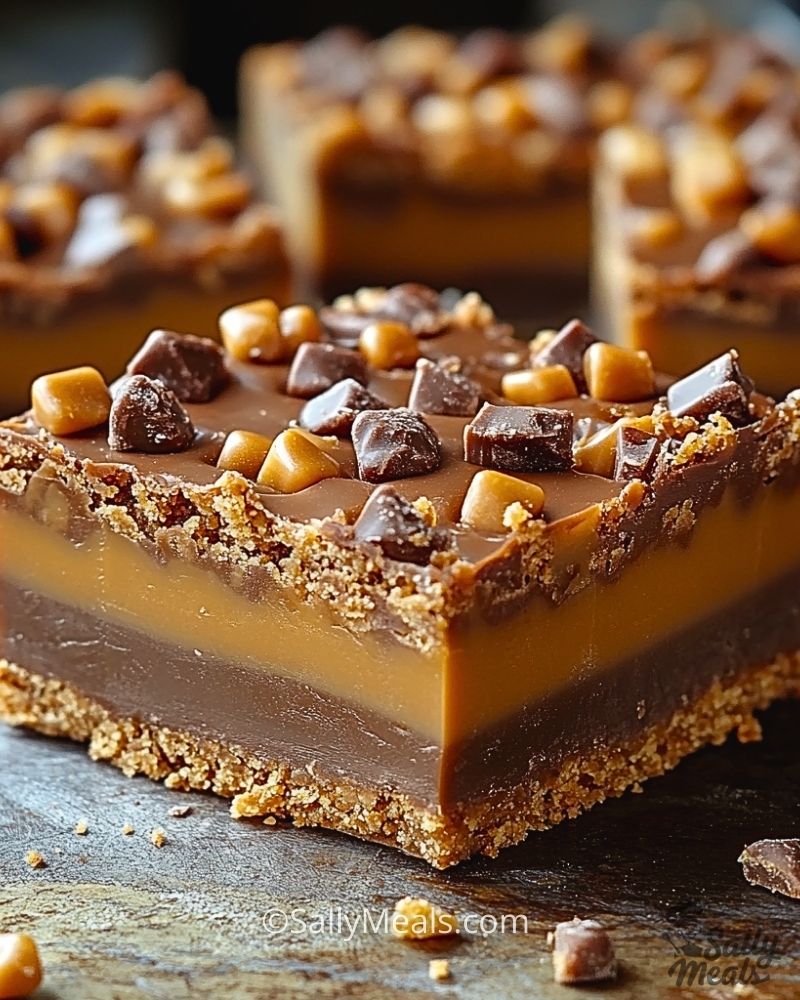
Step 1: Prepare the Base Layer
Preheat your oven to 350°F (175°C). Line a 9×13-inch baking pan with parchment paper, leaving a slight overhang for easy removal. In a mixing bowl, combine the graham cracker crumbs, melted butter, sugar, and chopped peanuts (if using). Stir until the mixture resembles wet sand. Press the mixture firmly and evenly into the bottom of the pan. Bake for 10 minutes, then remove and let it cool slightly.
Step 2: Make the Caramel Layer
In a medium saucepan over medium-low heat, combine sweetened condensed milk, brown sugar, butter, corn syrup, and salt. Stir constantly until the mixture comes to a gentle simmer. Continue cooking and stirring for about 8–10 minutes until the caramel thickens and turns a rich golden brown. Remove from heat and stir in the vanilla extract.
Step 3: Layer the Caramel
Pour the hot caramel over the baked crust, spreading it evenly with a spatula. Let it cool for about 10–15 minutes at room temperature, then refrigerate for 20–30 minutes to help it set before adding the chocolate.
Step 4: Add the Chocolate Topping
In a microwave-safe bowl, combine chocolate chips and butter. Microwave in 20-second intervals, stirring in between, until smooth and glossy. Pour the melted chocolate over the chilled caramel layer, smoothing it out evenly with an offset spatula.
Step 5: Sprinkle Butterfinger Pieces
Immediately after spreading the chocolate, sprinkle crushed Butterfinger pieces generously over the top. Gently press them into the chocolate to help them adhere.
Step 6: Chill and Slice
Refrigerate the bars for at least 2 hours or until fully set. Once firm, lift the entire slab out of the pan using the parchment paper. Use a sharp, lightly greased knife to slice into squares or bars.
Notes
- These bars are rich, so cutting them into smaller squares makes them perfect for sharing (or not—we won’t judge).
- Want to make them ahead? They’re even better the next day as the layers settle and flavors deepen.
- You can substitute other candy bars for the topping—Heath bits or chopped Snickers work well, but Butterfinger gives the most iconic crunch.
- If you’re short on graham crackers, digestive biscuits or vanilla wafers can be swapped in a pinch for the base.
Watch Out for These Mistakes While Cooking
- Skipping Parchment Paper: Without it, you’ll struggle to lift and slice the bars cleanly. Always line your pan!
- Overheating the Caramel: High heat can quickly burn the sugars or make the caramel grainy. Keep the heat low and stir constantly.
- Not Letting Layers Set: Pouring chocolate over hot caramel can cause them to blend. Chill the caramel before layering on the chocolate.
- Cutting Too Soon: Let the bars fully set in the fridge—cutting too early will make the layers slide or smudge.
- Using Cold Butterfinger Bars: Cold bars are harder to crush and won’t stick as well to the melted chocolate layer.
- Uneven Layering: Take your time spreading each layer evenly—it ensures that every bite has a perfect balance.
- Melting Chocolate Too Fast: Chocolate scorches easily in the microwave. Stick to short bursts and stir frequently.
- Forgetting Salt in Caramel: Just a pinch enhances the flavor and cuts the sweetness. Don’t skip it!
What to Serve With Butterfinger Caramel Crunch Bars?
These bars are delightful on their own, but pairing them with the right drink or treat can take them to another level. Whether you’re going for contrast or indulgent harmony, here are some delicious ideas to round out your dessert moment.
8 Recommendations
1. Vanilla Bean Ice Cream
The cold, creamy texture complements the sweet and chewy bar perfectly. Serve it on the side or right on top.
2. Cold Brew Coffee
A glass of strong, unsweetened cold brew balances the richness of the bars with its bold bitterness.
3. Whipped Cream Topped Hot Cocoa
Double down on the sweetness and turn it into a full-on dessert night.
4. Salted Caramel Latte
Match the caramel in the bars with a warm, salty-sweet latte—flavor harmony at its best.
5. Chopped Fruit Bowl
Serve a refreshing side of strawberries, kiwi, or orange slices to lighten things up between bites.
6. Espresso Shots
Strong and sharp, espresso provides a sophisticated contrast that cuts through the richness.
7. Milkshakes (Vanilla or Chocolate)
Blend one up for a nostalgic, diner-style dessert pairing.
8. Roasted Nuts or Spiced Pecans
Set a small bowl of nuts on the side for a salty crunch that complements the bar’s sweetness.
Storage Instructions
Butterfinger Caramel Crunch Bars store beautifully, making them an ideal make-ahead dessert or leftover treat.
- Room Temperature: Keep them in an airtight container for up to 2 days in a cool, dry place—just make sure they’re not exposed to heat or sunlight, or the chocolate will soften.
- Refrigerator: For best texture and freshness, store them in the fridge for up to 7 days. Place parchment paper between layers to prevent sticking.
- Freezer: These bars freeze well! Wrap each square individually in plastic wrap, then place them in a freezer-safe bag or container. Freeze for up to 2 months. Thaw in the fridge overnight or at room temp for about 30 minutes before serving.
Estimated Nutrition (Per Bar, Based on 24 Servings)
Please note: These are approximate values and can vary slightly depending on ingredient brands.
- Calories: 310
- Fat: 18g
- Saturated Fat: 10g
- Carbohydrates: 35g
- Sugar: 27g
- Protein: 3g
- Fiber: 1g
- Sodium: 120mg
Frequently Asked Questions
1. Can I use store-bought caramel instead of making it from scratch?
Yes, you can use a thick, high-quality caramel sauce or caramel candies melted with a splash of cream. However, homemade caramel has a richer flavor and sets better.
2. Can I make this gluten-free?
Absolutely! Use gluten-free graham cracker crumbs for the base, and double-check the labels on your chocolate chips and candy bars to ensure they’re certified gluten-free.
3. Can I use dark chocolate instead of semi-sweet?
Yes! If you prefer a more intense, less sweet flavor, dark chocolate is a fantastic substitute and pairs beautifully with caramel and Butterfinger.
4. How do I crush the Butterfinger bars easily?
Let them come to room temperature, then place them in a zip-top bag and gently crush with a rolling pin or the bottom of a glass.
5. Why is my caramel grainy or separating?
This usually happens if the heat is too high or if the mixture wasn’t stirred consistently. Keep the heat low and stir gently the whole time.
6. Can I double the recipe for a crowd?
Yes, just use a larger sheet pan and adjust baking times slightly. Watch the crust and caramel closely to avoid overcooking.
7. Do these bars travel well?
They do! Chill them fully before transporting, and stack with parchment paper between layers in a sturdy container.
8. Can I swap out Butterfinger for another candy?
Definitely—Heath toffee bits, Reese’s Pieces, or chopped peanut butter cups are fun alternatives. Just stick to candies with a crunchy texture for the best results.
Conclusion
Butterfinger Caramel Crunch Bars are the kind of treat that checks every box—decadent, easy to make, and an absolute crowd-pleaser. From the graham cracker base to the creamy caramel, smooth chocolate, and signature Butterfinger crunch, each layer brings its own charm. Whether you’re baking for a holiday, sharing with friends, or just craving something indulgent, these bars deliver the ultimate sweet fix.

Butterfinger Caramel Crunch Bars
- Prep Time: 25 minutes
- Chill Time: 2 hours
- Cook Time: 10 minutes
- Total Time: 2 hours 35 minutes
- Yield: 24 bars 1x
Description
These Butterfinger Caramel Crunch Bars are rich, layered dessert bars made with a buttery graham cracker crust, creamy homemade caramel, smooth chocolate topping, and a generous sprinkle of crushed Butterfinger candy. They’re perfect for parties, potlucks, or an indulgent treat at home!
Ingredients
Base Layer:
- 2 cups graham cracker crumbs
- 1/2 cup unsalted butter, melted
- 1/4 cup granulated sugar
- 1/2 cup chopped roasted peanuts (optional)
Caramel Layer:
- 1 (14 oz) can sweetened condensed milk
- 1/2 cup brown sugar
- 1/2 cup unsalted butter
- 1/4 cup light corn syrup
- Pinch of salt
- 1/2 teaspoon vanilla extract
Chocolate Layer:
- 1 1/2 cups semi-sweet chocolate chips
- 2 tablespoons unsalted butter
Topping:
- 1 1/4 cups crushed Butterfinger candy bars (about 5 fun-size bars)
Instructions
- Preheat oven to 350°F (175°C). Line a 9×13-inch pan with parchment paper.
- Mix graham cracker crumbs, melted butter, sugar, and peanuts. Press into pan and bake for 10 minutes. Let cool slightly.
- In a saucepan, combine condensed milk, brown sugar, butter, corn syrup, and salt. Cook over medium-low heat, stirring constantly, until thick and golden (8–10 minutes). Remove from heat, stir in vanilla.
- Pour caramel over crust and spread evenly. Cool at room temp, then refrigerate for 20–30 minutes.
- Melt chocolate chips and butter in a microwave-safe bowl in 20-second intervals, stirring until smooth. Spread over chilled caramel layer.
- Sprinkle crushed Butterfinger bars on top and press gently to adhere.
- Chill the entire pan for at least 2 hours or until set.
- Slice into squares using a sharp, greased knife. Enjoy!

