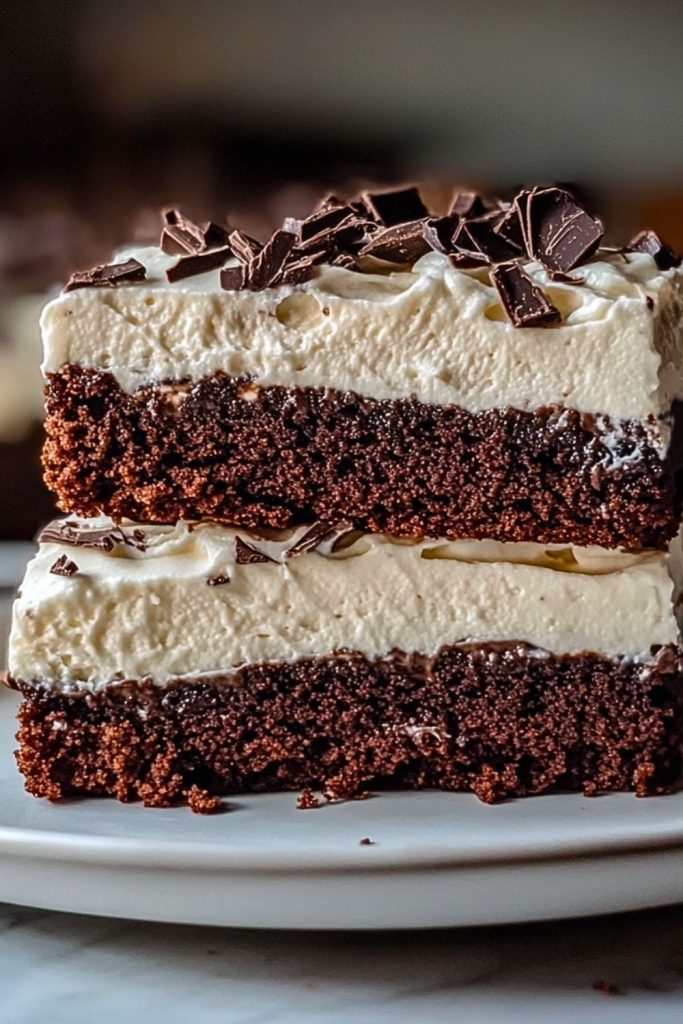
Rich, velvety, and decadently layered — this Brownie Refrigerator Cake is the kind of dessert that stops conversations and starts cravings. It’s a stunning no-bake treat that combines fudgy brownie layers with a creamy whipped filling, topped off with a generous swirl of chocolate frosting. The contrast of textures and flavors in each bite makes it a crowd-pleasing masterpiece, whether for a casual family dinner or a celebratory occasion.
This chilled delight isn’t just a treat for the taste buds; it’s also a gift to busy bakers. It comes together easily using a brownie base and luscious layers of whipped cream cheese filling. There’s no need to turn on the oven once your brownies are baked — the fridge does the magic from there, marrying the flavors into a dreamy, cool dessert.
Why You’ll Love This Brownie Refrigerator Cake
- No Fuss, All Flavor: Simple layering and chilling, no fancy techniques required.
- Perfect for Make-Ahead: Actually tastes better the next day as the layers settle and develop.
- Great for Any Season: Light enough for summer, rich enough for winter.
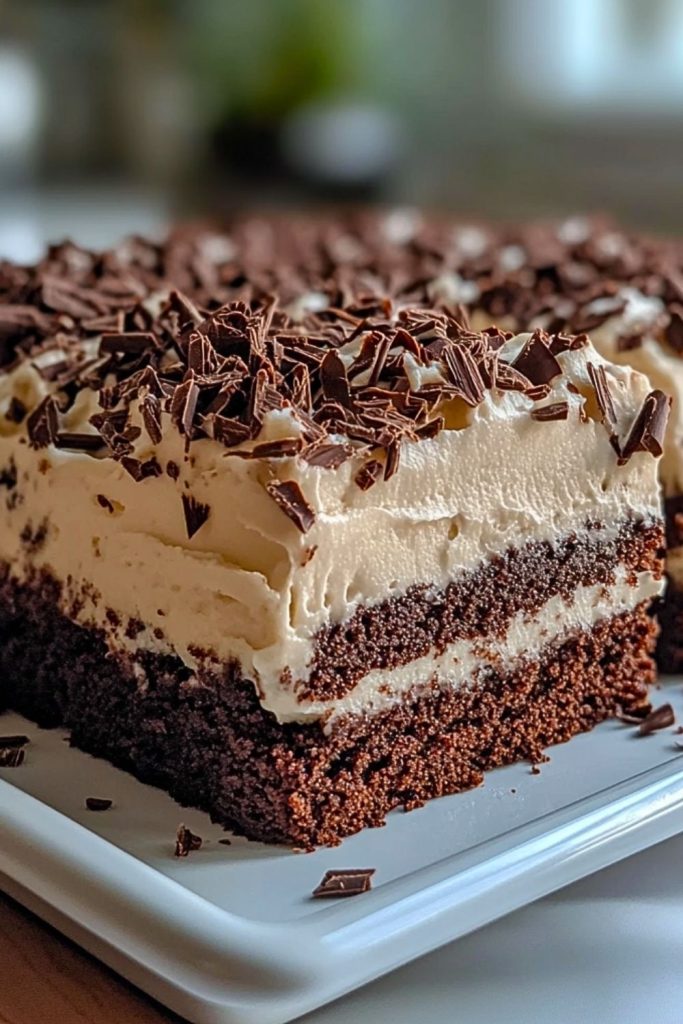
- Visually Stunning: The contrast of chocolate and cream layers makes every slice picture-perfect.
- Texture Heaven: Fudgy, fluffy, and silky all in one bite.
Preparation Phase & Tools to Use
Before diving into the delicious layers of this Brownie Refrigerator Cake, gathering the right tools is key to making the process smooth and satisfying. Each piece of equipment plays an essential role in creating the distinct textures and layers that define this dessert.
Essential Tools and Equipment:
- 9×13-inch Baking Pan: This size offers the ideal thickness for the brownie base and helps with even chilling.
- Electric Mixer or Stand Mixer: Crucial for whipping the cream cheese and heavy cream to a smooth, airy consistency.
- Mixing Bowls: At least two medium-to-large bowls — one for the brownie batter and one for the cream mixture.
- Offset Spatula or Rubber Spatula: Helps with evenly spreading each layer without tearing the base.
- Whisk and Measuring Cups/Spoons: For precise measuring and mixing smaller components like sugar or vanilla extract.
- Plastic Wrap or Aluminum Foil: To cover the cake while it sets in the refrigerator, preventing it from drying out or absorbing odors.
- Sharp Knife or Bench Scraper: For cleanly slicing the chilled cake into tidy portions.
Preparation Tips
- Chill the Mixing Bowl and Whisk: For the whipped cream layer, chilling the bowl and beaters before whipping helps achieve stiff peaks more quickly and consistently.
- Don’t Overbake the Brownies: A slightly underbaked brownie base keeps the dessert soft and easy to cut through after chilling.
- Let the Brownies Cool Completely: Before adding the cream layer, ensure the brownies are fully cooled to prevent melting or thinning of the whipped mixture.
- Use Full-Fat Cream Cheese: This gives the filling a rich, stable texture that won’t break down in the fridge.
- Make a Day Ahead: The flavors and structure of the cake improve significantly after resting overnight in the refrigerator.
Ingredients for This Brownie Refrigerator Cake
To build the irresistible layers of this chilled dessert, you’ll need a balance of rich chocolate, smooth cream, and a touch of sweetness. Here’s everything required to create your Brownie Refrigerator Cake from scratch:
For the Brownie Layer:
- 1 box brownie mix (or your favorite homemade brownie recipe)
- Ingredients required by the brownie mix (typically oil, eggs, and water)
Tip: Choose a fudgy brownie mix for the best texture in the refrigerator.
For the Cream Cheese Whipped Filling:
- 1 (8 oz) block cream cheese, softened
- 1 cup powdered sugar
- 2 teaspoons vanilla extract
- 2 cups heavy whipping cream, chilled
This creates a light yet rich filling that perfectly complements the dense brownie.
For the Topping:
- 1/2 cup chocolate chips or chocolate frosting
- Optional: Shaved chocolate, sprinkles, or cocoa powder for garnish
A chocolate ganache or piped frosting swirls add visual appeal and more indulgence.
Everything above can be adjusted to suit your sweetness preferences or dietary needs, but for the classic, show-stopping version, these ingredients hit the sweet spot.
Step 1: Bake the Brownie Base
Prepare the brownie mix according to the package instructions (or your homemade recipe) and pour the batter into a greased 9×13-inch baking pan. Bake as directed, but lean slightly under the recommended time for a softer texture that slices well after chilling. Once baked, let it cool completely on a wire rack.
Step 2: Make the Cream Cheese Whipped Filling
In a large bowl, beat the softened cream cheese with powdered sugar and vanilla extract until smooth and creamy. In a separate chilled bowl, whip the cold heavy cream until stiff peaks form. Gently fold the whipped cream into the cream cheese mixture until fully combined. This becomes your fluffy, tangy filling.
Step 3: Assemble the Layers
Once the brownie has cooled, carefully slice it horizontally into two even layers using a long serrated knife or a cake wire slicer. Place the bottom half back into the pan (or onto a serving platter if you plan to present it whole). Spread half of the whipped filling evenly over this base.
Place the second brownie layer on top and gently press down to secure. Add the remaining cream cheese mixture on top and smooth it out with a spatula.
Step 4: Add the Chocolate Topping
Melt chocolate chips in the microwave in 30-second intervals (stirring between each) or use ready-made chocolate frosting. Drizzle, spread, or pipe it across the top of the whipped layer. Feel free to get creative with garnishes like chocolate curls, mini chips, or a dusting of cocoa powder.
Step 5: Chill to Set
Cover the assembled cake with plastic wrap or foil and refrigerate for at least 4 hours — overnight is even better. This allows the flavors to meld and makes slicing easier and cleaner.
Step 6: Slice and Serve
Use a sharp knife, wiping clean between cuts for neat slices. Serve chilled for the best texture and taste.
Notes
- Make-Ahead Friendly: This dessert is ideal for preparing the day before. In fact, it improves after resting in the fridge overnight as the flavors and textures marry beautifully.
- Customizable Layers: You can flavor the whipped filling with instant coffee, cocoa powder, or even a splash of liqueur (like Kahlúa or Irish cream) for a grown-up twist.
- Presentation Tip: If you want perfectly defined layers, chill the brownie in the fridge before slicing it horizontally. Cold brownies are easier to cut cleanly.
- Freezer Option: This cake freezes well. Just wrap it tightly and thaw overnight in the fridge before serving.
- Portion Flexibility: Easily doubles for larger gatherings or can be halved for a smaller portion in an 8×8 pan.
Watch Out for These Mistakes While Cooking
- Skipping the Cool Down: Don’t rush the assembly with a warm brownie base—it’ll melt your cream layer and ruin the structure.
- Overbeating the Cream: Stiff peaks are the goal, but over-whipping will turn your cream grainy. Stop as soon as it holds shape.
- Uneven Layering: If you eyeball without smoothing between steps, you might get lopsided slices. Use an offset spatula to keep everything even.
- Too Thin Filling: Make sure the whipped mixture isn’t too runny. If needed, chill it briefly before spreading.
- Overloading the Top: While decorations are fun, too much weight from toppings like heavy ganache or candy can compress the whipped layers beneath.
- Underchilling: Less than 4 hours in the fridge means messy slices. Give it time to set for clean, photo-worthy presentation.
What to Serve With Brownie Refrigerator Cake?
While this cake stands beautifully on its own, pairing it with complementary treats or beverages can enhance the entire dessert experience. Whether you’re serving it at a party or enjoying a quiet night in, these additions will elevate your Brownie Refrigerator Cake presentation and flavor pairing.
8 Recommendations:
- Fresh Berries
A bowl of strawberries, raspberries, or blueberries adds a pop of freshness and a tart contrast to the rich chocolate and cream. - Espresso or Coffee
The bold bitterness of a fresh espresso shot or a smooth cup of coffee cuts through the cake’s sweetness, offering a refined pairing. - Vanilla Ice Cream
A scoop on the side turns the dish into an ultra-decadent, cold-and-creamy duo perfect for special occasions. - Salted Caramel Drizzle
Just a touch of warm salted caramel on the plate enhances each bite with a buttery-sweet finish. - Mint Leaves or Chocolate-Mint Bark
For a refreshing note, add mint as a garnish or serve a small square of mint chocolate on the side. - Whipped Cream with Cocoa Dusting
If you want to keep it light, a cloud of unsweetened whipped cream topped with cocoa or cinnamon works beautifully. - Nuts or Brittle Shards
Toasted almonds, pecans, or a sprinkle of nut brittle can offer crunch and deepen the flavor with a touch of roasted richness. - Dessert Wine or Port
A sweet red dessert wine or port makes a luxurious pairing, especially for evening events or celebrations.
Storage Instructions
To keep your Brownie Refrigerator Cake fresh and delicious, proper storage is essential. Here’s how to preserve both flavor and texture over time:
- Refrigeration: Store the cake tightly covered with plastic wrap or aluminum foil in the refrigerator. It will stay fresh for up to 4–5 days. The whipped cream and cream cheese filling hold up well when chilled.
- Freezing: For longer storage, you can freeze the cake. Wrap individual slices in plastic wrap, then place them in an airtight container or freezer-safe bag. It will keep in the freezer for up to 2 months. To serve, thaw slices in the refrigerator overnight. Avoid microwaving to prevent altering the texture.
- Serving After Storage: Always serve the cake cold. It’s best enjoyed directly out of the fridge, as the layers stay firmer and more structured.
Tip: Label the date on your storage container for easy tracking, especially when freezing.
Estimated Nutrition
These values are approximate and based on one slice (assuming the cake is cut into 12 portions):
- Calories: 410–450 kcal
- Total Fat: 28–32g
- Saturated Fat: 17g
- Cholesterol: 95mg
- Carbohydrates: 38–42g
- Sugars: 30g
- Protein: 4–6g
- Fiber: 1g
- Sodium: 200–250mg
Note: Nutritional content will vary based on the brownie mix or homemade recipe used, and specific brands of cream, cheese, and toppings.
Frequently Asked Questions
1. Can I make the Brownie Refrigerator Cake ahead of time?
Absolutely. In fact, it’s best when made a day in advance. The flavors meld beautifully, and the structure firms up for cleaner slicing.
2. Can I use homemade brownies instead of a boxed mix?
Yes! A rich, fudgy homemade brownie works perfectly. Just ensure it’s baked in a 9×13-inch pan for proper layering and thickness.
3. Is there a substitute for cream cheese in the filling?
You can use mascarpone for a slightly lighter flavor or a stabilized whipped cream base if you prefer it tangier. Greek yogurt is not recommended as it tends to water down the texture.
4. Can I add fruit to the cake layers?
Yes, thinly sliced strawberries or raspberries between the layers can add freshness and color, but use sparingly to avoid excess moisture.
5. How do I slice the cake neatly?
Chill the cake well (overnight is best), then use a sharp knife warmed in hot water and wiped clean between each cut.
6. Is this recipe gluten-free?
Not by default, but it can be adapted. Use a gluten-free brownie mix and verify that all additional ingredients (especially vanilla and chocolate) are certified gluten-free.
7. Can I double the recipe?
Yes. Double all ingredients and prepare in two 9×13 pans or a large sheet pan. Just ensure there’s enough fridge space for chilling.
8. Can I use whipped topping instead of whipped cream?
You can, especially for convenience. Just note that it might be slightly sweeter and less airy than freshly whipped cream.
Conclusion
The Brownie Refrigerator Cake is a stunning and versatile dessert that strikes the perfect balance between indulgent and refreshing. With a rich brownie base, a light whipped cream cheese filling, and decadent chocolate topping, it’s a guaranteed hit for any occasion. From birthdays to brunches, it’s a make-ahead masterpiece that’s as easy to prepare as it is to love.
With the right tools, a few simple steps, and a bit of chill time, you’ll have a showstopper ready to wow your guests or treat yourself — no oven marathon required. Now, let’s bring it all together in a printable format for your recipe box.
Brownie Refrigerator Cake
- Prep Time: 25 minutes
- Cook Time: 25 minutes
- Total Time: 50 minutes
- Yield: 12 servings 1x
Description
This chilled dessert combines a rich, fudgy brownie base with a light and airy cream cheese whipped filling, topped with a layer of smooth chocolate. Perfect for any occasion, this make-ahead treat is both indulgent and refreshing. Easy to assemble and crowd-pleasing every time.
Ingredients
Brownie Layer:
- 1 box brownie mix (plus ingredients as instructed: oil, eggs, water)
Cream Cheese Whipped Filling:
- 1 (8 oz) block cream cheese, softened
- 1 cup powdered sugar
- 2 tsp vanilla extract
- 2 cups heavy whipping cream, chilled
Topping:
- 1/2 cup chocolate chips or chocolate frosting
- Optional: chocolate shavings, sprinkles, cocoa powder for garnish
Instructions
- Prepare brownie mix according to package and bake in a greased 9×13-inch pan. Let cool completely.
- In a bowl, beat cream cheese, powdered sugar, and vanilla until smooth.
- In a chilled bowl, whip heavy cream until stiff peaks form.
- Fold whipped cream into cream cheese mixture until combined.
- Slice the cooled brownie horizontally into two layers.
- Place bottom half back in the pan and spread with half the cream mixture.
- Add the top brownie layer and spread remaining cream mixture evenly.
- Melt chocolate chips or use frosting and spread or drizzle on top.
- Garnish as desired and refrigerate for at least 4 hours or overnight.
- Slice with a sharp knife and serve chilled.