
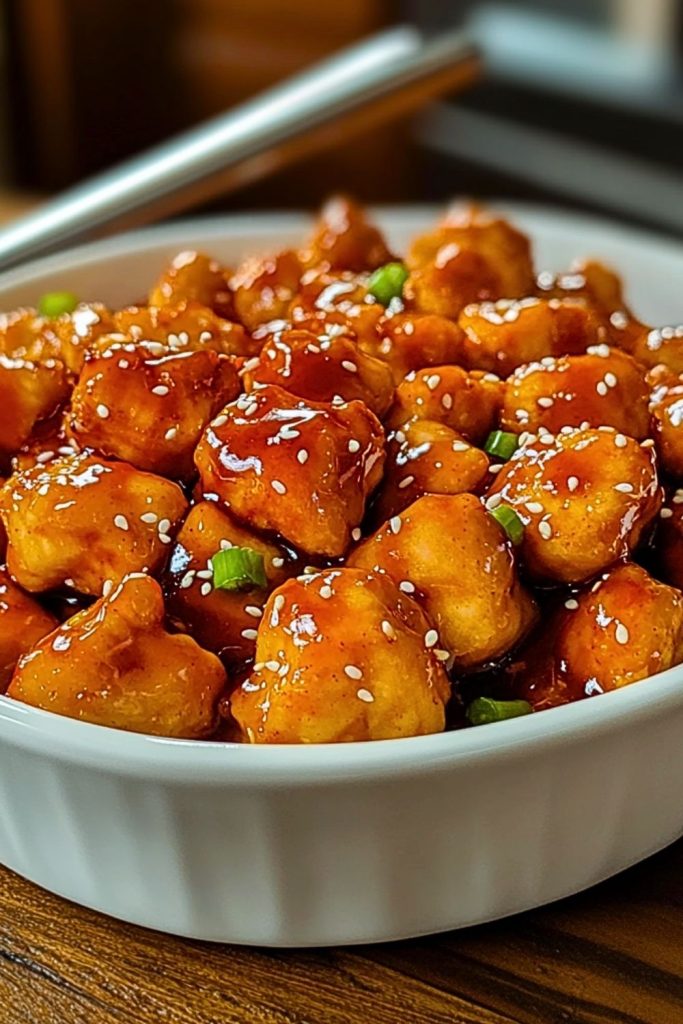
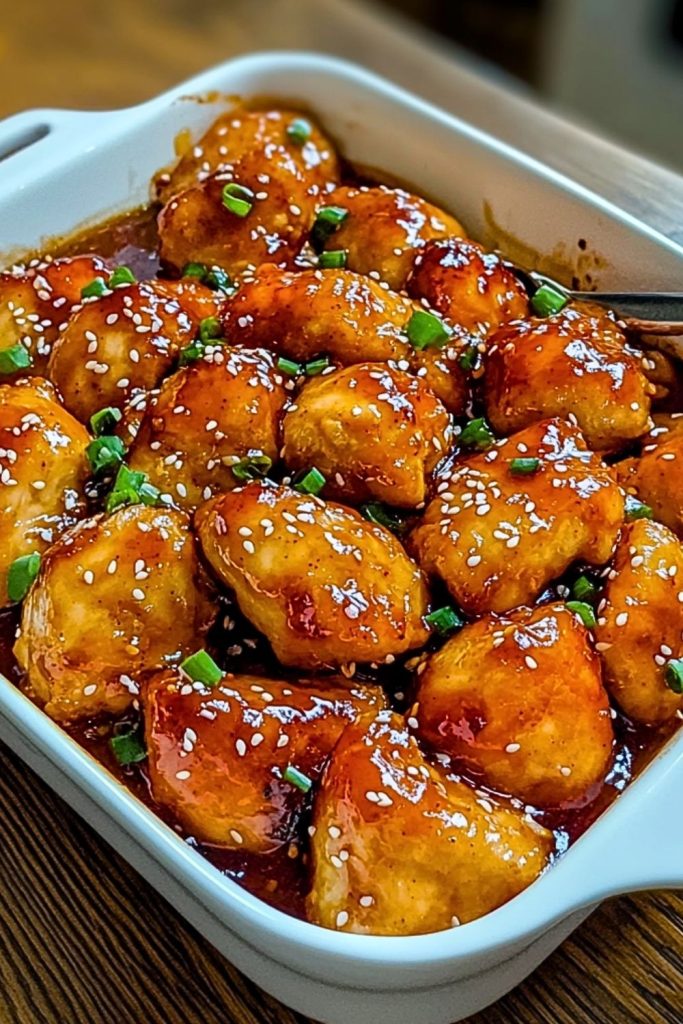
Golden, crispy chicken bites glazed with a glossy sweet and tangy sauce — this Baked Sweet and Sour Chicken is a true crowd-pleaser. Each piece is tender inside with a satisfying crunch outside, perfectly balanced with the vibrant flavors of pineapple, bell peppers, and that irresistible homemade sauce. Unlike deep-fried versions, this dish is baked, making it lighter without sacrificing any of the classic flavor.
Ideal for busy weeknights or special gatherings, this recipe brings restaurant-style quality to your home kitchen. Whether served over steamed rice or enjoyed as a standalone dish, it always leaves everyone wanting seconds.
Why You’ll Love This Baked Sweet and Sour Chicken
- Healthier alternative: Baking instead of deep frying cuts down on oil and calories.
- Incredible flavor: The homemade sauce hits all the right notes — sweet, sour, and savory.
- Versatile: Pairs well with many side dishes and is easy to customize with your favorite vegetables.
- Perfect texture: Crispy on the outside, juicy on the inside.
- Family-friendly: Both kids and adults love this dish.
Preparation Phase & Tools to Use
Before diving into the cooking process, having the right tools makes preparation smoother and ensures the best results for your Baked Sweet and Sour Chicken. Here’s what you’ll need and why:
- Mixing Bowls: Essential for coating the chicken in flour and egg, and for tossing vegetables. A set of different sizes is ideal.
- Baking Sheet: Preferably large and rimmed, lined with parchment paper or lightly greased to prevent sticking and promote even cooking.
- Wire Rack (optional but recommended): Placing the chicken on a rack allows heat to circulate, ensuring crispier bites.
- Whisk: For blending the sweet and sour sauce until smooth.
- Saucepan: Used to simmer and thicken the sauce before coating the chicken.
- Tongs or Spatula: Handy for turning chicken pieces and tossing them in sauce.
- Measuring Cups and Spoons: Accuracy matters for getting the perfect sauce balance.
Preparation Tips
- Pat the Chicken Dry: Moisture is the enemy of crispiness. Pat the chicken pieces thoroughly with paper towels before coating.
- Uniform Size: Cut the chicken into evenly sized bites for consistent cooking.
- Use a Rack for Maximum Crisp: If you have a wire rack, it elevates the chicken and prevents soggy bottoms.
- Preheat Your Oven: Make sure it’s fully heated before baking — this helps achieve the golden crust.
- Thicken the Sauce Properly: Simmer the sauce just enough so it coats the back of a spoon, ensuring it clings perfectly to the chicken.
- Work in Batches if Needed: Don’t overcrowd the baking sheet; space allows for even crisping.
Ingredients for This Baked Sweet and Sour Chicken
Here’s everything you need to bring this flavorful dish to life:
For the Chicken:
- 2 large boneless, skinless chicken breasts (cut into bite-sized pieces)
- Salt & black pepper (to season the chicken)
- 1/2 cup all-purpose flour
- 2 large eggs (lightly beaten)
- 2 tablespoons cornstarch (optional, for extra crispiness)
- Cooking spray or 2 tablespoons vegetable oil (for coating the baking sheet or rack)
For the Sweet and Sour Sauce:
- 1/2 cup granulated sugar
- 1/4 cup ketchup
- 1/3 cup rice vinegar (or apple cider vinegar)
- 1 tablespoon soy sauce
- 1 teaspoon garlic powder
- 1/2 cup water
- 2 teaspoons cornstarch (mixed with 2 teaspoons water to create a slurry)
Optional Add-ins:
- 1 cup diced pineapple (fresh or canned)
- 1 red bell pepper (chopped into bite-sized pieces)
- 1 yellow bell pepper (chopped into bite-sized pieces)
- Sesame seeds (for garnish)
- Chopped green onions (for garnish)
Step 1: Preheat the Oven
Begin by preheating your oven to 400°F (200°C). Line a large baking sheet with parchment paper or lightly grease it. If you’re using a wire rack, place it on top of the baking sheet and spray it with cooking spray. This setup ensures your chicken gets wonderfully crispy.
Step 2: Prepare the Chicken
Season the chicken pieces with a light sprinkle of salt and pepper.
Set up two shallow bowls: one with flour (mixed with optional cornstarch), and the other with beaten eggs.
Dip each piece of chicken first into the flour to coat, then into the egg mixture, and again into the flour for an extra crispy layer.
Step 3: Bake the Chicken
Arrange the coated chicken pieces in a single layer on your prepared baking sheet (or rack).
Bake for 20-25 minutes, turning halfway through to ensure even browning. The chicken should be golden and cooked through.
Step 4: Make the Sweet and Sour Sauce
While the chicken is baking, prepare the sauce.
In a saucepan over medium heat, combine the sugar, ketchup, vinegar, soy sauce, garlic powder, and water.
Stir well and bring to a gentle simmer. Add the cornstarch slurry (cornstarch mixed with water) and whisk until the sauce thickens enough to coat the back of a spoon. This usually takes 3-5 minutes. Remove from heat.
Step 5: Toss Everything Together
Once the chicken is baked, transfer it to a large bowl.
Pour the warm sweet and sour sauce over the chicken and gently toss to coat every piece.
If adding bell peppers and pineapple, stir them in now — their fresh crunch and sweetness add amazing texture and flavor.
Step 6: Serve
Garnish with sesame seeds and chopped green onions if desired.
Serve hot with steamed rice, fried rice, or your favorite side.
Notes
- Chicken Cuts: Boneless, skinless thighs also work well if you prefer a juicier bite.
- Vegetable Add-ins: Feel free to experiment with other veggies like snap peas, broccoli, or onions.
- Sauce Sweetness: Adjust the sugar to your preference for a more or less sweet sauce.
- Batch Cooking: You can double the recipe for larger gatherings — just bake in batches to avoid overcrowding the pan.
- Gluten-Free Option: Use a gluten-free flour blend and tamari instead of soy sauce to make this dish gluten-free.
Watch Out for These Mistakes While Cooking
- Skipping the preheat: Not preheating the oven fully can lead to unevenly cooked chicken that lacks crispiness.
- Overcrowding the baking sheet: If the chicken pieces are too close, they will steam instead of crisping up.
- Under-thickening the sauce: If you don’t simmer the sauce long enough, it will be too thin to cling to the chicken.
- Skipping the second flour dip: The double-dip in flour ensures a nice, crisp coating — don’t skip it!
- Adding sauce too early: Wait until the chicken is fully baked before tossing it in the sauce to maintain the crispy texture.
- Using wet chicken: Not patting the chicken dry can result in a soggy coating.
- Neglecting to turn the chicken: Flipping halfway through baking ensures all sides brown evenly.
- Rushing the simmer: Let the sauce gently simmer to develop its full flavor — rushing this step can lead to a flat-tasting sauce.
What to Serve With Baked Sweet and Sour Chicken?
8 Recommendations
- Steamed Jasmine Rice
The soft, fluffy texture perfectly absorbs the vibrant sauce — a classic pairing. - Fried Rice
Take it up a notch with fried rice tossed with eggs, peas, carrots, and scallions. - Garlic Noodles
Rich, buttery noodles with a hint of garlic make a satisfying complement. - Stir-Fried Vegetables
Light and crisp veggies like broccoli, snap peas, and bell peppers add color and nutrition. - Asian Slaw
A refreshing, crunchy slaw with a light sesame vinaigrette balances the dish. - Spring Rolls
Serve crispy spring rolls on the side for an extra indulgent appetizer. - Cucumber Salad
A cool cucumber salad with a tangy dressing helps cut through the richness of the chicken. - Egg Drop Soup
Warm and comforting, this light soup pairs beautifully as a starter or side.
Storage Instructions
Refrigeration:
Store leftover Baked Sweet and Sour Chicken in an airtight container in the refrigerator for up to 3-4 days. The sauce may cause the chicken to lose some crispiness over time, but the flavors will still be delicious.
Reheating:
- For the best texture, reheat in the oven at 350°F (175°C) for about 10-12 minutes until heated through.
- Alternatively, microwave on medium heat for 1-2 minutes, though this will yield a softer texture.
Freezing:
You can freeze the cooked chicken and sauce separately for up to 2 months. Thaw overnight in the refrigerator, then reheat as above. The texture may soften slightly after freezing.
Estimated Nutrition (Per Serving — based on 4 servings)
- Calories: ~420 kcal
- Protein: ~25g
- Carbohydrates: ~35g
- Sugars: ~15g
- Fat: ~20g
- Saturated Fat: ~3g
- Fiber: ~2g
- Sodium: ~600mg
Note: These values are approximate and can vary based on exact ingredients and portion sizes.
Frequently Asked Questions
1. Can I make Baked Sweet and Sour Chicken ahead of time?
Yes! You can bake the chicken and prepare the sauce a day in advance. Store them separately and toss together when reheating for the best texture.
2. Can I use chicken thighs instead of breasts?
Absolutely. Boneless, skinless chicken thighs will yield juicier, more flavorful bites and are just as delicious.
3. How do I keep the chicken crispy?
Bake on a wire rack and avoid overcrowding the pan. Add the sauce only right before serving to maintain crispiness.
4. Can I make this recipe gluten-free?
Yes. Use gluten-free flour and substitute tamari for soy sauce to keep it gluten-free.
5. Is it possible to make this dish without sugar?
You can reduce the sugar or substitute with honey or a sugar alternative, but it will alter the flavor slightly.
6. Can I air fry the chicken instead of baking?
Definitely. Air fry the coated chicken at 380°F (195°C) for 15-18 minutes, turning halfway through, for an even crispier version.
7. How long does the sauce last?
Stored in an airtight container, the sauce can last up to 1 week in the refrigerator.
8. What vegetables can I add to this dish?
Bell peppers, pineapple, snap peas, broccoli, carrots, and onions are all excellent additions for extra color and crunch.
Conclusion
Baked Sweet and Sour Chicken is a delightful, healthier twist on a takeout favorite. With its perfectly crispy chicken, bright, tangy sauce, and flexibility to customize, it’s a dish you’ll find yourself returning to again and again. Whether you’re serving it for a cozy family dinner or a fun gathering with friends, this recipe promises big flavor with every bite. Enjoy!

Baked Sweet and Sour Chicken
- Prep Time: 15 minutes
- Cook Time: 25 minutes
- Total Time: 40 minutes
- Yield: 4 servings 1x
Description
Baked Sweet and Sour Chicken delivers the perfect balance of crispy baked chicken coated in a glossy, tangy-sweet sauce. This healthier take on a takeout classic is simple to prepare, family-friendly, and endlessly versatile. With just the right amount of crunch and vibrant flavor, it’s an easy recipe that will quickly become a household favorite.
Ingredients
For the Chicken:
- 2 large boneless, skinless chicken breasts (cut into bite-sized pieces)
- Salt & black pepper (to taste)
- 1/2 cup all-purpose flour
- 2 large eggs (lightly beaten)
- 2 tablespoons cornstarch (optional)
- Cooking spray or 2 tablespoons vegetable oil
For the Sweet and Sour Sauce:
- 1/2 cup granulated sugar
- 1/4 cup ketchup
- 1/3 cup rice vinegar (or apple cider vinegar)
- 1 tablespoon soy sauce
- 1 teaspoon garlic powder
- 1/2 cup water
- 2 teaspoons cornstarch (mixed with 2 teaspoons water)
Optional Add-ins:
- 1 cup diced pineapple
- 1 red bell pepper (chopped)
- 1 yellow bell pepper (chopped)
- Sesame seeds (for garnish)
- Chopped green onions (for garnish)
Instructions
-
Preheat Oven to 400°F (200°C). Prepare a baking sheet with parchment paper or a greased wire rack.
-
Season Chicken with salt and pepper.
-
Coat Chicken: Dip pieces in flour, then beaten egg, and flour again.
-
Bake Chicken: Arrange on baking sheet and bake for 20-25 minutes, turning halfway through.
-
Prepare Sauce: In a saucepan, combine sugar, ketchup, vinegar, soy sauce, garlic powder, and water. Simmer and thicken with cornstarch slurry.
-
Toss Chicken: Place baked chicken in a large bowl, pour over the sauce, and toss gently to coat.
-
Add Vegetables: Stir in bell peppers and pineapple if using.
-
Serve: Garnish with sesame seeds and green onions. Enjoy with rice or your preferred side.