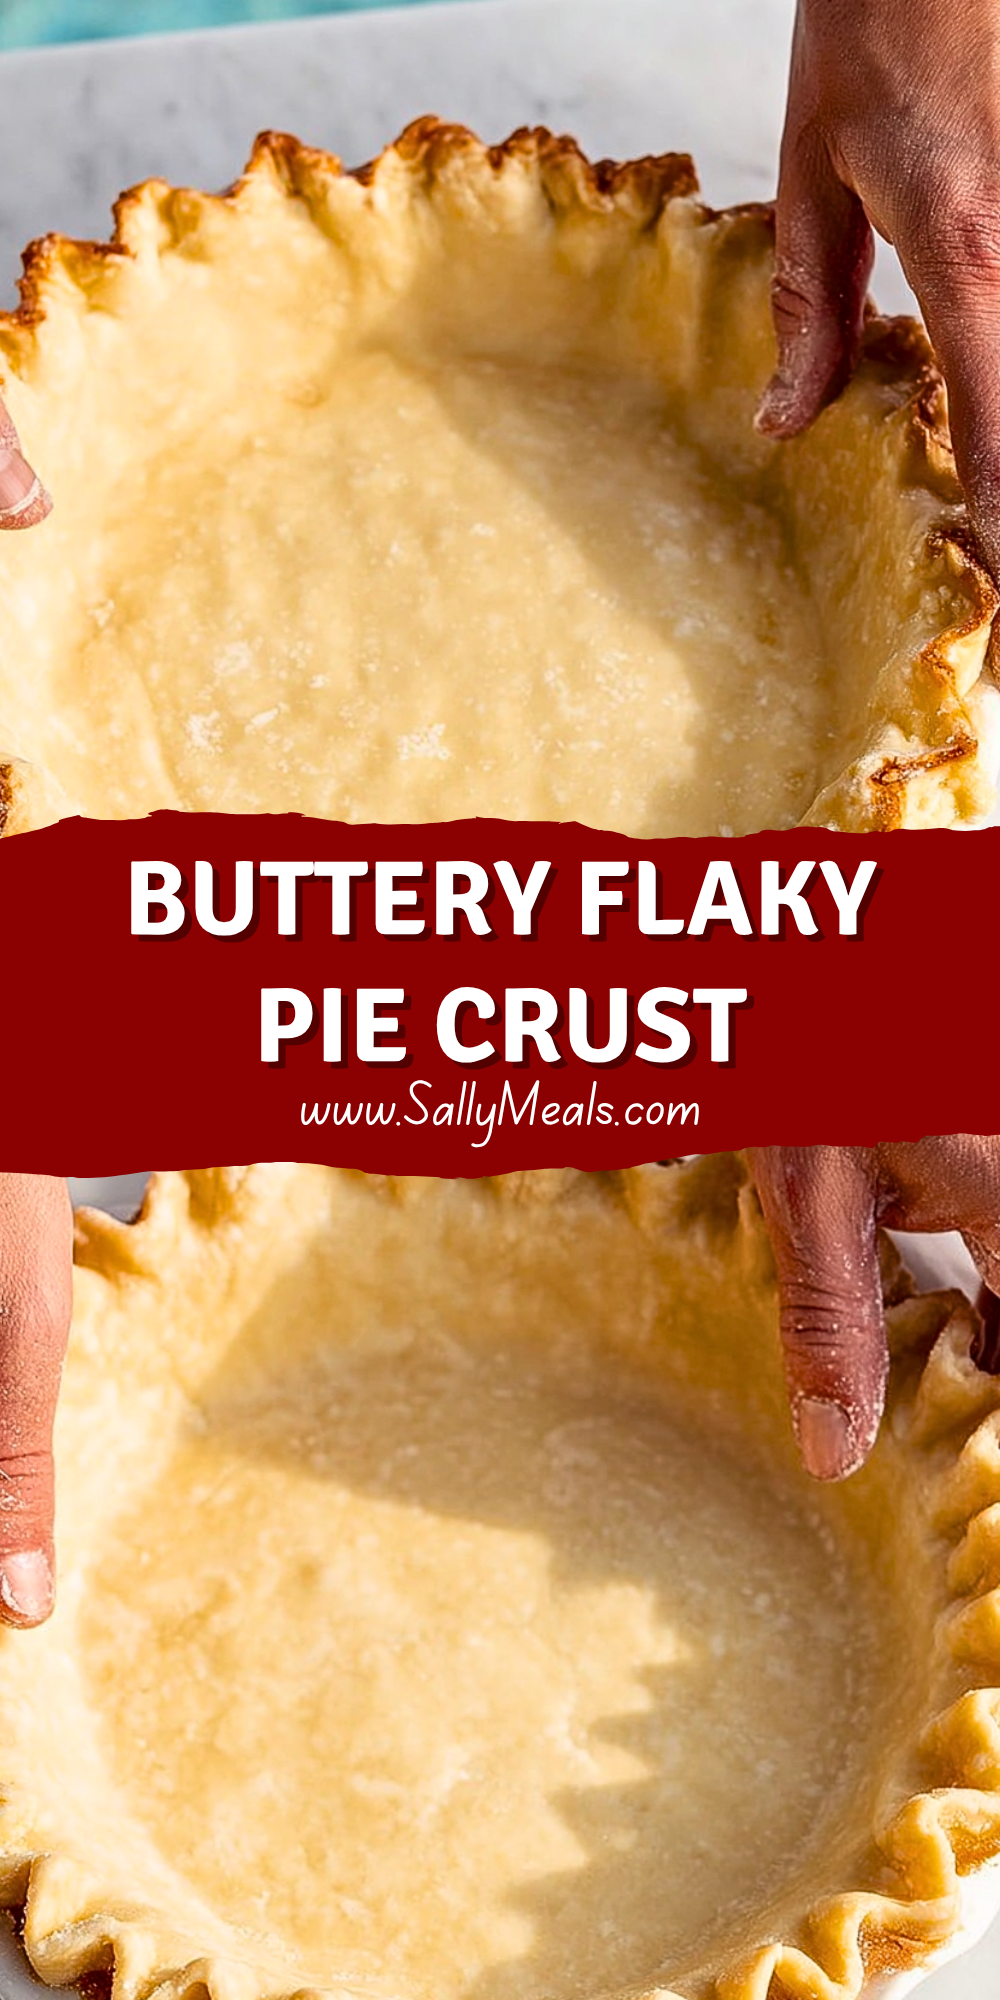
A perfectly made buttery flaky pie crust is the quiet hero behind every unforgettable pie. With its delicate layers, golden edges, and melt-in-your-mouth texture, it transforms even the simplest filling into something truly special. Whether you’re baking a classic apple pie or experimenting with savory creations, the crust sets the tone for the entire dish.
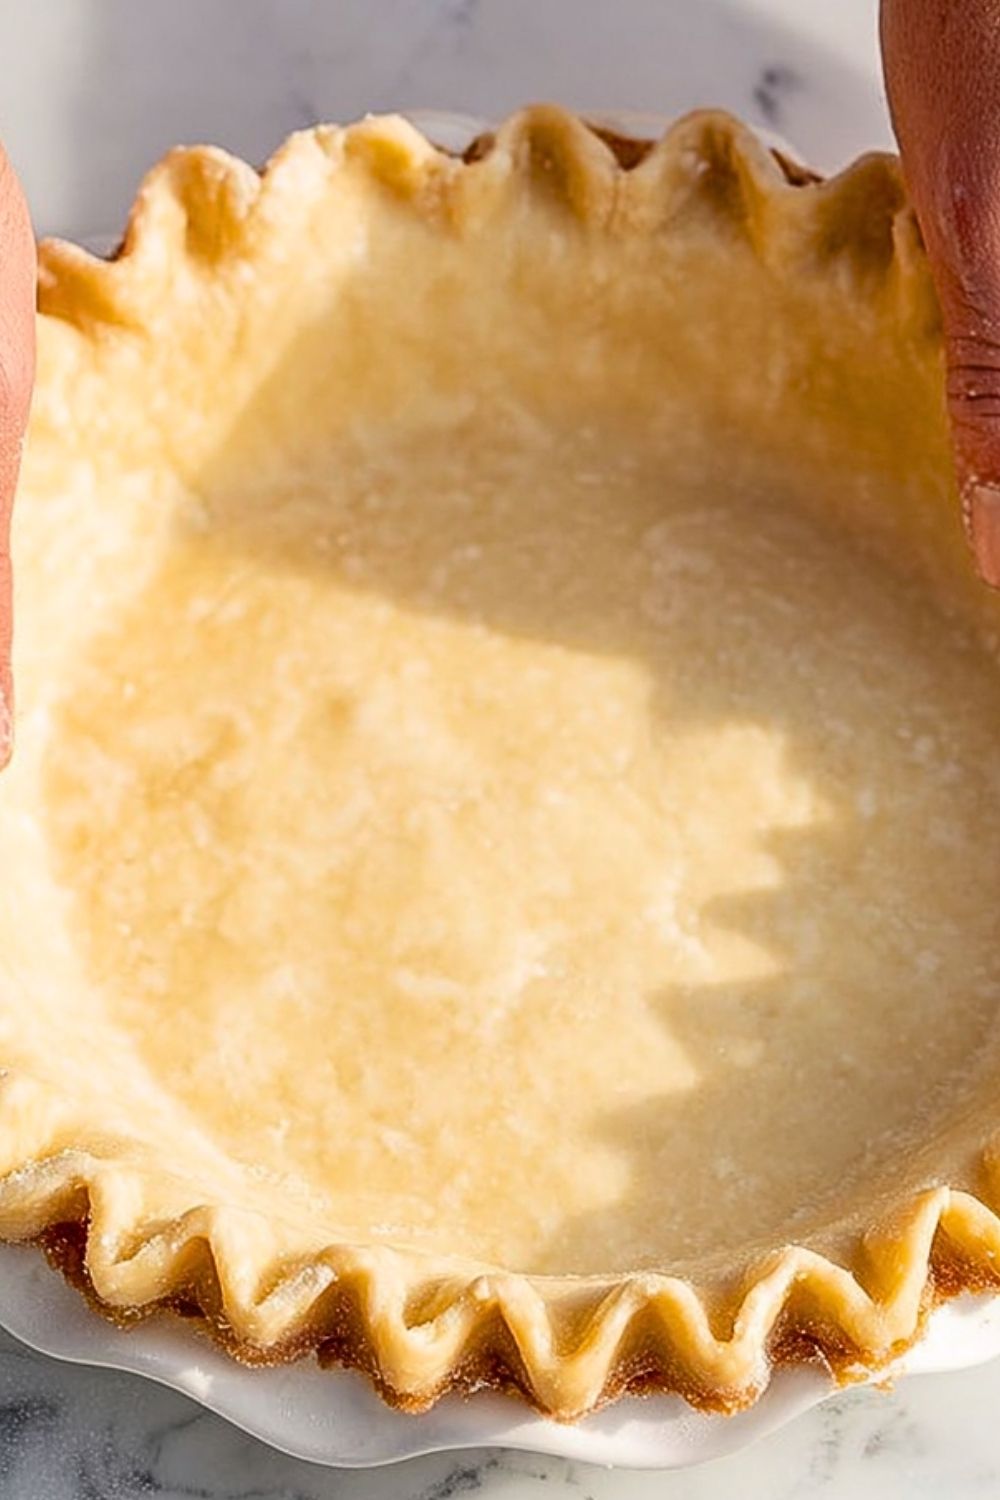
What makes this crust stand out is its balance of tenderness and structure. It holds fillings beautifully while still delivering that satisfying crisp bite. Once you master this foundational recipe, it becomes a reliable go-to for countless baking adventures.
Why You’ll Love This Buttery Flaky Pie Crust
This crust delivers consistent results with minimal fuss, making it ideal for both beginners and experienced bakers. The rich buttery flavor pairs well with sweet and savory fillings alike, while the flaky texture gives every bite a bakery-quality finish. It’s also highly adaptable, allowing you to prepare it ahead of time or freeze it for future use.
Preparation Phase & Tools to Use (Essential Tools and Equipment and Their Importance)
Creating a flawless pie crust depends heavily on using the right tools. A sturdy mixing bowl helps keep ingredients contained while blending. A pastry cutter or food processor is essential for cutting butter into the flour efficiently, ensuring those signature flaky layers. A rolling pin allows you to evenly flatten the dough without overworking it, while a pie dish shapes and supports the crust during baking. Chilling tools like a refrigerator or freezer are just as important, as keeping the dough cold prevents the butter from melting too soon, which is key to achieving flakiness.
Preparation Tips
Keeping everything cold is the golden rule when making a buttery flaky pie crust. Use chilled butter and ice-cold water to maintain the integrity of the fat in the dough. Avoid overmixing, as this can develop too much gluten and lead to a tough crust. When rolling out the dough, work quickly and lightly, turning it occasionally to prevent sticking. If the dough becomes too soft at any point, let it rest in the refrigerator before continuing. These small but crucial steps make a noticeable difference in the final texture.
Ingredients for this Buttery Flaky Pie Crust
- 2 1/2 cups (315g) all-purpose flour (preferably unbleached)
- 1 teaspoon fine salt
- 1 tablespoon granulated sugar (optional, recommended for sweet pies)
- 1 cup (226g) unsalted butter, very cold and cut into small cubes
- 6–8 tablespoons ice-cold water
- 1 teaspoon apple cider vinegar or lemon juice (optional, helps tenderize)
- Extra flour for dusting
Ingredient Notes:
Flour provides structure, while cold butter creates the flaky layers. Salt enhances flavor, and a small amount of sugar adds balance in sweet applications. Ice-cold water binds the dough without melting the butter. The optional vinegar or lemon juice helps inhibit gluten formation, resulting in a more tender crust.
Step 1: Prepare Your Ingredients
Measure all ingredients accurately before starting. Cut the butter into small cubes and place it in the refrigerator or freezer for at least 10–15 minutes. Fill a small bowl with ice water and set aside. Chilling ensures the butter stays solid, which is essential for flakiness.
Step 2: Mix Dry Ingredients
In a large mixing bowl, whisk together the flour, salt, and sugar (if using). This ensures even distribution and prevents clumping later in the process.
Step 3: Cut in the Butter
Add the cold butter cubes to the flour mixture. Using a pastry cutter, two forks, or a food processor, cut the butter into the flour until the mixture resembles coarse crumbs with some pea-sized pieces remaining. These larger bits of butter are key to forming flaky layers.
Step 4: Add Liquid Gradually
Drizzle in 6 tablespoons of ice-cold water along with the vinegar or lemon juice. Mix gently with a fork or your hands just until the dough begins to come together. Add more water, 1 tablespoon at a time, only if necessary. The dough should be slightly crumbly but hold together when pressed.
Step 5: Form the Dough
Turn the mixture onto a lightly floured surface. Gently gather it into a ball without kneading. Divide the dough into two equal portions, flatten each into a disk about 1 inch thick, and wrap tightly in plastic wrap.
Step 6: Chill the Dough
Refrigerate the dough disks for at least 1–2 hours, or up to 2 days. This resting period allows the gluten to relax and the butter to firm up, making the dough easier to roll out and improving texture.
Step 7: Roll Out the Dough
Remove one disk from the refrigerator and let it sit for 5 minutes if too firm. Roll it out on a floured surface into a circle about 12 inches in diameter. Rotate the dough frequently and lightly dust with flour to prevent sticking.
Step 8: Transfer to Pie Dish
Carefully roll the dough onto your rolling pin and transfer it to a pie dish. Gently press it into the bottom and sides without stretching. Trim excess dough, leaving about a 1-inch overhang.
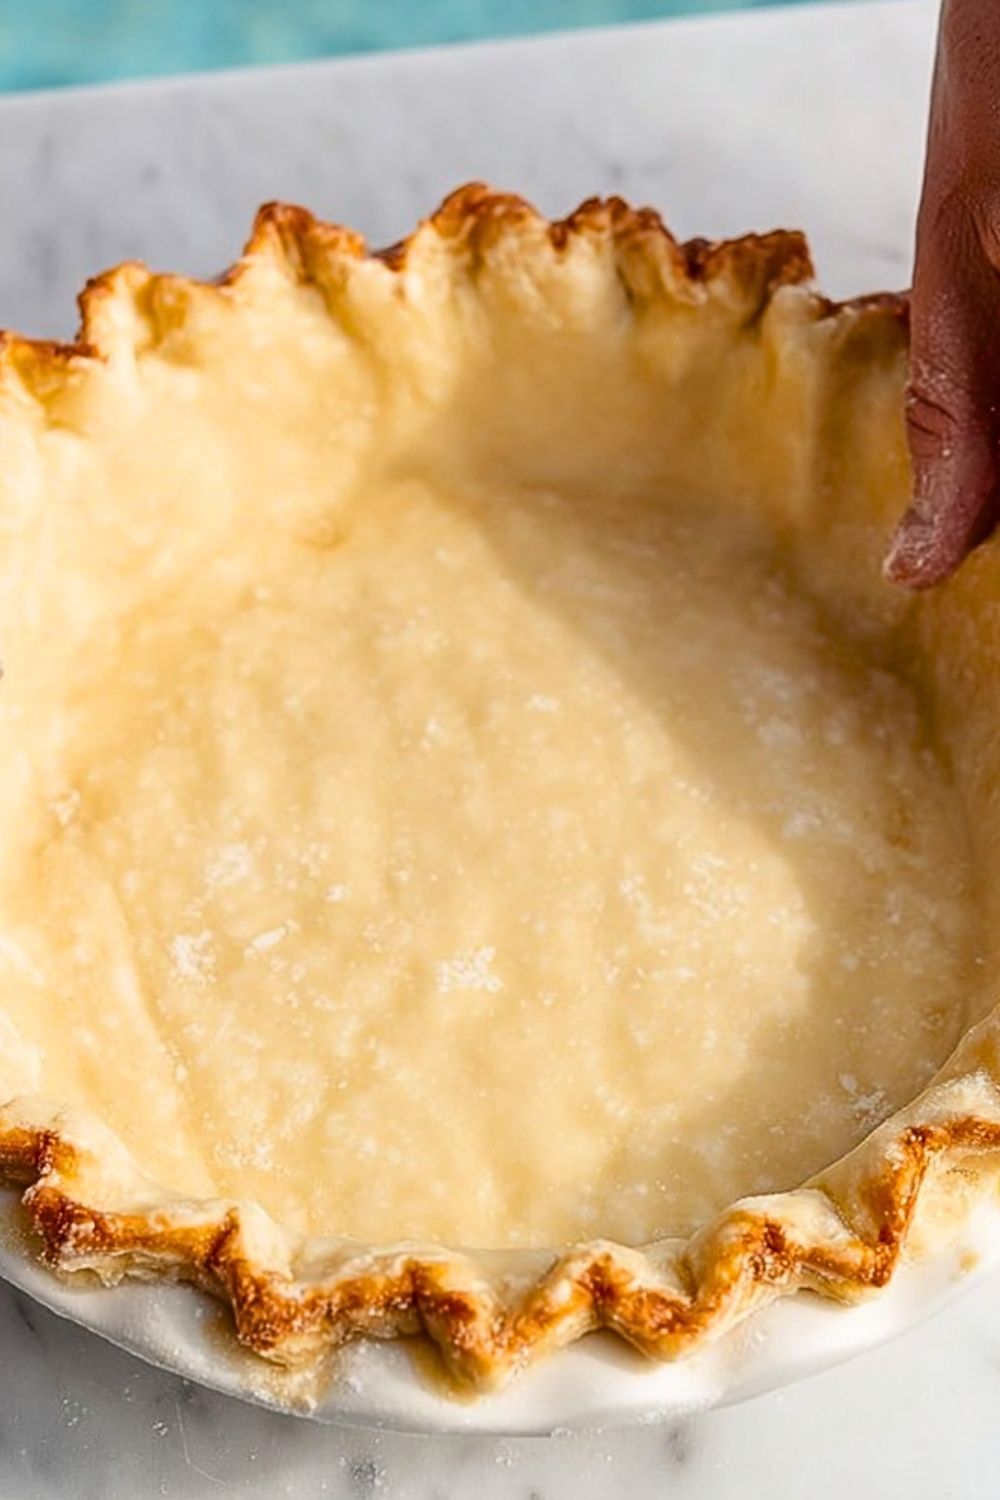
Step 9: Crimp the Edges
Fold the overhang under itself and crimp the edges using your fingers or a fork to create a decorative border. This also helps seal the crust and prevent shrinking.
Step 10: Chill Before Baking
Place the prepared crust in the refrigerator for 20–30 minutes before baking. This step helps maintain shape and prevents the crust from shrinking in the oven.
Step 11: Blind Bake (If Needed)
For recipes requiring a pre-baked crust, line the chilled crust with parchment paper and fill with pie weights or dried beans. Bake at 375°F (190°C) for 15–20 minutes, then remove weights and bake an additional 5–10 minutes until lightly golden.
Step 12: Fill and Bake
If making a filled pie, add your desired filling and bake according to your recipe instructions. Ensure the crust edges are protected with foil or a pie shield if browning too quickly.
Notes
Achieving a truly buttery flaky pie crust is all about technique and patience. The visible bits of butter in the dough are what create steam pockets during baking, resulting in those signature flaky layers. If your kitchen is warm, consider chilling your tools and even your flour beforehand. This recipe can easily be doubled for batch baking, and the dough freezes exceptionally well for future use. Always allow the dough to rest adequately, as this step significantly improves both texture and workability.
Watch Out for These Mistakes While Cooking
- Overworking the dough, which leads to a tough crust instead of a tender one.
- Using warm butter that blends too much into the flour, preventing flakiness.
- Adding too much water, making the dough sticky and dense.
- Skipping the chilling steps, which can cause shrinking during baking.
- Stretching the dough when placing it into the pie dish, leading to uneven baking.
- Not using pie weights during blind baking, which can cause bubbling or puffing.
Storage Instructions
The dough can be stored in the refrigerator for up to 2 days when tightly wrapped. For longer storage, freeze the dough disks for up to 3 months. Thaw overnight in the refrigerator before using. A fully baked crust can be kept at room temperature for up to 2 days or refrigerated for up to 5 days. Always cover well to prevent drying out.
Estimated Nutrition
Per serving (based on 8 servings):
- Calories: 260
- Fat: 18g
- Saturated Fat: 11g
- Carbohydrates: 22g
- Protein: 3g
- Sugar: 1g
- Sodium: 150mg
Frequently Asked Questions
Can I use salted butter instead of unsalted?
Yes, but reduce the added salt in the recipe to balance the flavor.
Why is my crust not flaky?
This usually happens if the butter was too warm or overmixed into the flour.
Can I make this dough ahead of time?
Absolutely, it actually benefits from resting and can be made up to 2 days in advance.
What is blind baking and when should I use it?
Blind baking is pre-baking the crust before adding filling, often used for custard or no-bake pies.
How do I prevent my crust from shrinking?
Avoid stretching the dough and always chill it before baking.
Can I freeze a baked pie crust?
Yes, wrap it היט and freeze for up to a month, then thaw before use.
What type of flour works best?
All-purpose flour is ideal for a balanced texture.
How do I know when my crust is done baking?
It should be golden brown with a firm, crisp texture.
Conclusion
Mastering a buttery flaky pie crust opens the door to endless baking possibilities. With the right techniques and a bit of practice, you can consistently create a crust that is tender, crisp, and beautifully layered. Whether you’re preparing a comforting dessert or a savory pie, this foundational recipe ensures delicious results every time.
Buttery Flaky Pie Crust
- Prep Time: 20 minutes
- Cook Time: 30 minutes
- Total Time: 1 hour 50 minutes
- Yield: 8 servings 1x
- Category: Dessert
- Method: Baking
- Cuisine: American
- Diet: Vegetarian
Description
Get ready to elevate your baking with this buttery flaky pie crust that’s crisp, tender, and incredibly easy to make. Perfect for quick breakfast pies, easy dinner ideas, healthy snack bases, and dessert recipes. This easy recipe is ideal for anyone looking for reliable food ideas that work every time.
Ingredients
2 1/2 cups all-purpose flour
1 teaspoon salt
1 tablespoon sugar
1 cup unsalted butter, cold and cubed
6–8 tablespoons ice-cold water
1 teaspoon apple cider vinegar
Instructions
1. Prepare all ingredients and chill the butter thoroughly
2. Whisk together flour, salt, and sugar in a bowl
3. Cut in the cold butter until mixture resembles coarse crumbs
4. Gradually add ice water and vinegar, mixing gently
5. Form dough into a ball, divide, and flatten into disks
6. Wrap and chill for at least 1–2 hours
7. Roll out dough into a 12-inch circle
8. Transfer to pie dish and press gently
9. Trim and crimp edges
10. Chill again before baking
11. Blind bake if required or fill and bake as desired
Notes
Keep all ingredients cold for best flakiness
Do not overmix the dough to avoid toughness
Chill the dough before and after shaping for best results
Nutrition
- Serving Size: 1 slice
- Calories: 260
- Sugar: 1g
- Sodium: 150mg
- Fat: 18g
- Saturated Fat: 11g
- Unsaturated Fat: 6g
- Trans Fat: 0g
- Carbohydrates: 22g
- Fiber: 1g
- Protein: 3g
- Cholesterol: 45mg
Keywords: buttery pie crust, flaky crust, easy recipe, baking basics, pie dough