
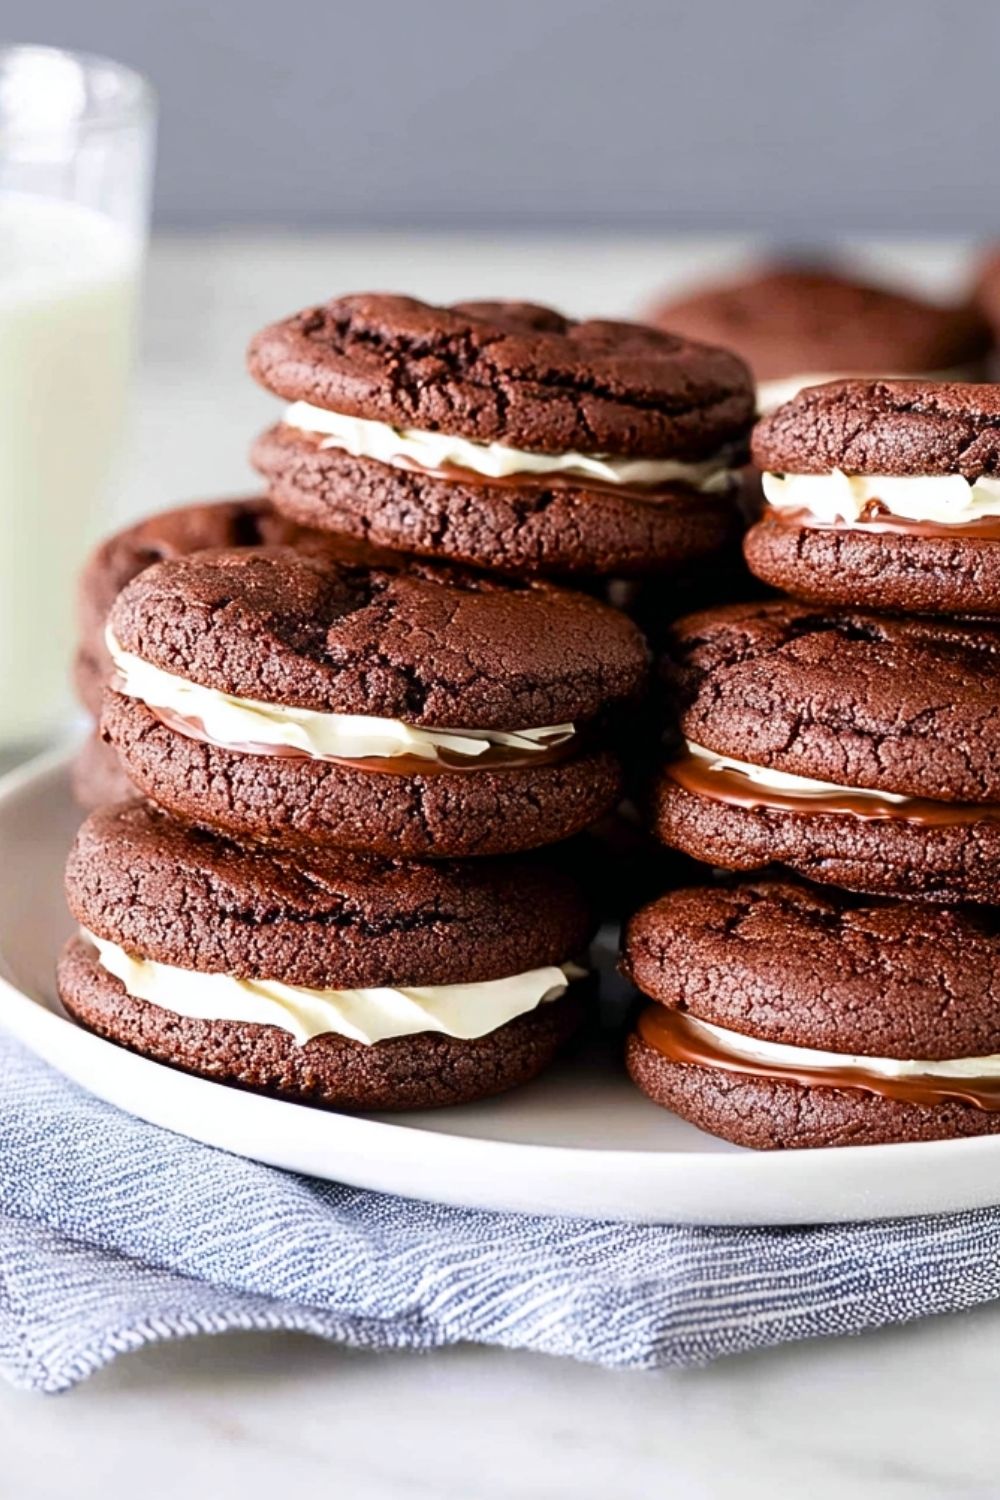
Biting into one of these homemade Chocolate Sandwich Cookies is pure joy. I love how the soft, chewy chocolate cookies give way to a creamy vanilla filling that’s just sweet enough to balance the richness of the cocoa. It’s the kind of treat that feels both nostalgic and luxurious, like something between a childhood favorite and a bakery indulgence.

I came up with this recipe on a chilly weekend afternoon, craving something cozy but not too fussy. These cookies hit all the right notes: chocolatey, creamy, a little bit gooey if eaten warm, and absolutely perfect with a glass of cold milk. They store beautifully, making them great for gifting or prepping ahead of time for parties, holidays, or just because.
Why You’ll Love This Chocolate Sandwich Cookies Recipe
These cookies have the best of both worlds: a soft-baked, rich chocolate cookie and a smooth, buttery vanilla filling. They’re easy to make from scratch, without any complicated steps or fancy equipment. Each bite offers a balance of texture and flavor that makes them irresistible. Plus, they’re fun to assemble, making them a great baking project to share with kids or friends.
What Kind of Cocoa Powder Should I Use?
I recommend using unsweetened Dutch-process cocoa powder for this recipe. It gives the cookies a deep, dark chocolate flavor and a more refined, less bitter finish. Natural cocoa powder works in a pinch, but you may notice a sharper, tangier taste. Dutch-process also gives that rich, almost “Oreo-like” quality that pairs beautifully with the creamy filling.
Options for Substitutions
If you’re out of Dutch-process cocoa, natural cocoa powder can still be used—just reduce the baking soda slightly to keep the acidity in balance. For the filling, swap in a dairy-free butter if needed or try flavored extracts like mint or almond for a fun twist. You can even roll the cookie edges in sprinkles or crushed nuts for an added pop of texture and flair.
Ingredients for This Chocolate Sandwich Cookies Recipe
Unsalted Butter
Butter gives these Chocolate Sandwich Cookies their rich flavor and soft, tender texture. In the cookie dough, it creates a chewy bite and helps the cookies spread just enough in the oven. In the filling, butter is what makes the center creamy, smooth, and luscious. Using unsalted butter gives better control over the overall flavor of the recipe.
Granulated Sugar
Granulated sugar sweetens the dough and helps the cookies develop lightly crisp edges. It also works with the butter during creaming to create a lighter texture. Without it, the cookies would lose some of their structure and balanced sweetness.
Brown Sugar
Brown sugar adds moisture and a subtle caramel depth that makes the chocolate flavor taste fuller and warmer. It is especially important in sandwich cookies like these because it helps keep the cookie layers soft even after they are filled and stored.
Eggs
Eggs bind the dough together and give the cookies structure. They also add richness and help create that soft, slightly fudgy interior that makes these cookies feel extra special.
Vanilla Extract
Vanilla rounds out the chocolate flavor and adds warmth to both the cookie dough and the filling. Even though it may seem like a small ingredient, it has a big impact on the final taste.
All-Purpose Flour
Flour gives the cookies body and helps build the structure needed to hold the creamy filling. It keeps the dough stable enough for shaping and baking while still allowing the cookies to stay soft and tender.
Dutch-Process Cocoa Powder
This is the ingredient that gives the cookies their deep chocolate personality. Dutch-process cocoa creates a darker color and smoother, richer flavor than natural cocoa. It is a key ingredient if you want a bakery-style sandwich cookie with a bold chocolate taste.
Baking Soda
Baking soda helps the cookies rise slightly and spread evenly. It contributes to the final texture, making the cookies soft rather than dense or heavy.
Salt
Salt sharpens all the flavors in the dough. It keeps the cookies from tasting flat and enhances both the chocolate and the sweetness.
Chocolate Chips
Chocolate chips add pockets of melty chocolate throughout the cookies. They make each bite more indulgent and give the cookies extra texture. While optional in some chocolate cookie recipes, they bring a lot of character here.
Powdered Sugar
Powdered sugar is essential for the filling because it dissolves smoothly and creates that fluffy, sweet center. It gives the filling structure without making it grainy.
Milk
A small amount of milk helps loosen the filling to the perfect spreadable or pipeable consistency. It turns the butter and powdered sugar mixture into a silky cream.
Step 1: Prepare the Oven and Baking Sheets
Start by preheating your oven to 350°F (175°C). This ensures the cookies bake evenly from the moment they go in. Line two baking sheets with parchment paper so the cookies release easily and bake with better color on the bottom.
Step 2: Cream the Butter and Sugars
In a large mixing bowl, beat the softened butter with the granulated sugar and brown sugar until the mixture looks light and fluffy. This step is more important than it may seem because it creates air in the dough, which helps produce cookies that are soft and tender instead of heavy.
Take your time here and mix for about 2 to 3 minutes. Proper creaming also helps the sugar begin dissolving, which improves the texture of the finished cookies.
Step 3: Add the Eggs and Vanilla
Crack in the eggs one at a time, mixing well after each addition. Then stir in the vanilla extract. The eggs help emulsify the fat and sugar mixture, creating a smooth, rich dough. The vanilla adds warmth and boosts the chocolate flavor without overpowering it.
If the mixture looks slightly curdled at this point, do not worry. Once the dry ingredients are added, the dough will come together beautifully.
Step 4: Mix the Dry Ingredients Separately
In another bowl, whisk together the all-purpose flour, Dutch-process cocoa powder, baking soda, and salt. Mixing these ingredients separately helps distribute the leavening and cocoa evenly so every cookie bakes with the same texture and flavor.
This is also the best moment to break up any cocoa lumps, which helps keep the dough smooth and uniform.
Step 5: Combine the Wet and Dry Mixtures
Gradually add the dry ingredients to the butter mixture, mixing on low speed or folding gently by hand. Stop as soon as the flour disappears into the dough. Overmixing at this stage can make the cookies tougher than you want, so keep it gentle.
The dough should look thick, rich, and deeply chocolatey.
Step 6: Fold in the Chocolate Chips
Add the chocolate chips and fold them through the dough until evenly distributed. This gives the cookies little bursts of extra chocolate in every bite and makes them feel even more indulgent.
If you like, you can reserve a few chocolate chips to press into the tops of the dough balls before baking for a prettier finish.
Step 7: Portion the Dough
Use a cookie scoop or tablespoon to portion the dough into evenly sized mounds and place them on the prepared baking sheets. Try to keep the cookies the same size so they bake evenly and pair neatly when it is time to sandwich them.
Leave about 2 inches of space between each mound to allow for spreading.
Step 8: Bake the Cookies
Bake for 10 to 12 minutes, or until the edges are set and the centers still look slightly soft. The cookies will continue to firm up as they cool, so avoid waiting until they look fully done in the oven.
This is the secret to getting a soft, brownie-like texture rather than a dry cookie.
Step 9: Cool Completely
Let the cookies sit on the baking sheet for about 5 minutes before transferring them to a wire rack. This short rest helps them finish setting up without breaking apart.
After that, allow them to cool completely. This step is essential because even slightly warm cookies can melt the filling and make assembly messy.
Step 10: Make the Filling
In a clean bowl, beat the softened butter until creamy. Gradually add the powdered sugar, then mix in the vanilla extract and milk. Beat until the filling becomes smooth, fluffy, and easy to spread.
If it looks too thick, add a tiny splash more milk. If it feels too soft, add a little extra powdered sugar until the texture is just right.
Step 11: Assemble the Chocolate Sandwich Cookies
Turn half of the cooled cookies upside down. Pipe or spread a generous amount of filling onto the flat side of each one, then place another cookie on top to create the sandwich.
Press gently so the filling reaches the edges without spilling out too much. Matching cookies of similar size makes the finished sandwiches look especially polished.
Step 12: Let Them Set and Serve
For the neatest results, let the assembled cookies sit for 10 to 15 minutes so the filling can settle slightly. Then serve them right away or store them in an airtight container.
These Chocolate Sandwich Cookies are wonderful the same day, but they are also delicious after a few hours when the filling and cookies have had time to meld together.
Extra Recipe Notes for Better Results
Keep the Butter Properly Softened
Butter should be soft enough to press with a finger but not shiny or melted. This texture helps the dough cream correctly and gives the filling a smooth consistency.
Use a Cookie Scoop for Uniform Sandwiches
Evenly portioned cookies are easier to pair together. This makes the final sandwiches look more professional and helps the filling distribute more evenly.
Do Not Skip Cooling Time
Warm cookies can ruin the filling texture. A full cooling period gives you cleaner assembly and a prettier final result.
Chill the Dough for Thicker Cookies
If you want a puffier sandwich cookie, chill the dough for 20 to 30 minutes before baking. This helps control spreading and intensifies the flavor.
Pipe the Filling for a Bakery-Style Look
A piping bag or zip-top bag with the corner snipped off makes the filling neater and more even. It is a simple step that makes a big visual difference.
How Long to Prepare the Chocolate Sandwich Cookies Recipe
The total time commitment for these Chocolate Sandwich Cookies is surprisingly manageable. For prep, you’ll spend about 20 minutes mixing the dough, scooping, and preparing the filling while the cookies bake. The cookies themselves bake in about 10-12 minutes per batch, and you’ll need a little time to let them cool before sandwiching.
All in all, you’re looking at roughly 45-60 minutes from start to finish, depending on how many trays you bake at once and whether you chill the dough (optional but recommended for thicker cookies). It’s an ideal weekend project or something to whip up on a relaxed evening.
Tips for Perfect Chocolate Sandwich Cookies
- Chill the dough for at least 30 minutes if you want a thicker, chewier texture.
- Use a cookie scoop for uniform size so they sandwich evenly.
- Allow cookies to fully cool before adding the filling to prevent melting.
- Don’t overbake—the cookies should be soft in the center when removed from the oven.
- Pipe the filling for a clean, professional look and even distribution.
Watch Out for These Mistakes While Cooking
- Skipping the chill time can result in flat cookies.
- Overmixing the dough will make the cookies tough.
- Using warm butter can cause the dough to spread too much.
- Not measuring flour correctly (spoon and level!) can dry out the dough.
- Overfilling the sandwich can cause the cream to ooze out when you bite.
What to Serve With Chocolate Sandwich Cookies?
1. A tall glass of cold milk
Nothing beats the classic combo—rich cookies and cold milk.
2. Coffee or espresso
Perfect for adults looking for a bold pairing.
3. Vanilla ice cream
Use the cookies to make epic ice cream sandwiches.
4. Fresh berries
A light, fruity balance to the intense chocolate flavor.
5. Chocolate drizzle
Drizzle melted chocolate on top for extra indulgence.
Storage Instructions
Store the fully assembled cookies in an airtight container at room temperature for up to 3 days. For longer storage, refrigerate them for up to a week. If you want to freeze them, do so before filling. Freeze the cookies in a single layer on a baking sheet, then transfer to a freezer-safe container. Thaw at room temperature and add the filling before serving for the best texture and flavor.
Estimated Nutrition
These estimates are based on one sandwich cookie:
- Calories: 210
- Total Fat: 10g
- Saturated Fat: 6g
- Carbohydrates: 28g
- Sugar: 18g
- Protein: 2g
- Fiber: 2g
Frequently Asked Questions
Can I make the dough ahead of time?
Yes, you can make the dough up to 2 days in advance and keep it refrigerated.
Can I freeze the assembled cookies?
You can, but the filling texture is best when fresh. Freeze unfilled cookies and assemble later.
Can I use store-bought frosting?
Sure! It won’t be as rich or creamy, but it’s a quick shortcut.
How do I keep the cookies soft?
Store them in an airtight container with a slice of bread—it keeps moisture locked in.
Can I double the recipe?
Absolutely. This recipe scales up beautifully if you’re baking for a crowd.
Conclusion
Chocolate Sandwich Cookies are a delightful treat that brings together the richness of a brownie-like cookie with the nostalgic sweetness of vanilla cream. Whether you’re baking for a party, a lunchbox surprise, or just a self-care moment, these cookies deliver every time. I promise you’ll want to make a double batch—they disappear fast!
Chocolate Sandwich Cookies
- Prep Time: 20 minutes
- Cook Time: 12 minutes
- Total Time: 45 minutes
- Yield: 12 sandwich cookies 1x
- Category: Dessert
- Method: Baking
- Cuisine: American
Description
These rich, chewy Chocolate Sandwich Cookies are everything you love about a classic cookie and cream combo. With a soft chocolate cookie exterior and a fluffy vanilla buttercream center, they’re perfect for dessert tables, lunchboxes, or cozy evenings at home. This easy recipe is great for beginners and fun for kids to help with too. Whether you’re looking for a quick dessert idea, an easy snack recipe, or homemade cookie gifts, these chocolate sandwich cookies fit the bill. Try them for your next bake and you’ll see why they’re a favorite!
Ingredients
1 cup unsalted butter, softened
1 cup granulated sugar
1 cup brown sugar, packed
2 large eggs
2 teaspoons vanilla extract
2 cups all-purpose flour
1 cup Dutch-process cocoa powder
1 teaspoon baking soda
1/2 teaspoon salt
1 cup chocolate chips
1/2 cup unsalted butter, softened (for filling)
1 1/2 cups powdered sugar (for filling)
1 teaspoon vanilla extract (for filling)
1 tablespoon milk (for filling)
Instructions
1. Preheat the oven to 350°F (175°C) and line two baking sheets with parchment paper.
2. In a large bowl, cream together the butter, granulated sugar, and brown sugar until light and fluffy.
3. Beat in the eggs one at a time, then add vanilla extract.
4. In a separate bowl, whisk together the flour, cocoa powder, baking soda, and salt.
5. Gradually add the dry ingredients to the wet ingredients, mixing just until combined.
6. Fold in the chocolate chips.
7. Use a cookie scoop to portion dough onto baking sheets, spacing them about 2 inches apart.
8. Bake for 10–12 minutes, or until the edges are set but centers are still soft.
9. Let cookies cool on the baking sheet for 5 minutes before transferring to a wire rack.
10. While cookies cool, make the filling: beat butter until creamy, then gradually add powdered sugar. Mix in vanilla and milk until smooth.
11. Pipe or spread filling onto the flat side of half the cookies, then top with remaining cookies to form sandwiches.
12. Serve immediately or store as directed.
Notes
Chill the dough for 30 minutes if you prefer a thicker cookie with less spread.
To keep cookies soft, store them with a slice of bread in the container.
For a flavor twist, add a drop of peppermint or almond extract to the filling.
Nutrition
- Serving Size: 1 sandwich cookie
- Calories: 210
- Sugar: 18g
- Sodium: 90mg
- Fat: 10g
- Saturated Fat: 6g
- Unsaturated Fat: 3g
- Trans Fat: 0g
- Carbohydrates: 28g
- Fiber: 2g
- Protein: 2g
- Cholesterol: 35mg
Keywords: easy dessert, chocolate cookie sandwich, homemade oreo, baking recipe, cookies and cream, chocolate sandwich cookies, easy snack