
This dessert brings back memories of family gatherings, potluck dinners, and the kind of old-school baking that never goes out of style. Vintage Cherries In the Snow is one of those no-bake, retro recipes that looks like it took hours to make—but it’s actually quick, fuss-free, and absolutely gorgeous. I’ve made this dish more times than I can count, and it never fails to disappear fast at every event.
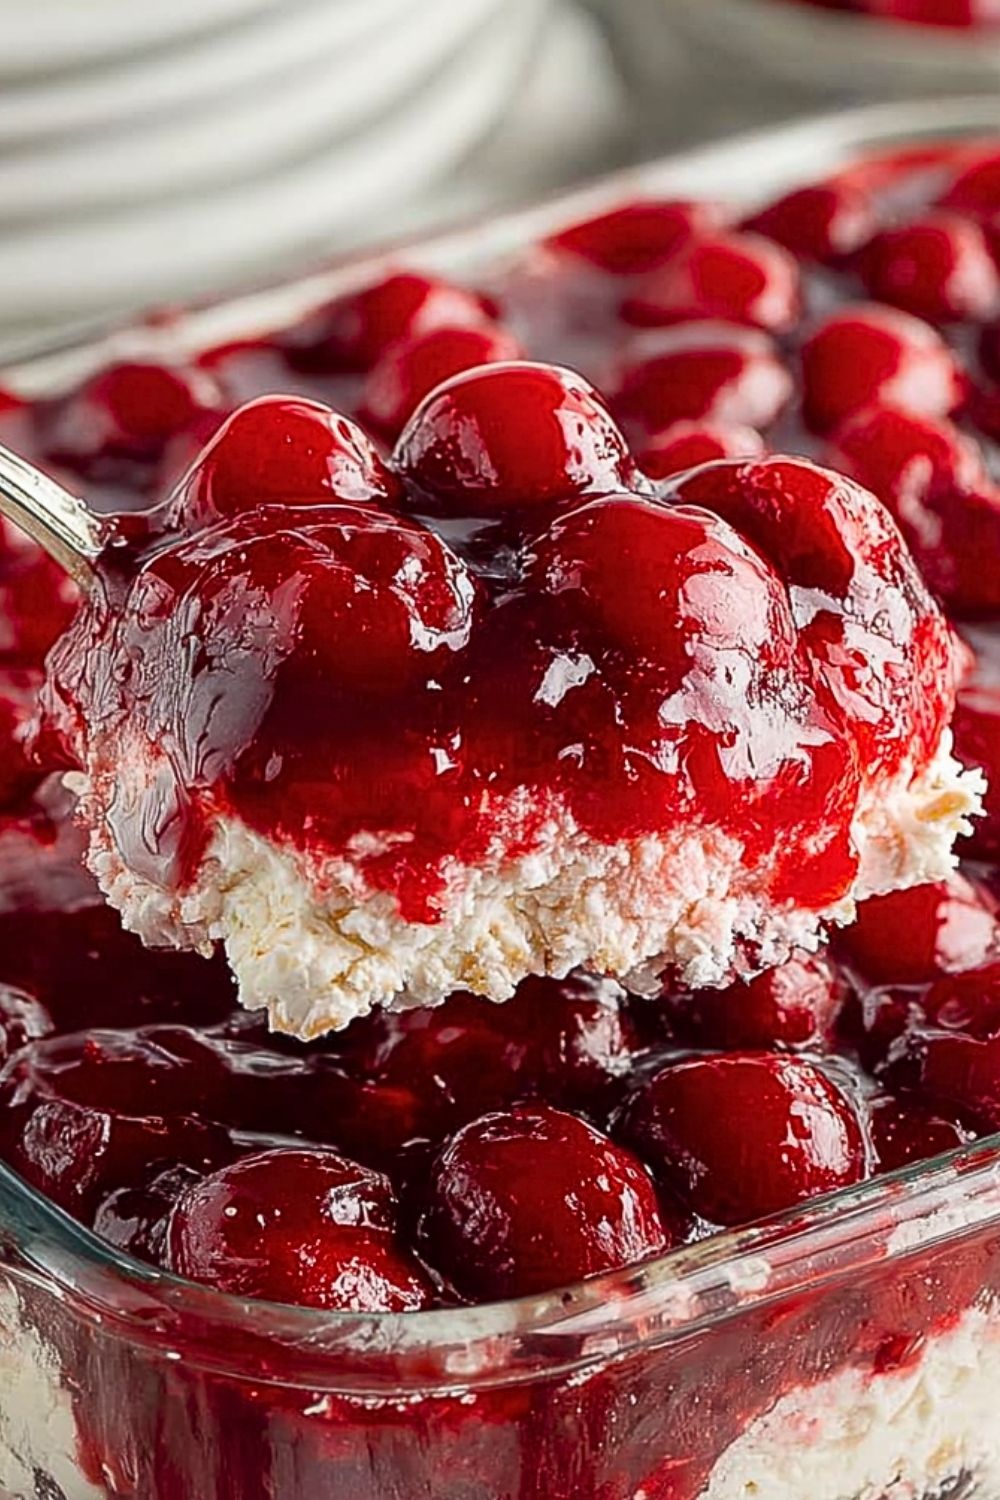
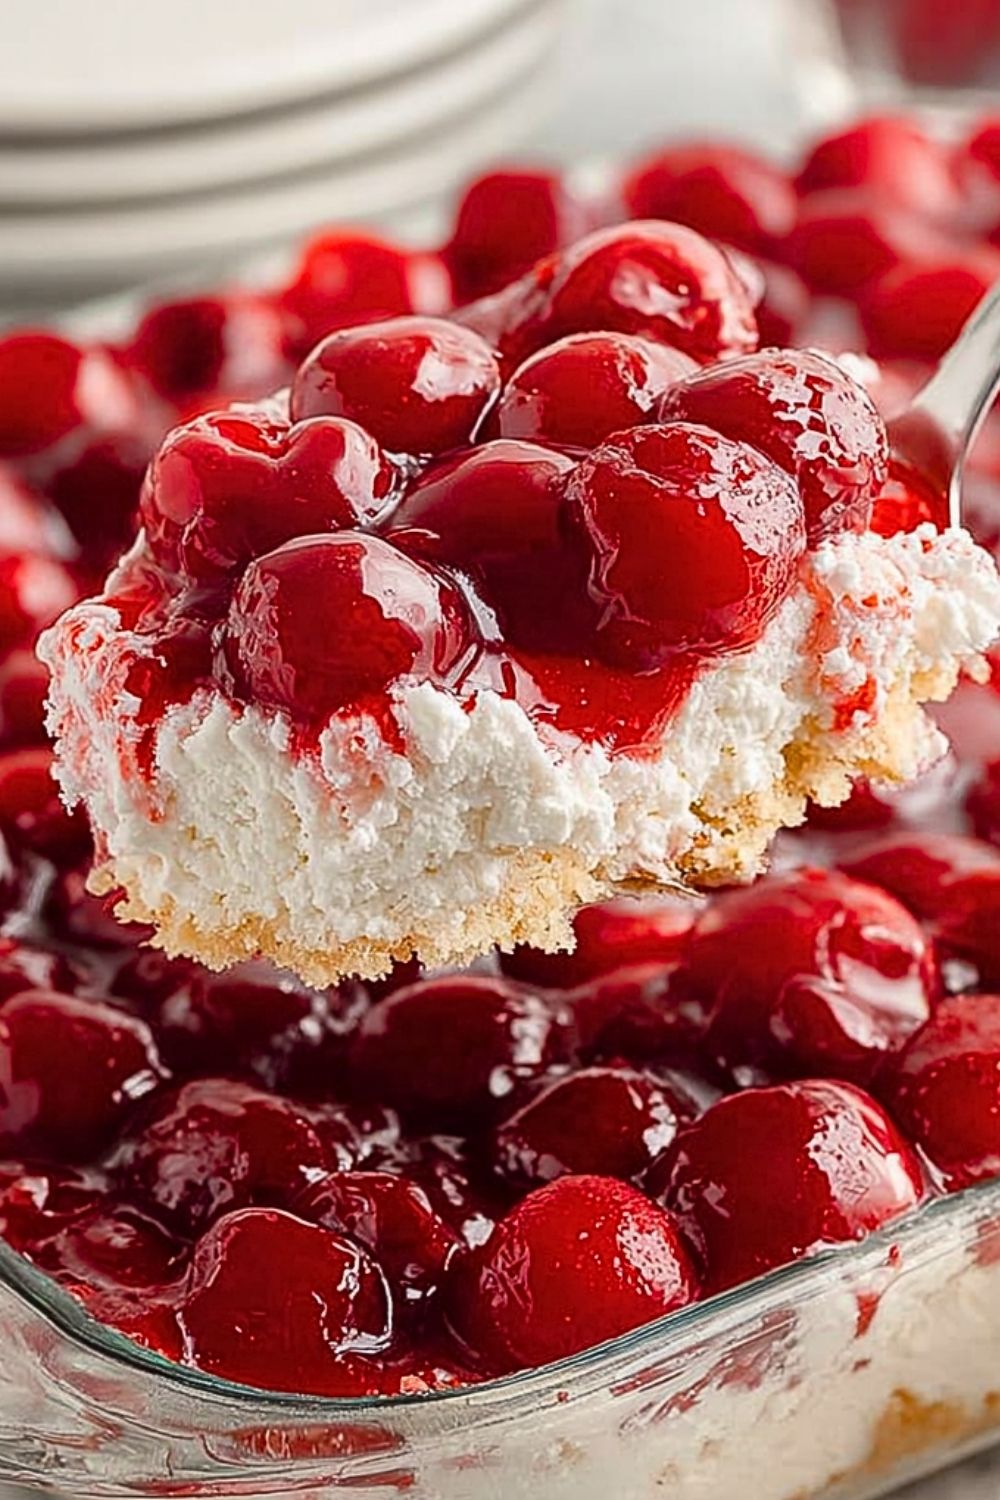
It’s a creamy, dreamy layered dessert with a graham cracker crust, fluffy cream cheese filling, and glossy cherry pie topping that gives it the signature “snowfall” look. It’s sweet, slightly tangy, and perfectly balanced with a bit of crunch and loads of cherry flavor. Whether you’re serving it for a holiday meal or a casual weekend treat, this is one of those dishes that feels both nostalgic and irresistible.
Why You’ll Love This Vintage Cherries In the Snow
- No baking required – perfect for warm weather or quick prep
- Crowd-pleasing flavor – creamy, fruity, and rich without being too heavy
- Easy to make ahead – actually tastes better after chilling overnight
- Classic and beautiful – looks stunning on the table with minimal effort
- Customizable – you can switch up toppings or crusts to make it your own
What Kind of Cherries Should I Use?
I always go with canned cherry pie filling for ease and flavor consistency. It gives the dessert that glossy, vibrant red finish that really makes it pop. However, if you’re feeling adventurous, you can use homemade cherry topping made with fresh or frozen cherries simmered with sugar and cornstarch. Just make sure it thickens well—this dish needs that signature jammy cherry layer.
Options for Substitutions
There are plenty of ways to tweak this dessert based on your preferences or pantry situation:
- Crust: Swap graham crackers for vanilla wafers, shortbread cookies, or even a chocolate cookie base for a twist.
- Cream cheese layer: If you’re short on cream cheese, a blend of mascarpone or even Greek yogurt and whipped topping can work in a pinch.
- Fruit topping: Cherry is classic, but blueberry or strawberry pie filling works just as beautifully.
- Sweetness: Want it less sweet? Reduce the sugar in the cream cheese layer or use a no-sugar-added pie filling.
- Dairy-free: Use plant-based cream cheese and whipped topping for a completely dairy-free dessert that still tastes amazing.
Ingredients for This Vintage Cherries In the Snow
- Graham cracker crumbs – These form the buttery, slightly crunchy base that balances the creamy filling.
- Granulated sugar – Used in both the crust and the filling to add just the right amount of sweetness.
- Unsalted butter – Melted and mixed with the graham crumbs to create a solid crust.
- Cream cheese – The star of the filling. Soft, tangy, and rich, it gives the dessert body and depth.
- Powdered sugar – Blends smoothly into the cream cheese for a silky texture without any graininess.
- Vanilla extract – Adds warmth and flavor complexity to the creamy layer.
- Heavy whipping cream – Whipped until fluffy to lighten the cream cheese filling.
- Cherry pie filling – The iconic glossy, ruby-red topping that defines this dessert.
Step 1: Make the Crust
Combine graham cracker crumbs, granulated sugar, and melted butter in a bowl. Mix until evenly moistened, then press firmly into the bottom of a 9×13 inch dish. Place in the refrigerator to chill while you make the filling.
Step 2: Prepare the Cream Cheese Filling
In a large bowl, beat the softened cream cheese with powdered sugar and vanilla extract until completely smooth. Make sure there are no lumps—this base needs to be creamy and well-blended.
Step 3: Whip the Cream
Using a stand mixer or hand mixer, whip the heavy cream until stiff peaks form. Be careful not to overmix. You want a fluffy consistency that holds shape but still feels light.
Step 4: Fold and Layer
Gently fold the whipped cream into the cream cheese mixture, keeping the mixture airy and light. Spread this over the chilled graham cracker crust in an even layer.
Step 5: Add the Cherry Topping
Carefully spoon the cherry pie filling over the cream cheese layer. Spread evenly, making sure you don’t mix the layers. The vibrant cherry topping should sit beautifully on top.
Step 6: Chill and Serve
Cover the dish with plastic wrap and refrigerate for at least 4 hours, or ideally overnight. This gives the layers time to set and makes slicing easier. Serve cold and enjoy every creamy, cherry-filled bite!
How Long to Prepare Vintage Cherries In the Snow
This recipe doesn’t require baking, but it does need a bit of chilling time to set properly. The active prep takes around 20–25 minutes, especially if you’re working efficiently with an electric mixer and prepping your crust and filling back to back.
After assembly, it’s important to refrigerate the dessert for at least 4 hours before serving. Overnight chilling is even better—it helps the flavors meld and makes slicing easier.
Tips for Perfect Vintage Cherries In the Snow
- Room temperature cream cheese is essential for a smooth filling—cold cream cheese leads to lumps.
- Don’t overwhip the cream or it may turn buttery. Stop as soon as you reach stiff peaks.
- Chill the crust while making the filling so it holds together better.
- Use a gentle hand when folding the whipped cream into the cream cheese to maintain the fluffiness.
- Let it chill overnight for best flavor and texture. It slices beautifully when fully set.
Watch Out for These Mistakes While Cooking
- Skipping the chilling time will result in a runny dessert that doesn’t hold its layers.
- Using low-fat cream cheese can make the filling too thin.
- Overmixing the whipped cream leads to a dense, greasy texture.
- Not pressing the crust firmly can cause it to crumble when sliced.
- Applying the cherry topping too soon may cause it to sink—wait until the filling is evenly layered.
What to Serve With Vintage Cherries In the Snow?
1. Fresh Mint or Lemon Zest
A little sprinkle of lemon zest or a sprig of mint adds brightness and color contrast.
2. Hot Coffee or Espresso
The bitterness of coffee balances the sweetness of the dessert beautifully.
3. Sparkling Water with Lime
A refreshing, non-sweet drink helps cleanse the palate.
4. Vanilla Ice Cream
For an extra indulgent pairing—especially loved by kids.
5. Chocolate-Dipped Biscotti
Crunchy, slightly bitter, and deliciously complementary.
Storage Instructions
Refrigerator: Store covered in the refrigerator for up to 4 days. The crust may soften a little over time, but the flavor remains excellent.
Freezer: While not ideal, you can freeze individual portions wrapped tightly in plastic wrap and placed in an airtight container. Thaw overnight in the refrigerator before serving. Note that the texture of the cream layer may be slightly altered after freezing.
Estimated Nutrition (per serving, based on 12 servings)
- Calories: ~340 kcal
- Fat: 20g
- Saturated Fat: 12g
- Carbohydrates: 38g
- Sugar: 25g
- Protein: 3g
- Fiber: <1g
- Sodium: 160mg
Frequently Asked Questions
Can I make this dessert ahead of time?
Absolutely. It actually tastes better the next day after the flavors have settled and the layers have firmed up.
Can I use homemade cherry topping?
Yes, just make sure it’s thick and cool before spreading it on top. Homemade topping adds a fresh, tart edge.
Can I use Cool Whip instead of whipped cream?
You can. Cool Whip makes it even easier, though real whipped cream has a richer, fresher taste.
Is this dessert gluten-free?
Not by default, but you can use gluten-free graham crackers or cookies for the crust to make it so.
What size dish should I use?
A 9×13 inch dish is standard and works best for even layering and slicing.
Conclusion
Vintage Cherries In the Snow is the kind of dessert that combines simplicity with nostalgic flair. It’s unfussy, visually striking, and ridiculously delicious. Whether you’re making it for a potluck, family holiday, or just because you’re craving something sweet and creamy, this dish never fails to impress. Easy to assemble and even easier to eat—it’s a true classic that earns a permanent spot in your dessert rotation.

Vintage Cherries In the Snow
- Prep Time: 25 minutes
- Cook Time: 0 minutes
- Total Time: 4 hours 25 minutes
- Yield: 12 servings 1x
- Category: Dessert
- Method: No-Bake
- Cuisine: American
Description
Creamy, dreamy, and no-bake—this Vintage Cherries In the Snow dessert is a retro classic made with layers of buttery graham cracker crust, fluffy cream cheese filling, and a vibrant cherry pie topping. It’s the perfect treat for anyone craving an easy recipe that feels indulgent but is effortless to make. Ideal for quick dessert ideas, potluck food, or holiday treats, this dish is rich in nostalgia and bursting with fruity flavor. It also fits beautifully into your collection of no-bake recipes, easy dinner desserts, or fun food ideas for gatherings.
Ingredients
1 and 1/2 cups graham cracker crumbs
1/4 cup granulated sugar
1/2 cup unsalted butter, melted
16 ounces cream cheese, softened
1 cup powdered sugar
1 and 1/2 teaspoons vanilla extract
1 cup heavy whipping cream
1 can (21 ounces) cherry pie filling
Instructions
1. In a medium bowl, mix graham cracker crumbs, granulated sugar, and melted butter until well combined. Press into the bottom of a 9×13 inch dish to form the crust. Refrigerate while you prepare the filling.
2. Beat softened cream cheese, powdered sugar, and vanilla extract in a large bowl until smooth and creamy.
3. In a separate bowl, whip the heavy cream until stiff peaks form.
4. Gently fold the whipped cream into the cream cheese mixture until well blended and fluffy.
5. Spread the cream mixture evenly over the chilled crust.
6. Spoon the cherry pie filling evenly over the cream layer, making sure not to press or swirl.
7. Cover and refrigerate for at least 4 hours or overnight for best results. Slice and serve chilled.
Notes
Make sure the cream cheese is at room temperature before mixing to ensure a smooth, lump-free filling.
For best texture, refrigerate the assembled dessert overnight before serving.
Try different pie fillings like blueberry or strawberry for a fun flavor twist.
Nutrition
- Serving Size: 1 slice
- Calories: 340
- Sugar: 25
- Sodium: 160
- Fat: 20
- Saturated Fat: 12
- Carbohydrates: 38
- Fiber: 0.5
- Protein: 3
Keywords: no-bake dessert, vintage dessert, cherries in the snow, easy holiday recipe, retro dessert